Scrapbook Paper Boxes…

008

OMG!!!  These are so fun to make!  You can make them in many sizes with 12×12 scrapbook paper!

001

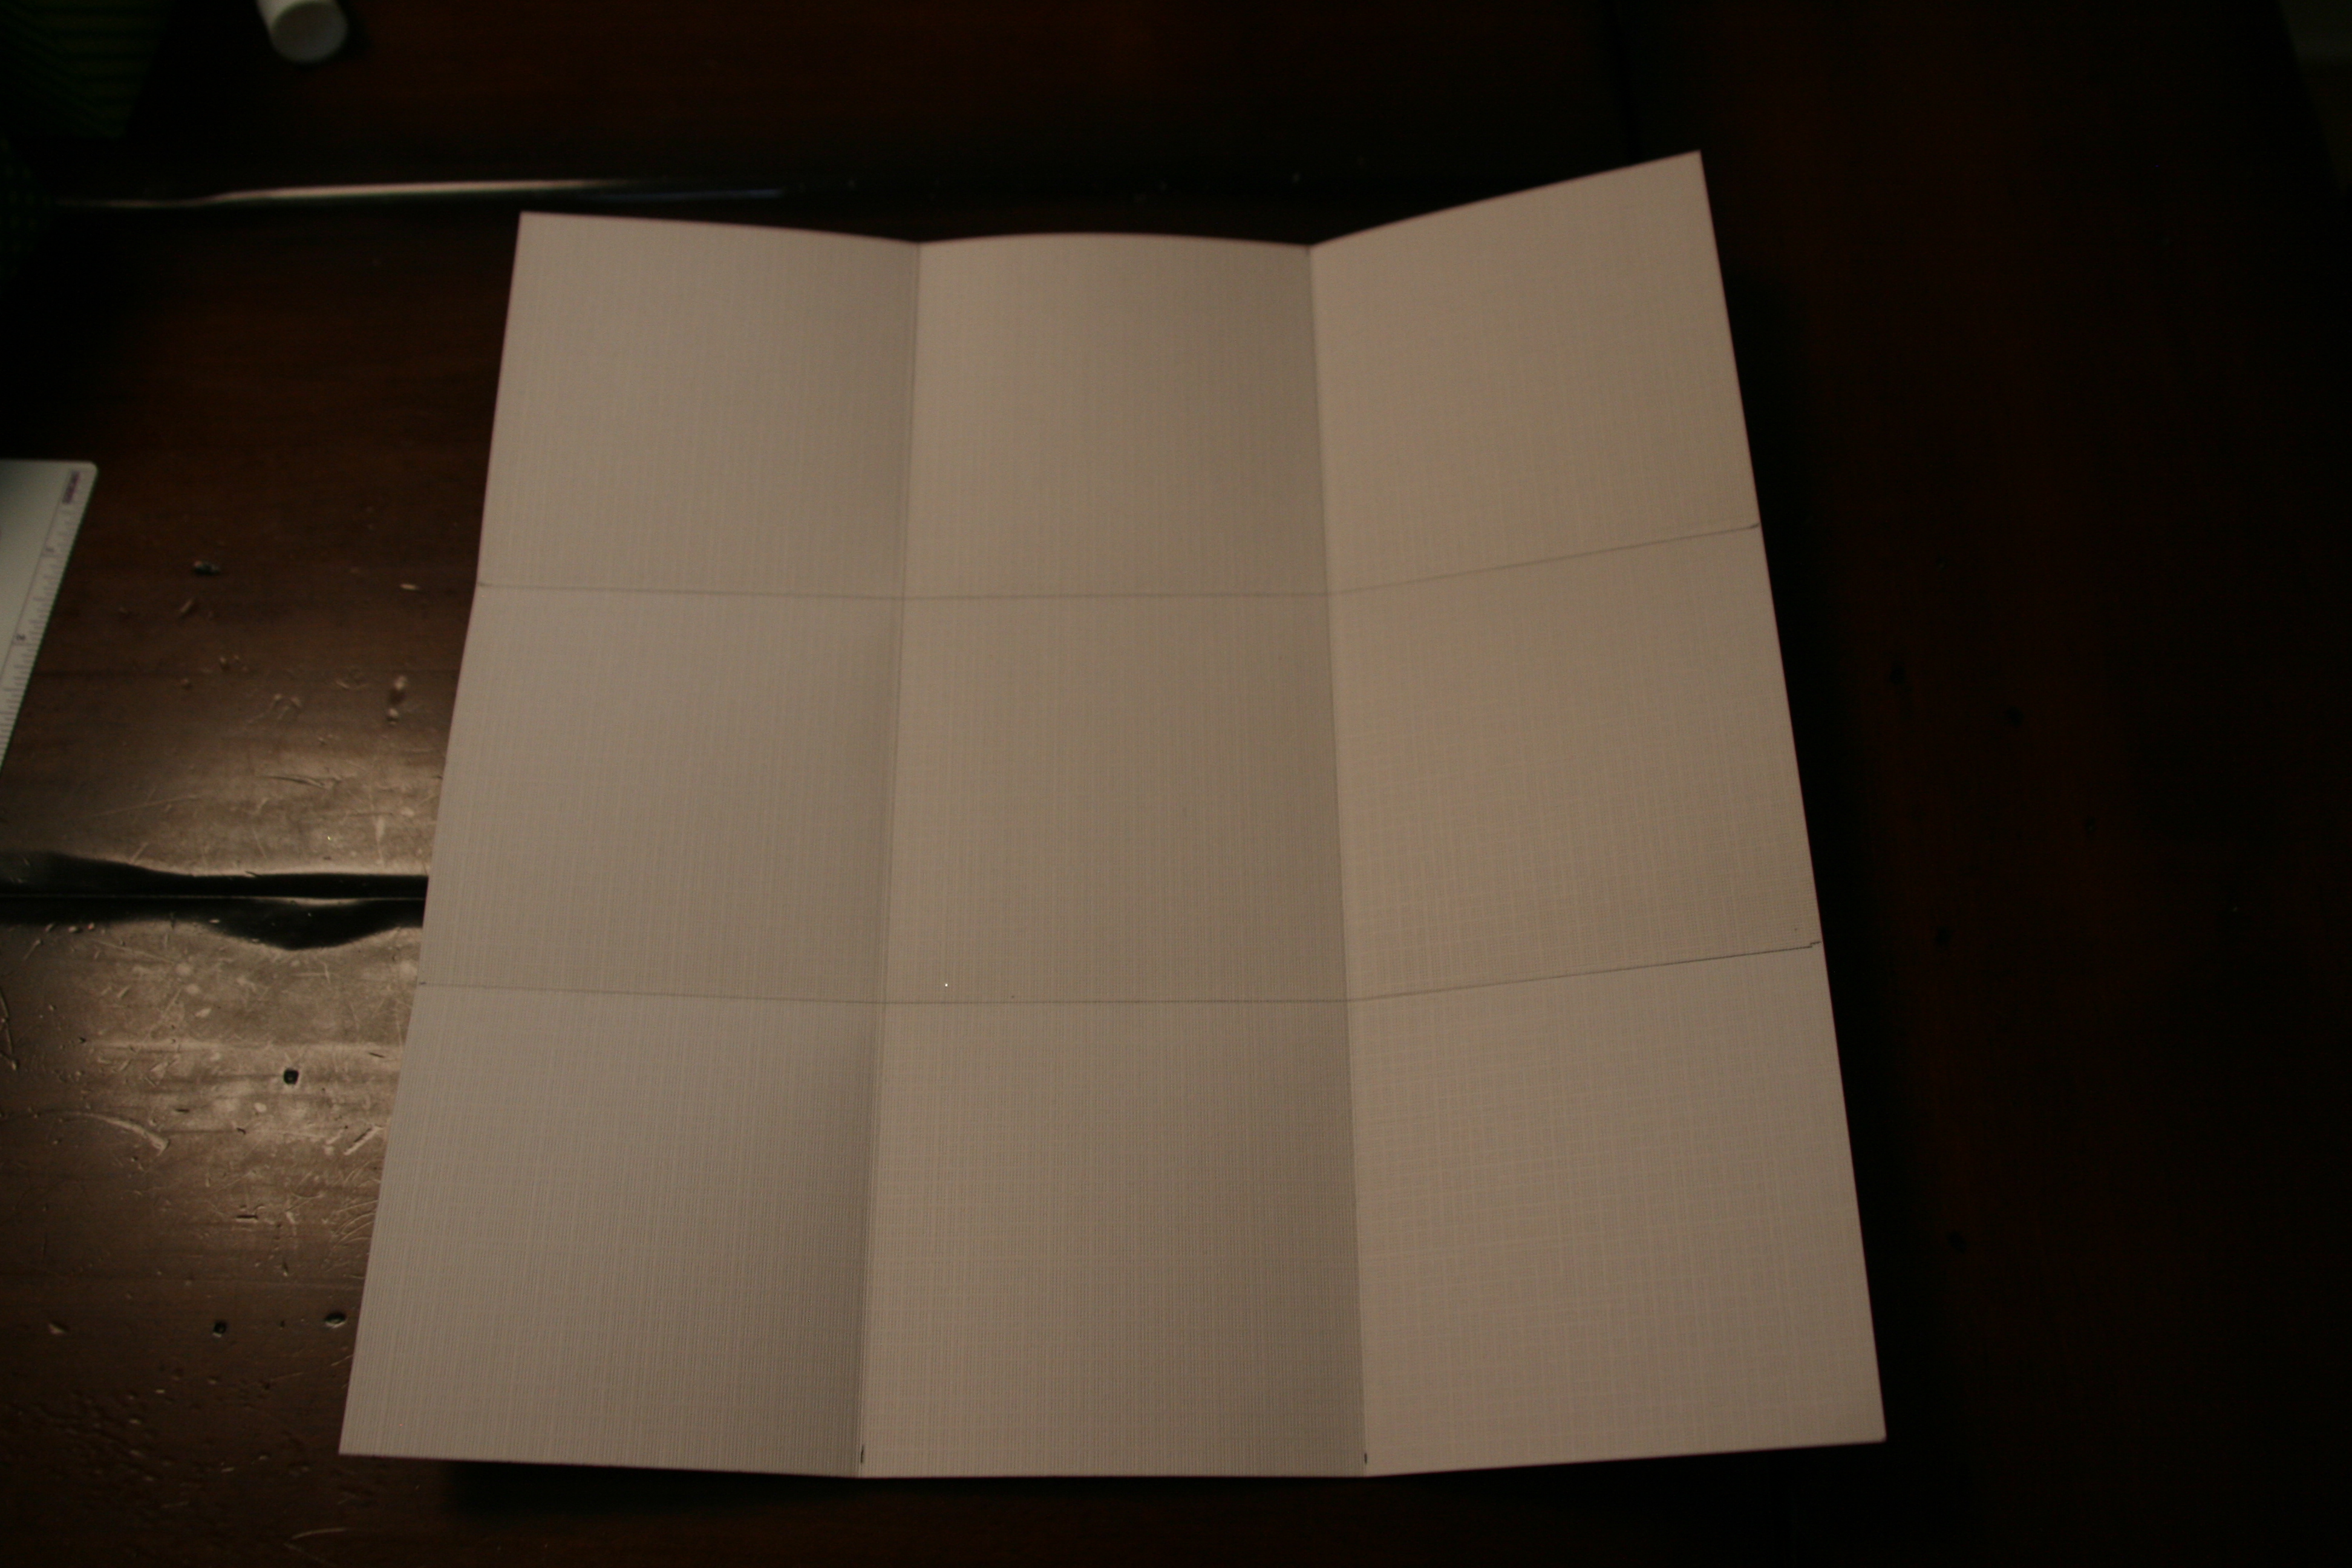
Start by measuring and drawing lines on the back side of the scrapbook paper.  Here, I created a 4×4 cube box, so I drew lines at the 4″ marks.  Then fold the paper on all of the lines you have drawn.

002

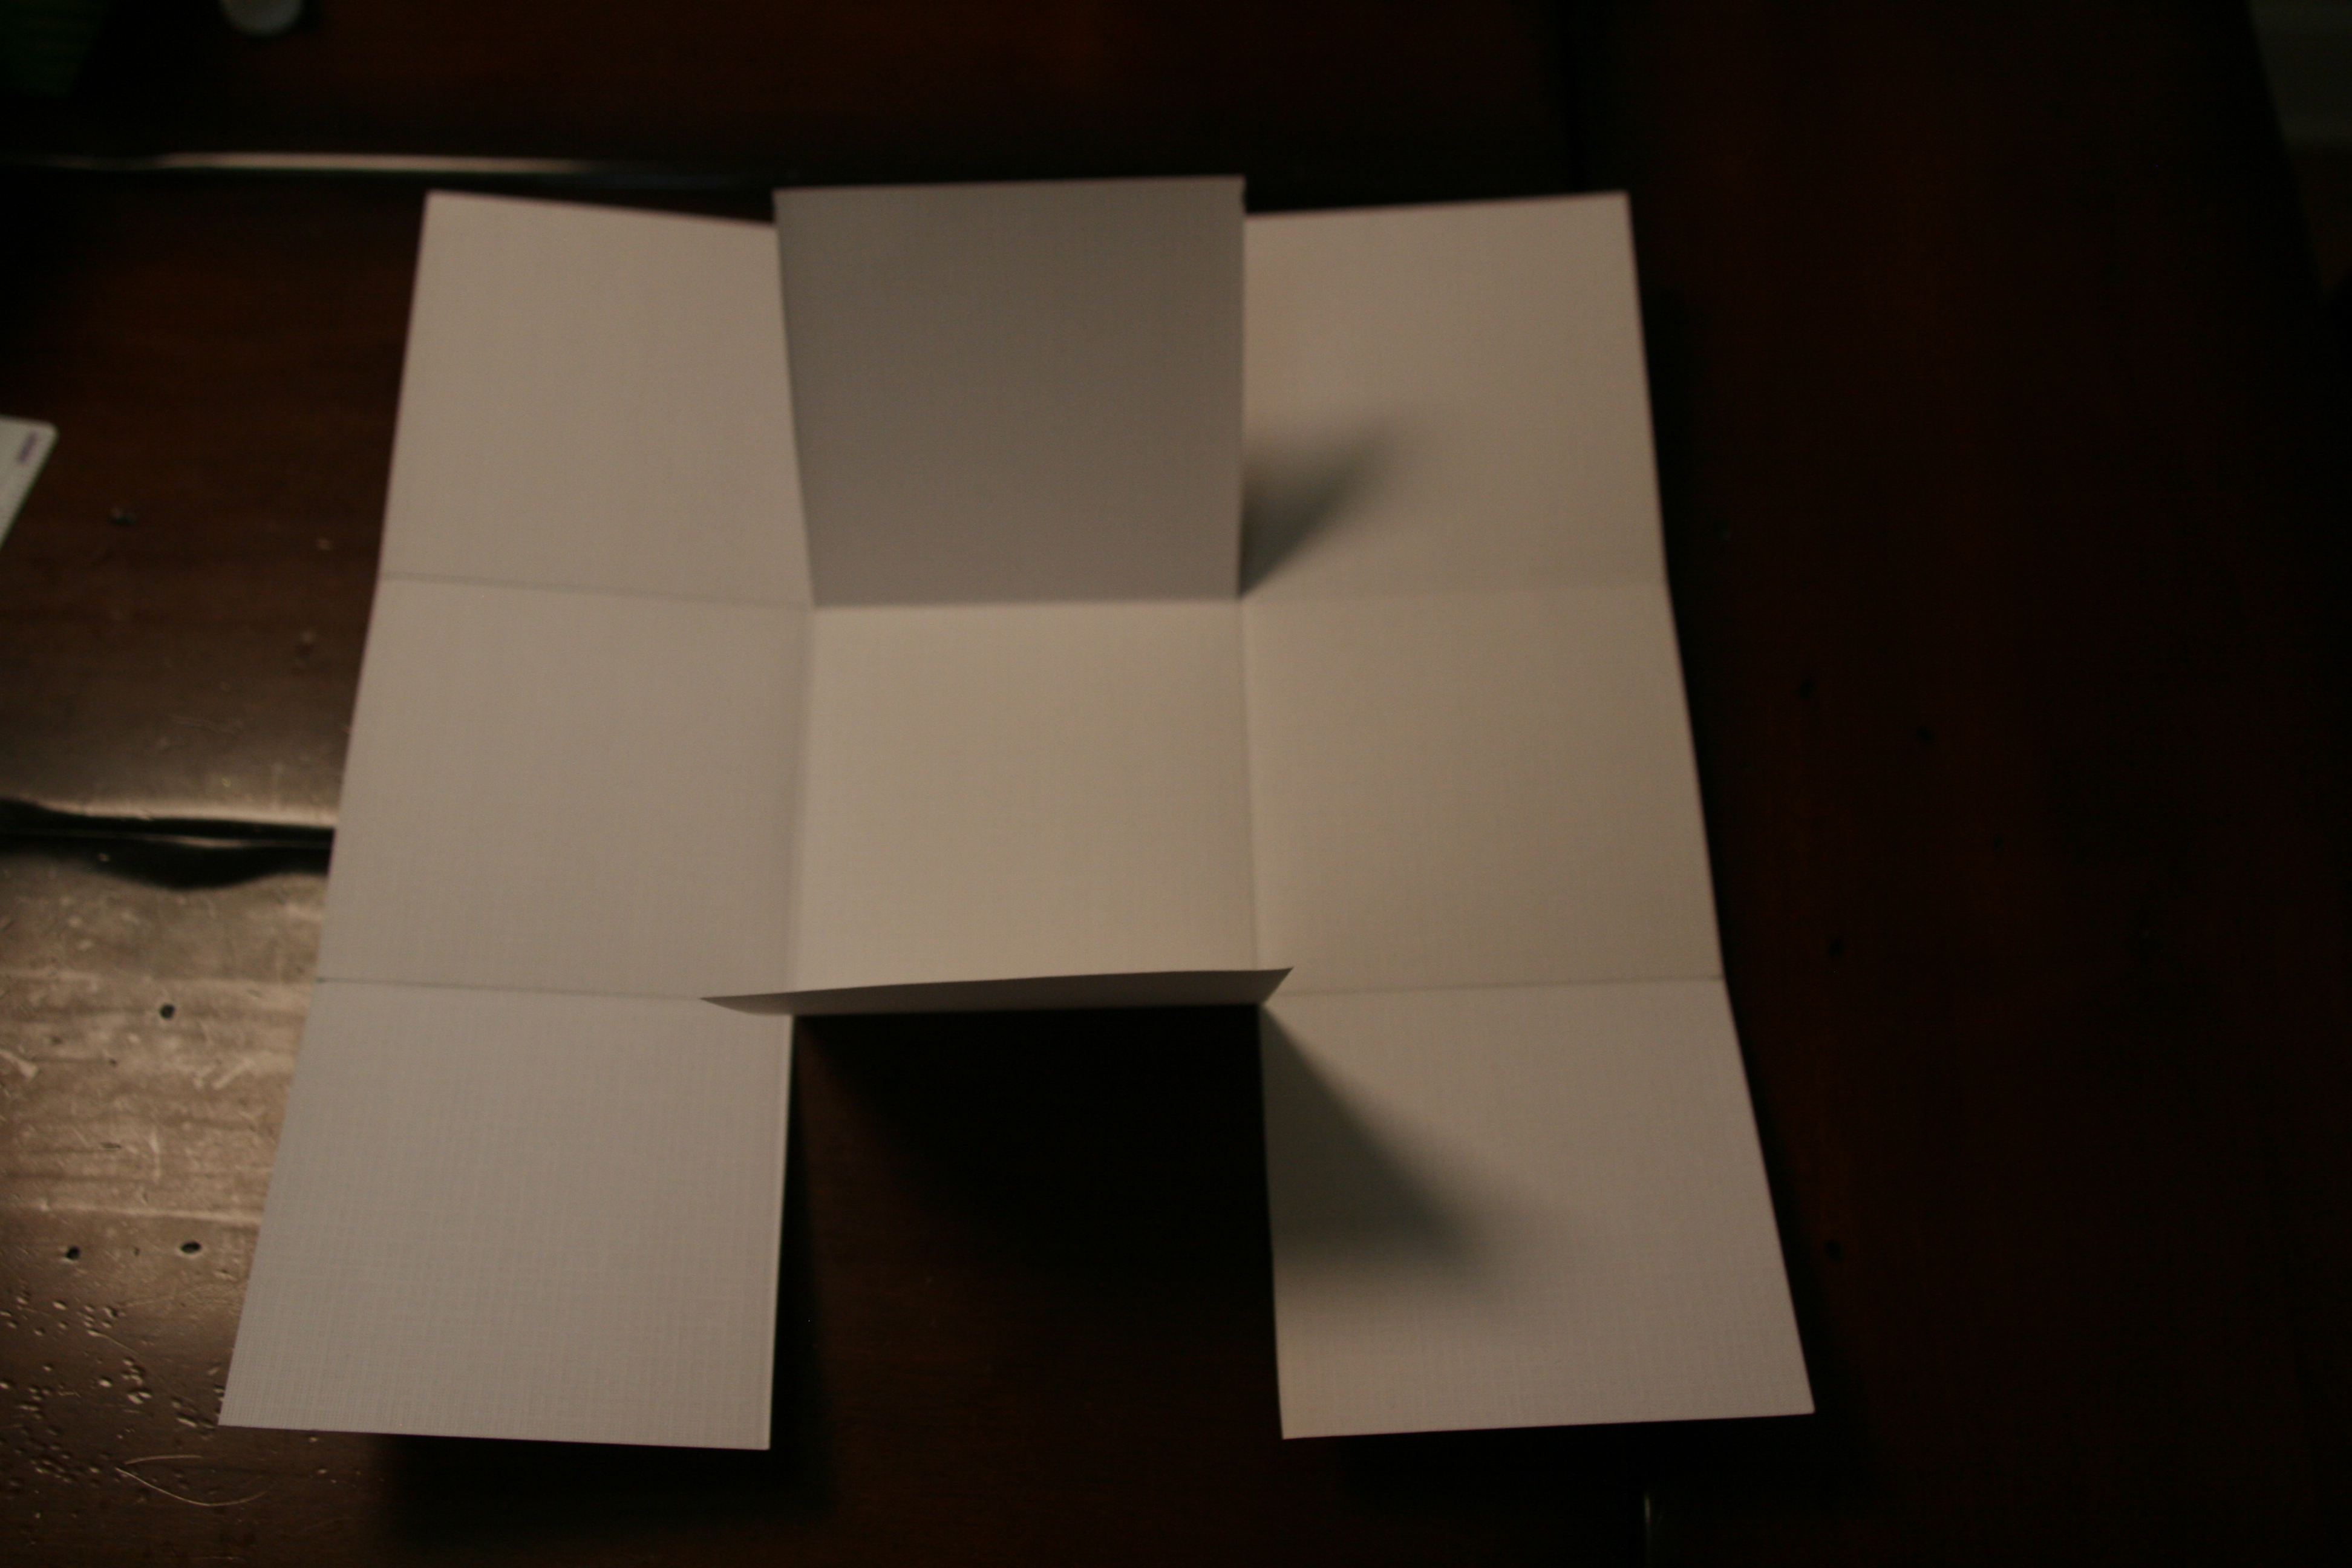
Cut on the folds on 2 sides of the paper as shown above.

003

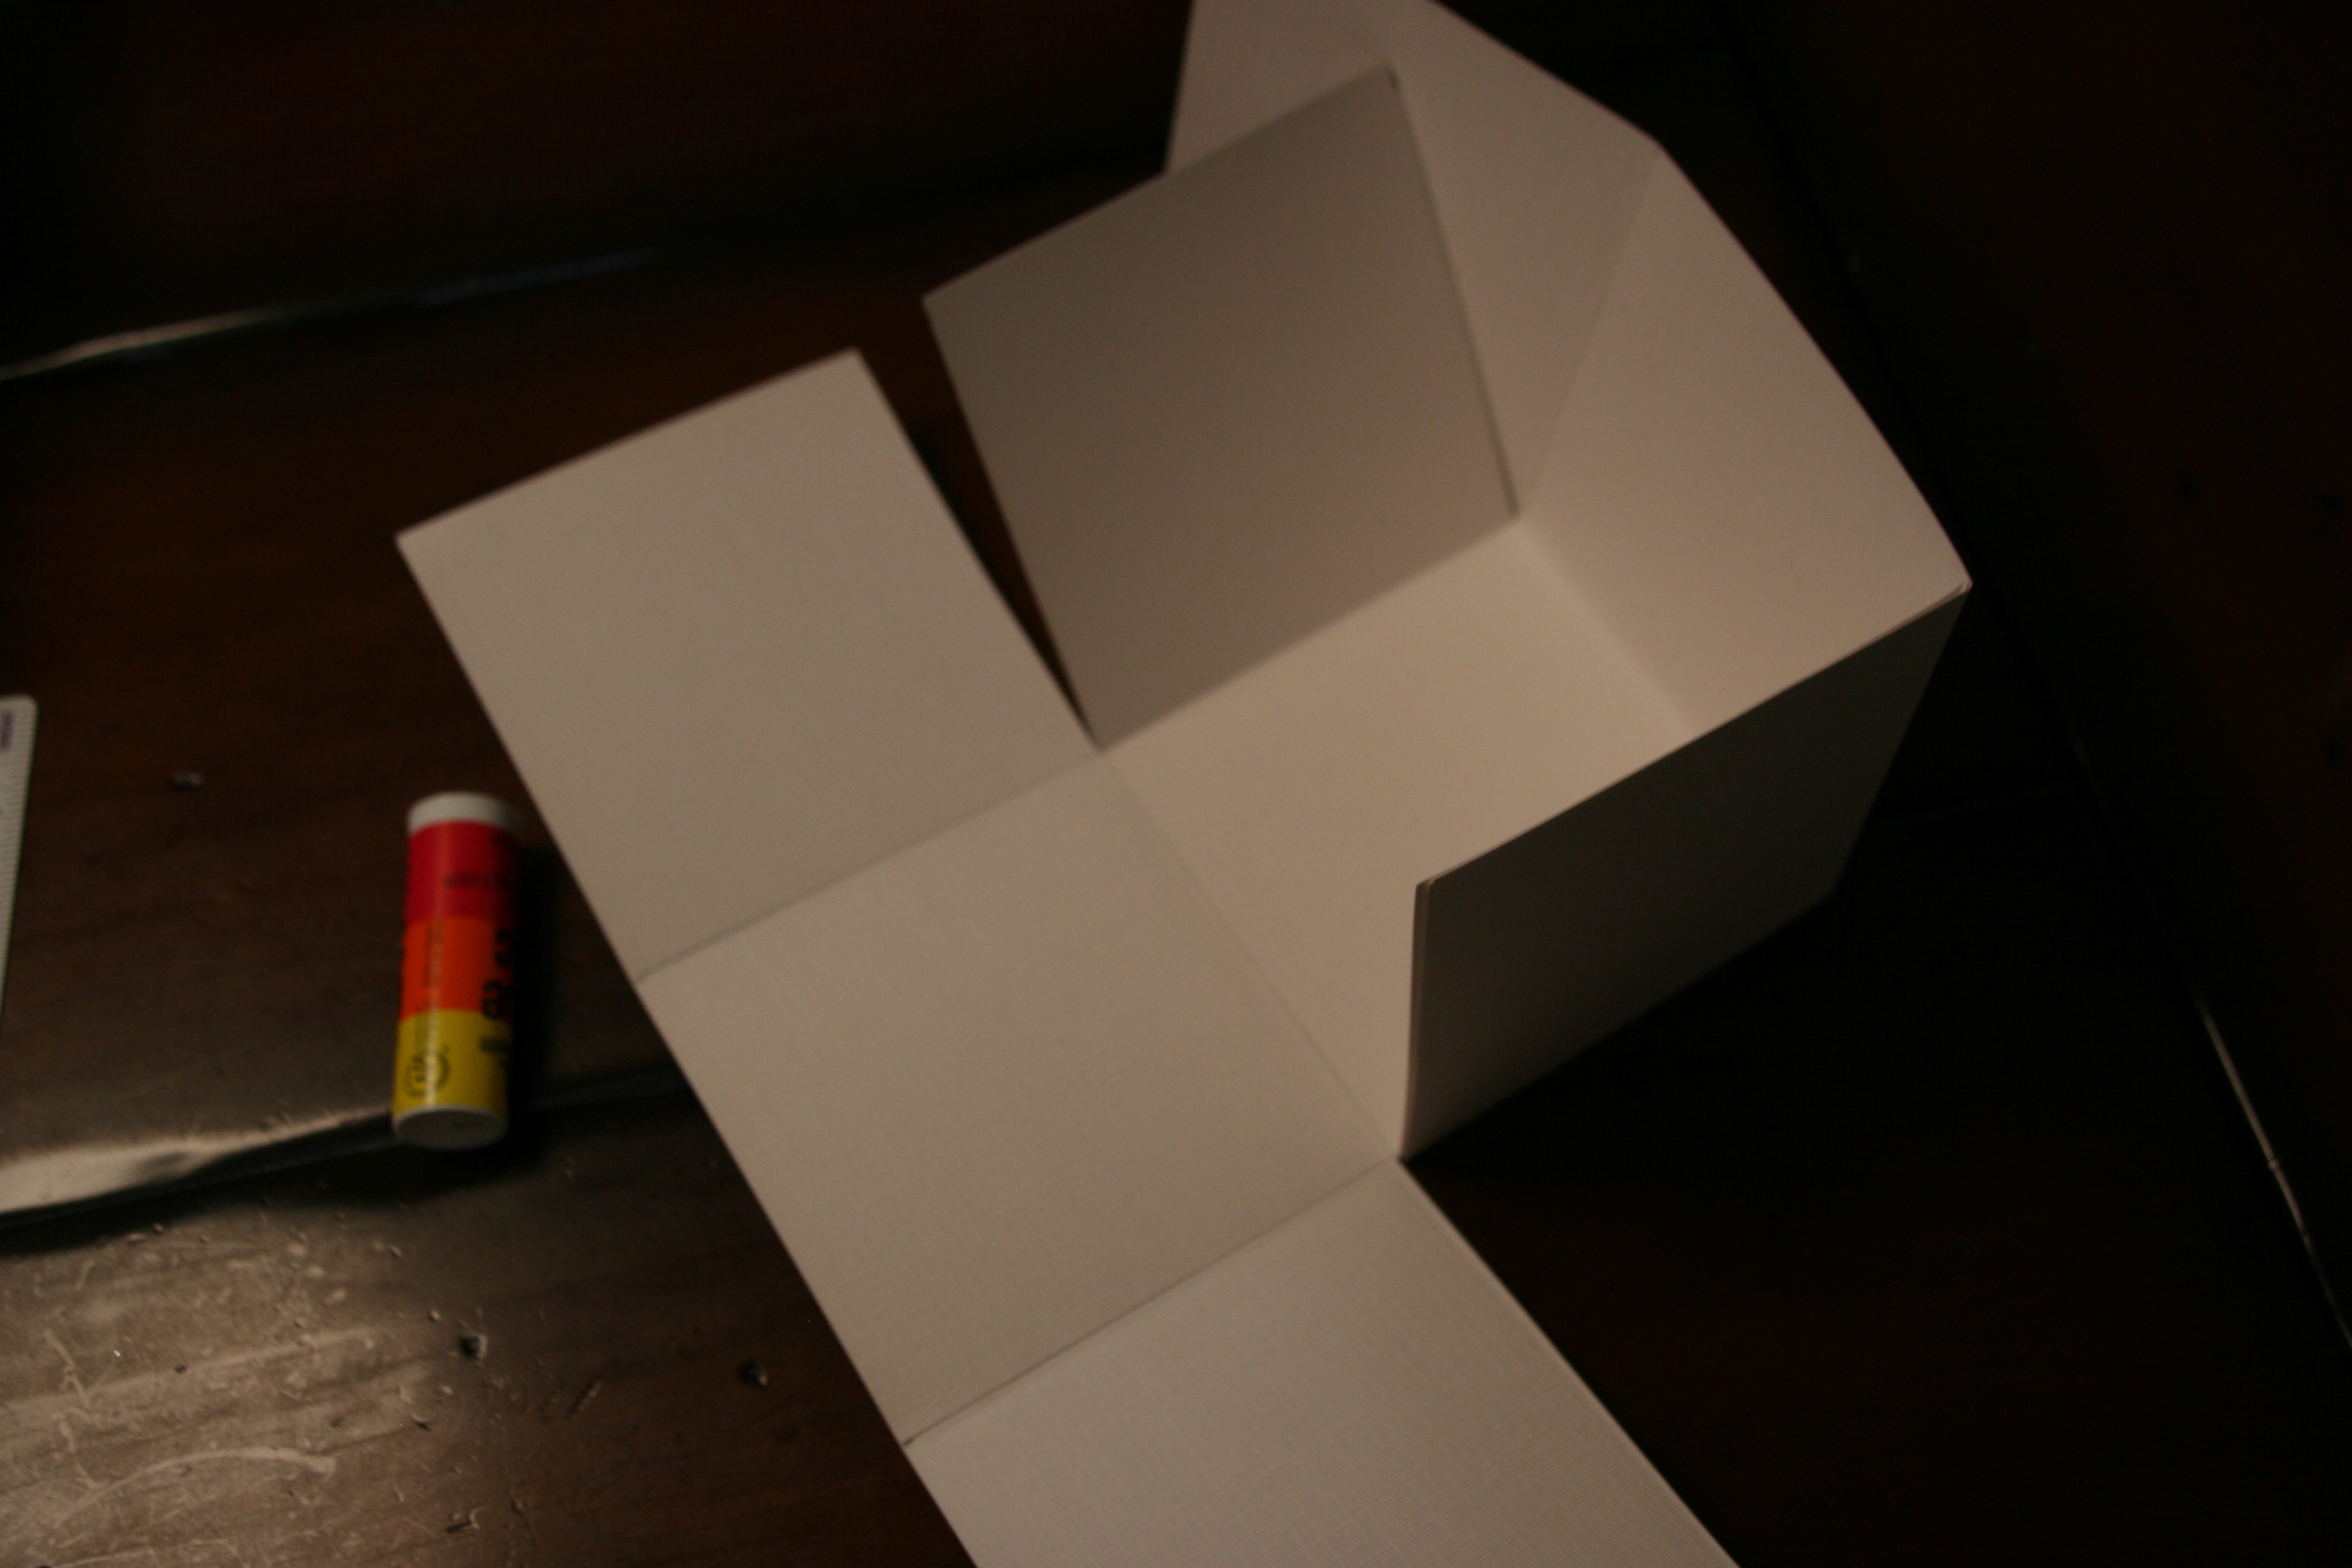
Raise the paper at the folds, and over lap the flaps that were created with the cuts.  Use a glue stick to secure the flaps.

004

Repeat the process on the other side of the paper.

005

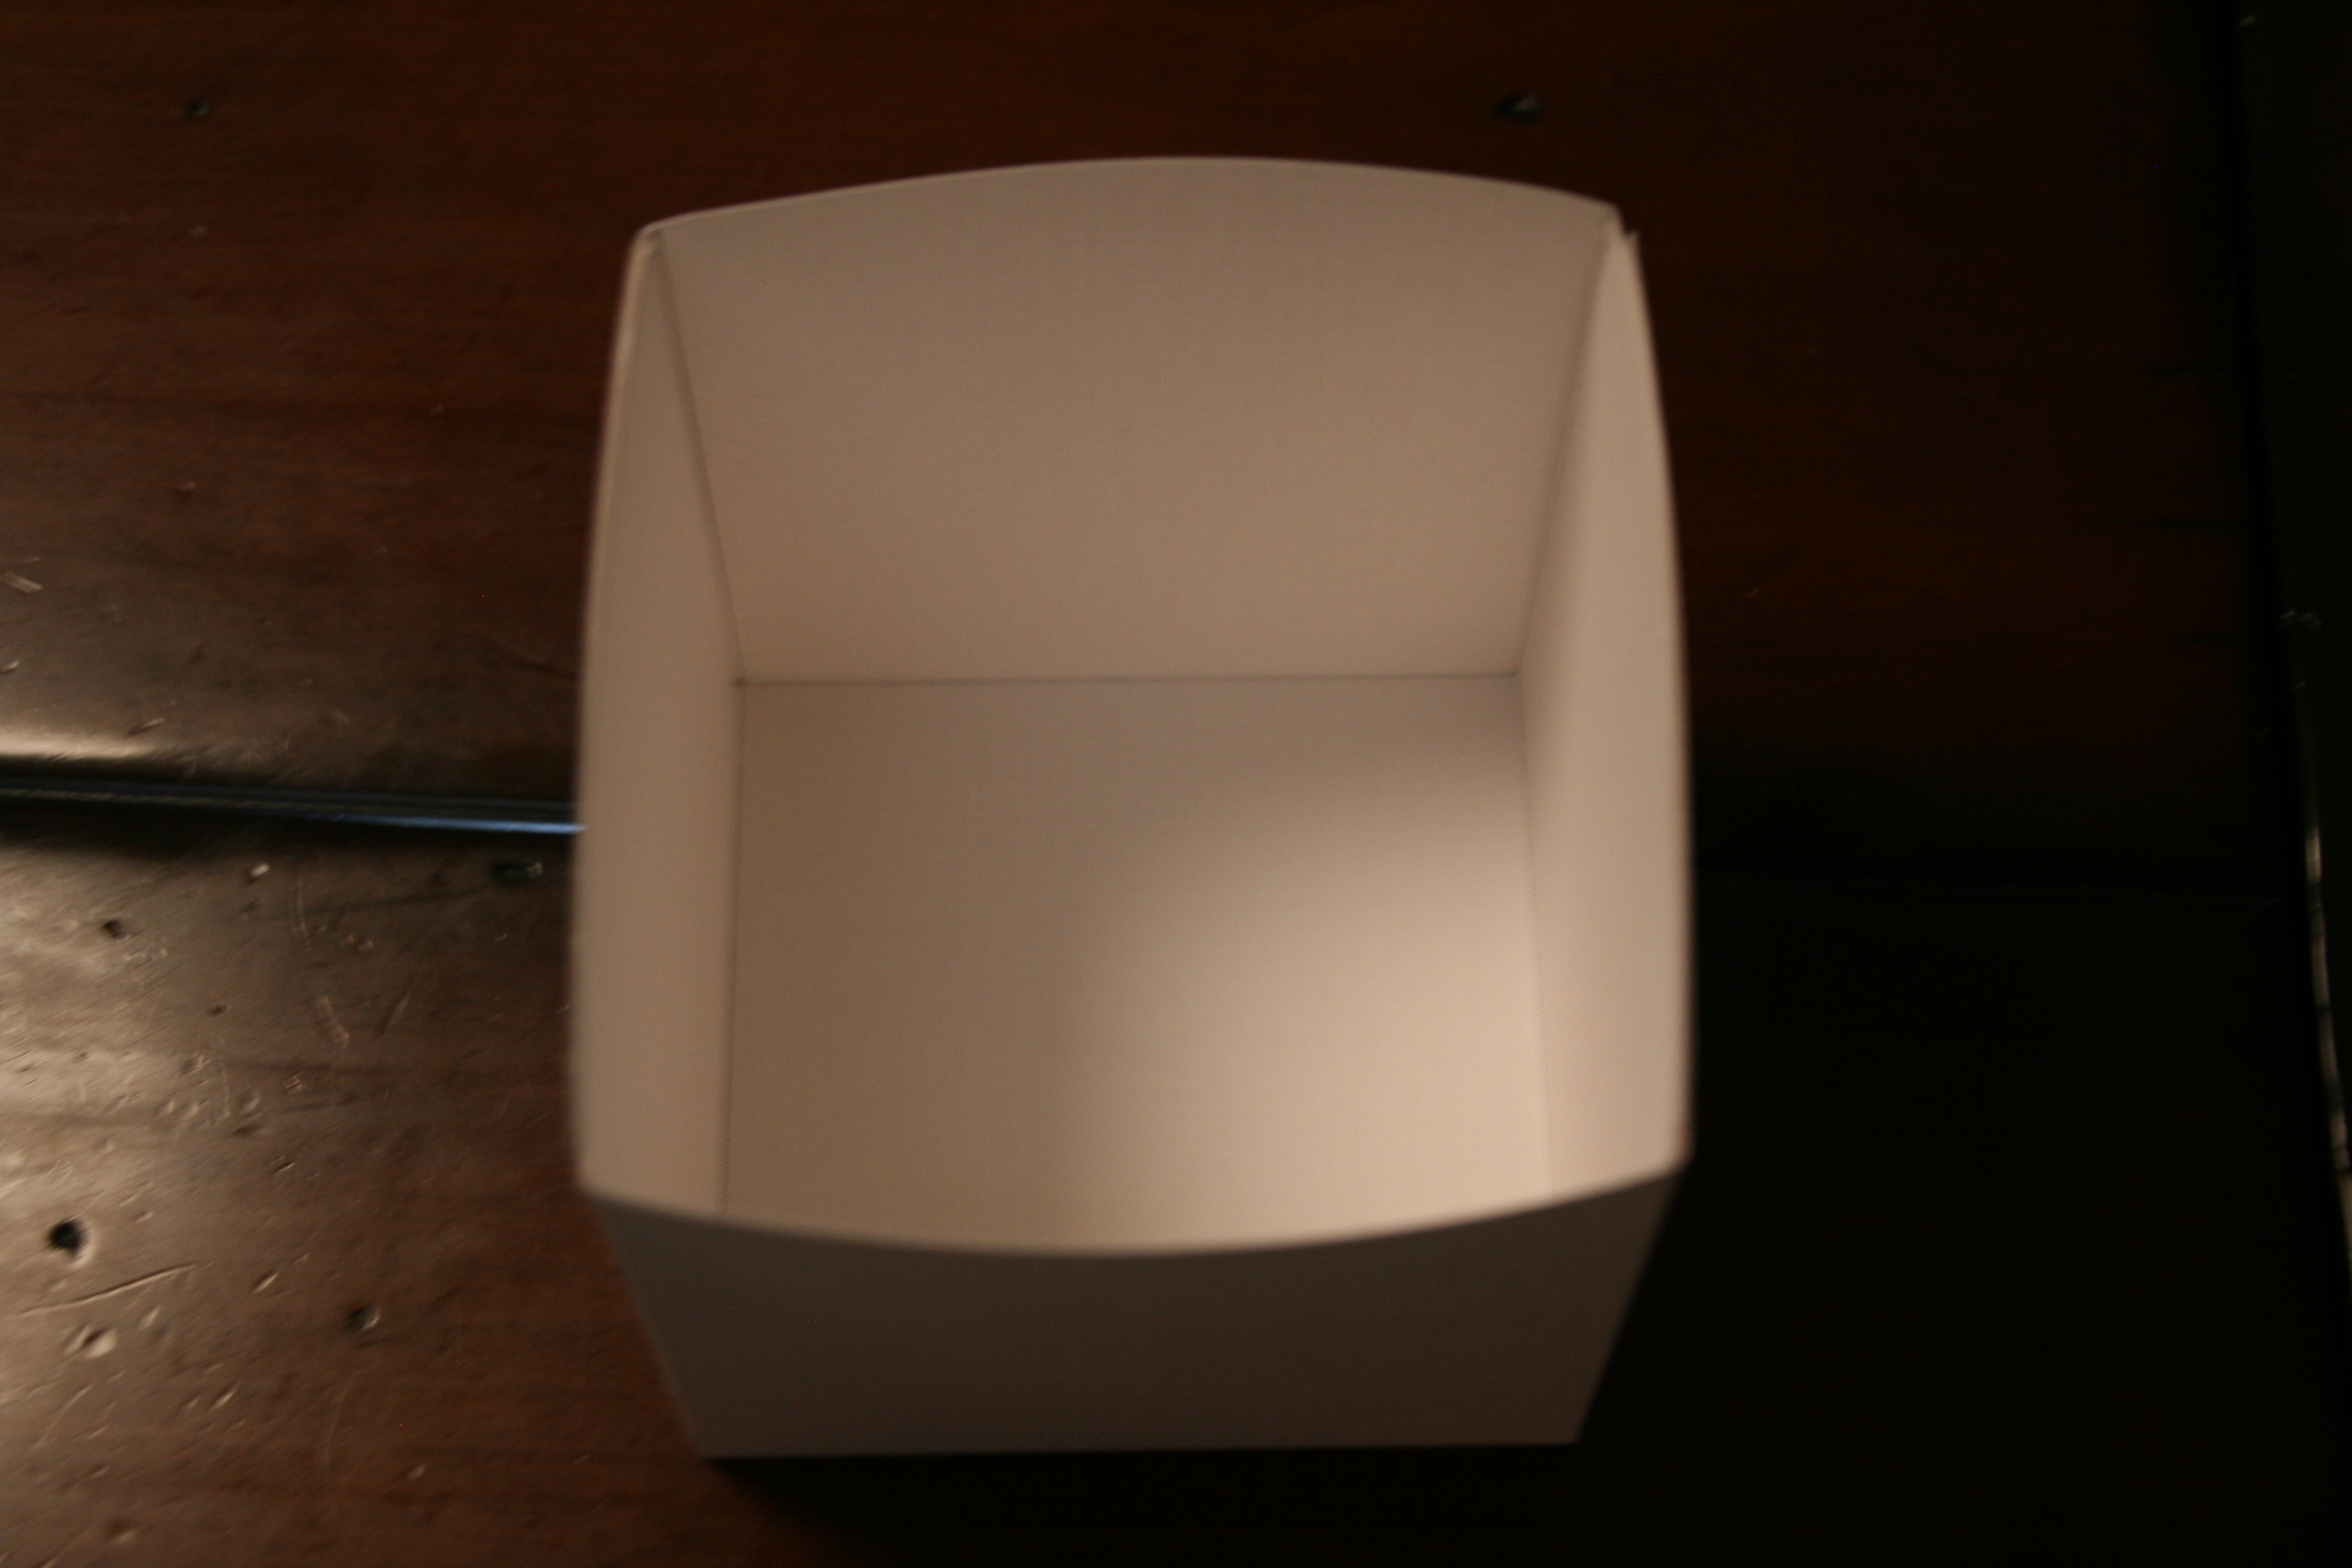
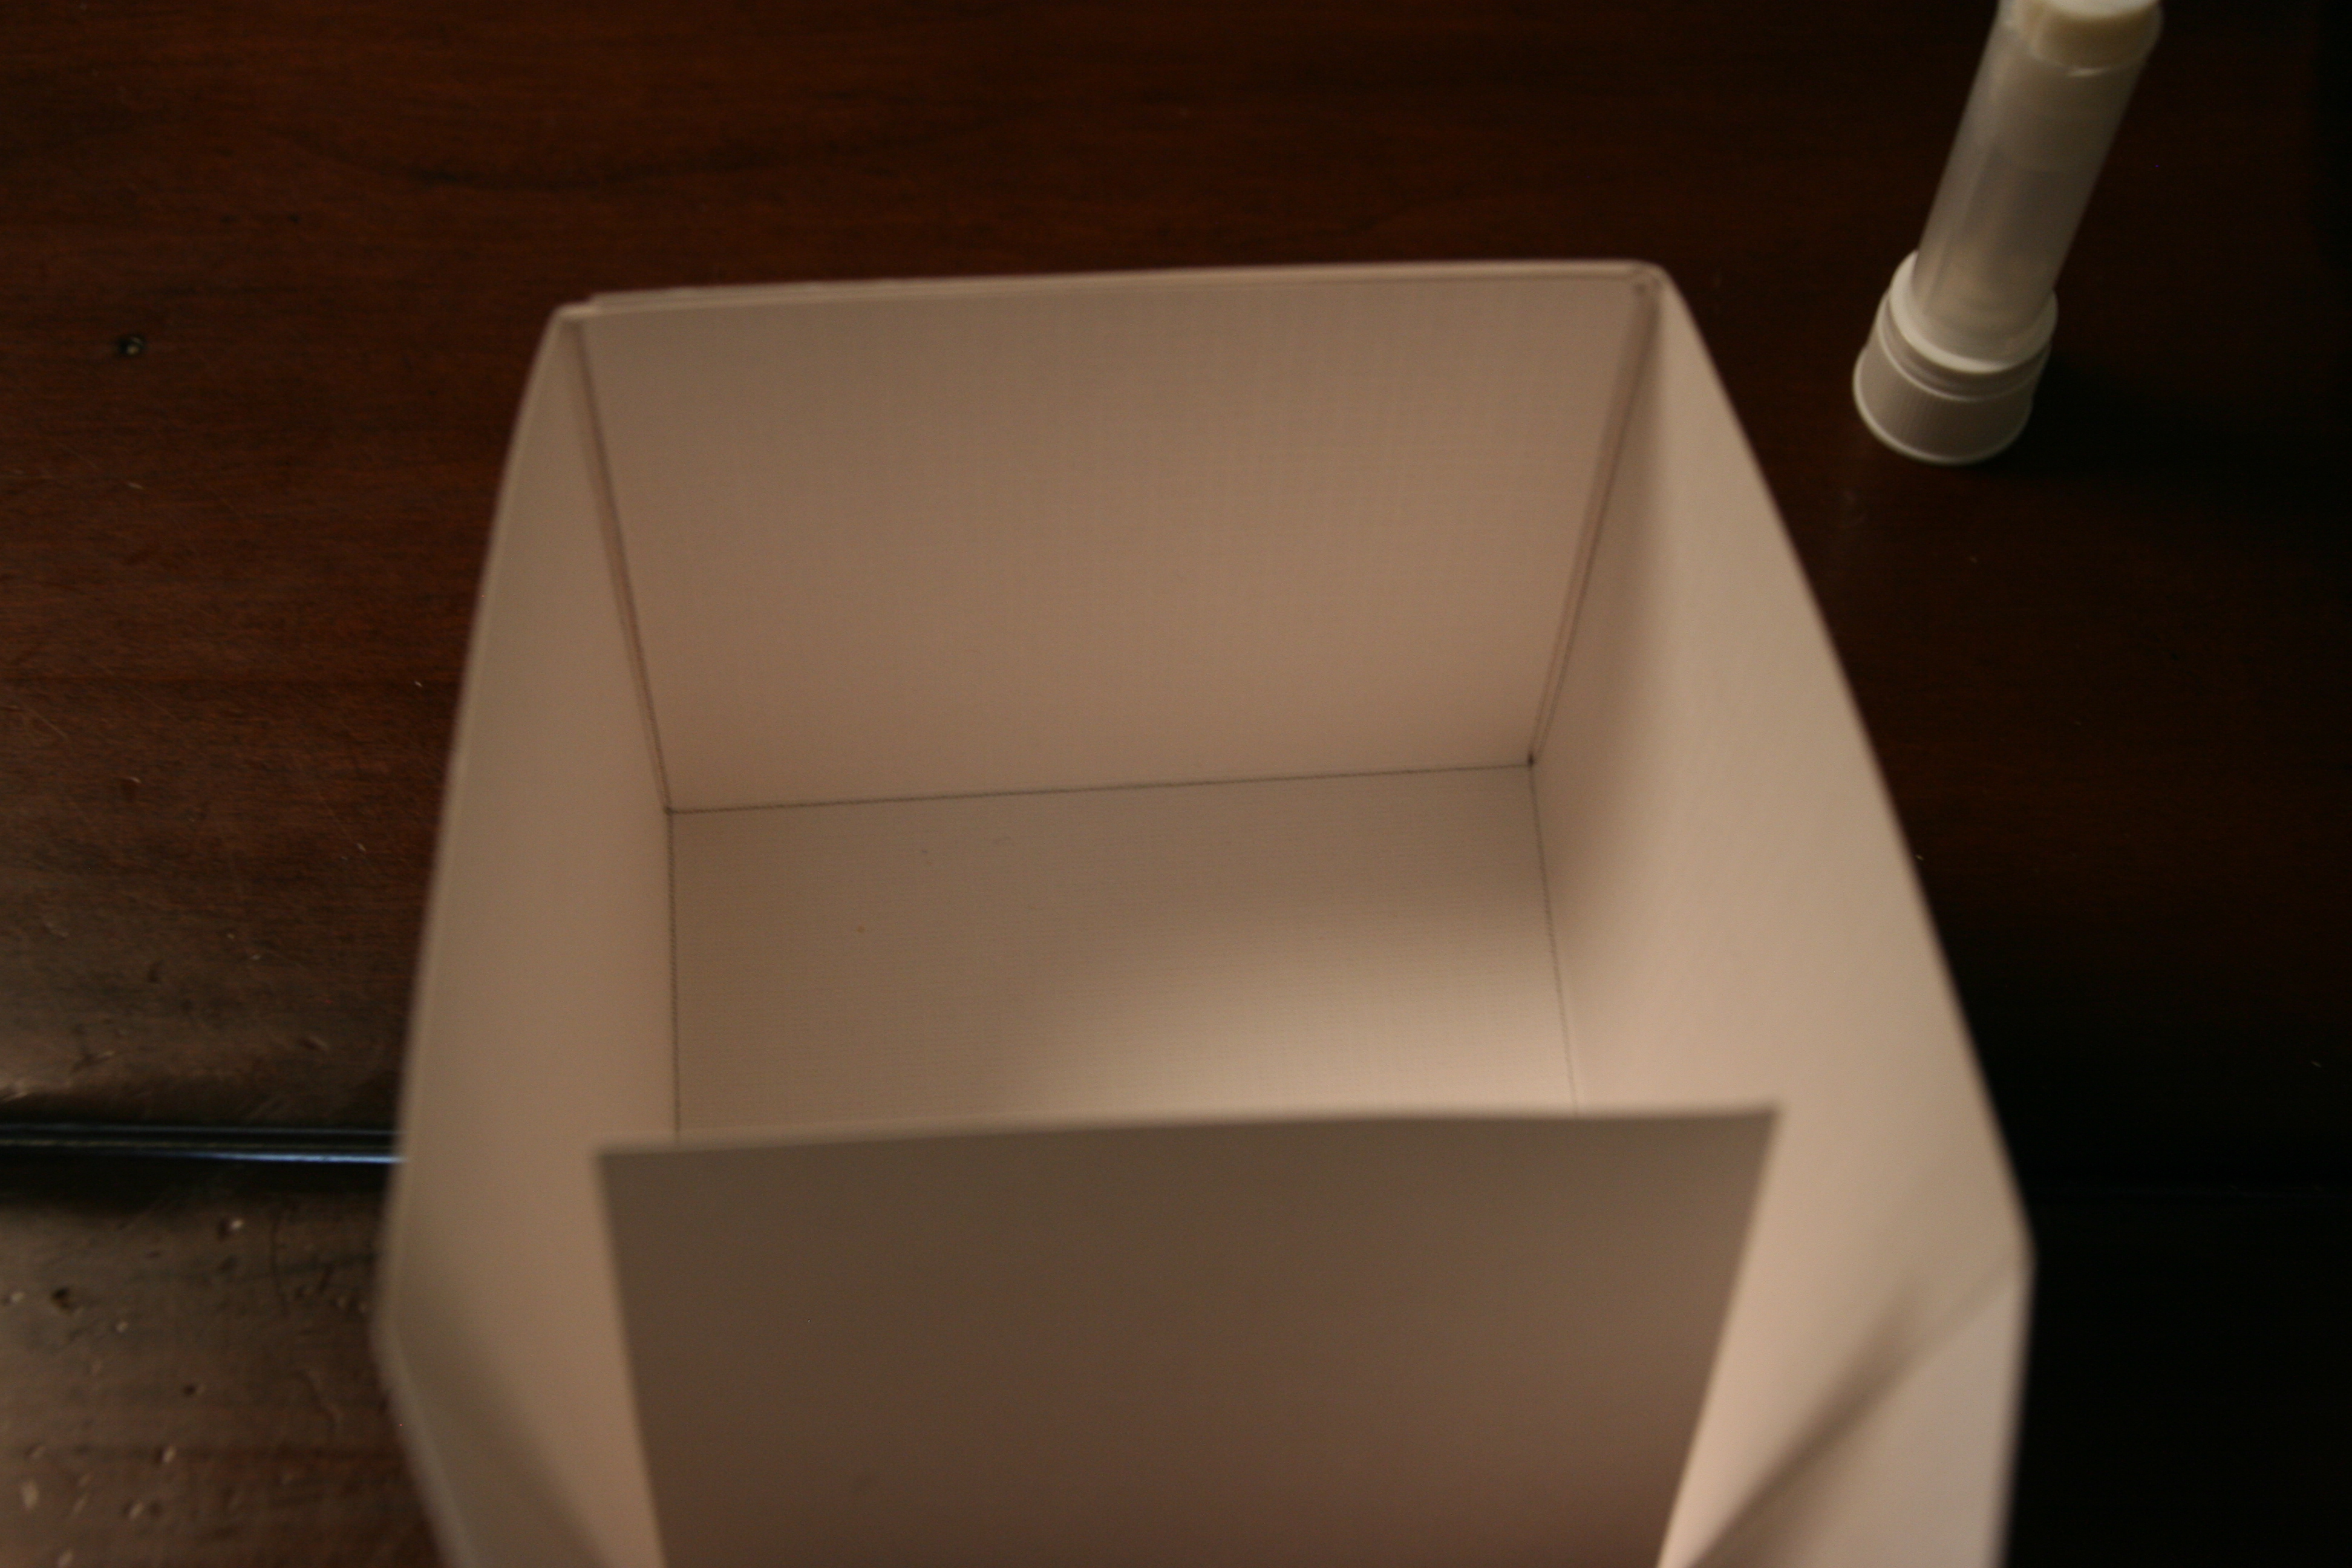
You have now created one side of the box.  Repeat the entire process with a second piece of paper to form the entire box.  I prefer to use Cardstock for the bottom, and decorative scrapbook paper for the top.  The cardstock makes the box more stiff.

006007

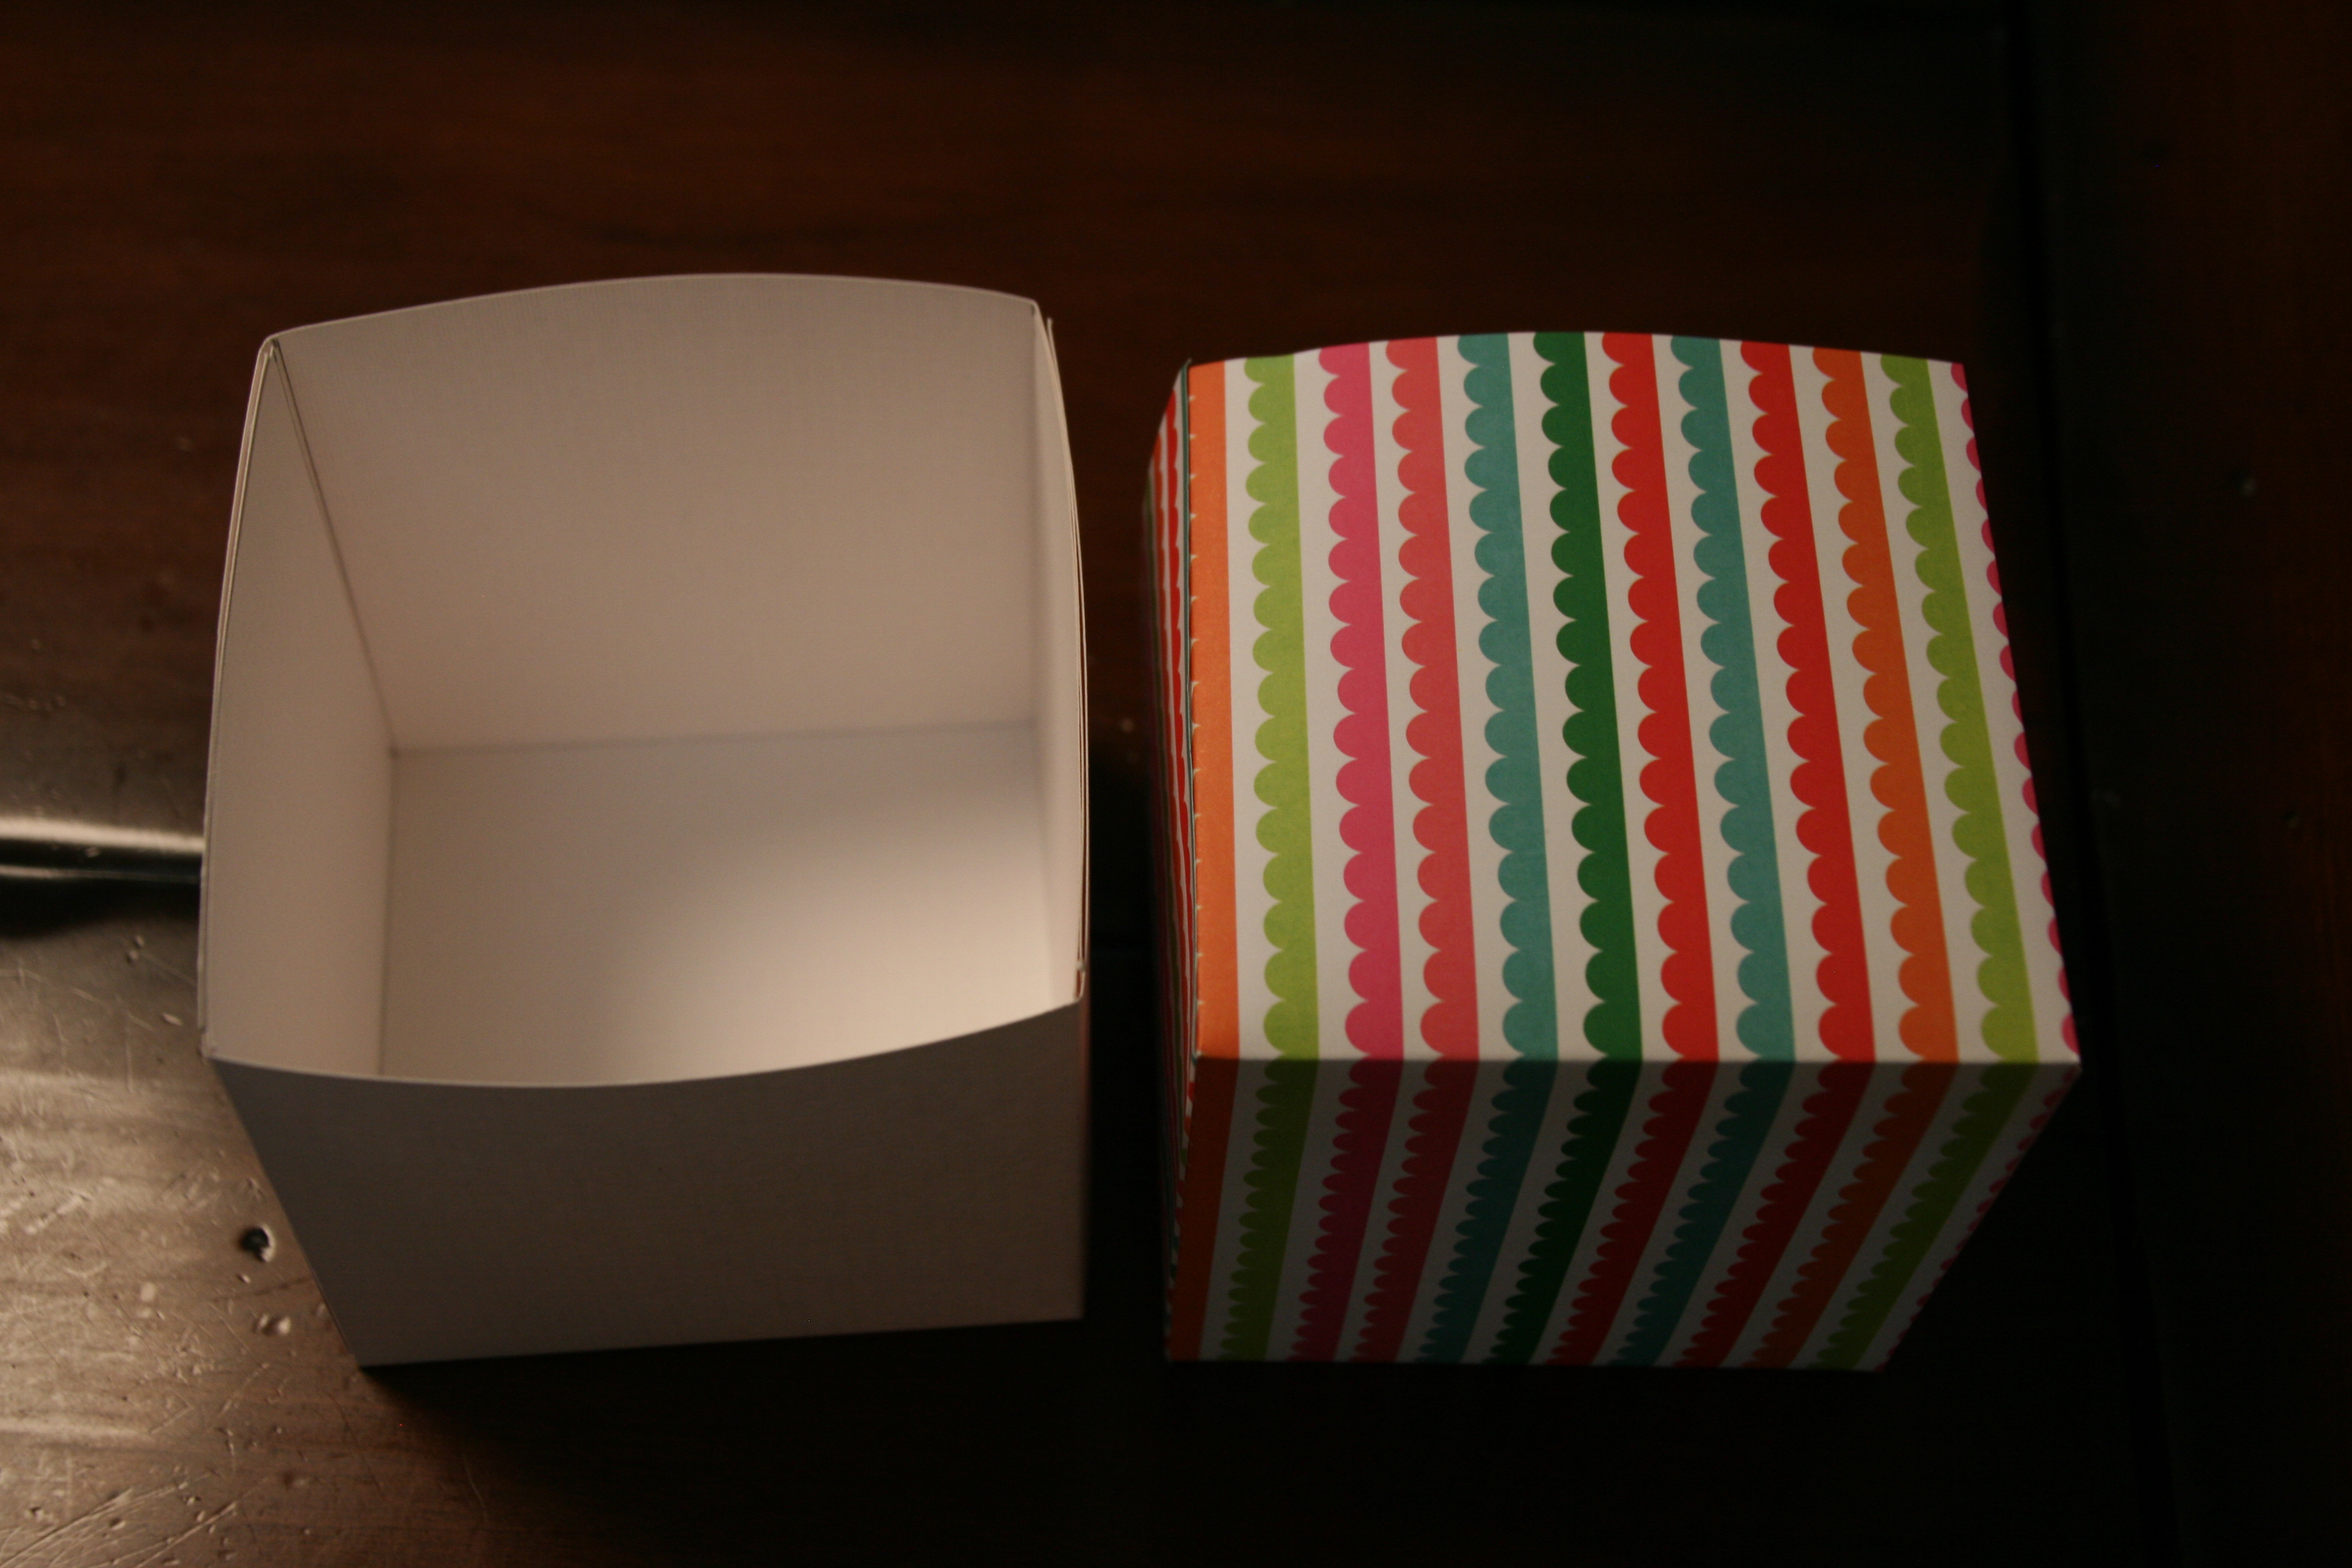
Gently put the lid onto the bottom and you have a 4×4″cube box.

008

Happy boxing…

“Wonder what I will come up with next”…

Rice Krispie ball “Lollipops”…

012

I love to make fun tasty treats that are creatively displayed.  I made Rice Krispie treats and formed them into balls, added a skewer, wrapped them in a clear plastic bag, tied a ribbon to create a “Lollipop”.

Start by making Rice Krispie treats by following the recipe on the cereal box.  After the ingredients have been melted and stirred, form the treats into balls instead of placing in a pan.  Be sure to grease your hands with a non stick spray, such as Pam.  Once the balls are formed,  roll the balls in a bowl filled with different sprinkles.  Don’t let the balls sit for too long before rolling them in the sprinkles, or the sprinkles won’t stick to the marshmellows.  Place the balls on parchment paper to set.  Next, use a bbq wood skewer and pierce the point into the ball.  Place the ball into a clear plastic bag and tie a ribbon.

009010

Place the skewer into a styrofoam cube (I get these at the Dollar Tree), and you have a Rice Krispie “Lollypop”.  If you want to display several at a time, purchase a flat rectangle of styrofoam (I get these at Michaels) and pierce the skewers into it.  Believe it or not, the Lollipops will stand up and not tip over.

012

Happy Lollipops…

“Wonder what I will come up with next”…

Fun styrofoam snowmen…

087

These snowmen are so cute, and they were so easy to make!!!

Start with styrofoam balls and cones.  Use a toothpick & glue to place the ball on top of the cone.  Put half of the toothpick in the top of the cone and the other half into the ball.  I used cut pipe cleaners for the eyes, nose, mouth, buttons, & some scarves.  Just push in the cut pipe cleaners.  No glue is needed.  Cut black felt for the top hats.  I created a cylinder with the felt and glued it.  Then I glued the cylinder to a circle to create the top hat.  If you want a felt scarf, cut a long rectangle of felt and tie it around the neck.  This is so easy!  It would be a fun craft to do with your kids!

090091

089

Happy crafting…

“Wonder what I will come up with next”…

Marbled & swirled paint ball ornaments…

015

These marbleized paint ornaments are so beautiful, and are so easy to make!  You can make them as gifts for all of your family and friends!

Start with clear glass ball ornaments (I usually purchase mine at Michaels or Joanns), paint (I have used either craft paint or tempera paint).  Remove the top hanger from the balls.  Squirt paint into the glass ball.  Be sure to rotate the ball and stop and start squirting paint as you rotate the ball in your hand.  Squirt in as many colors as you want, but DON’T put in too much paint.  Pay attention to how much paint you have inside the ball as you are moving it around to cover the entire inside.  Once the entire inside of the ball is covered with paint, turn the ball upside down onto a small plastic cup.

014

Leave the ball upside down in the cup for a few days to allow all of the excess paint to drain out.  Then turn the ball right side up and allow the paint to finish drying.  I like to use the trays the balls come in for this drying process.

013

Once the paint is dry, put the top hanger back on the ball.  Be careful not to bend the metal.  Then hang the ball on the tree, or wrap it as a gift.

016

Happy painting…

“Wonder what I will come up with next”…

Simple lighted sign…

032

Since I am darn near “MRS. CLAUS”, it is only fitting that I have my own lighted sign in our front yard.  These signs are so easy & simple to make, you will ALL want your own!

023024

Start with a piece of plywood.  Draw on the wood what you would like the sign to say.  Be sure to space things evenly and make the letters the same size.  Use a drill to drill holes over where you have drawn the letters.  Leave enough space between holes so the holes don’t connect.  Use a drill bit size that will accommodate the size of Christmas lights.  After the holes are drilled, paint the wood with a dark color.  You don’t need to paint it perfectly.  Spray paint will work just fine.  Once the paint has dried, take a string of Christmas lights and push the lights through the holes.  Plug it in and you have your very own lighted sign.

032

Happy lighting…

“Wonder what I will come up with next”…

Simple, but unique ways to decorate the bottom of your trees…

I like using traditional tree skirts on several of my Christmas trees, BUT, having 11 trees in my house, I feel the need to create fun “tree bottoms”!

078

I used brown hand towels to create “sand” on my “under the ocean” tree.  I then placed star fish, sea shells, and a lobster on top of the towels to complete the “Ocean” themed tree.

081085

Both of these trees are covered in mesh, so I continued the mesh at the bottom of the trees.  I added areas of ornaments on the mesh for the pink tree.

054

This is the simplest tree bottom of all!!!  I bunched up white cotton felt under the tree, then placed 4 LARGE bling ornaments on the felt,

056

Here I used white cotton felt bunched at the bottom and topped it with beaded garland strands.

058

A traditional gold tree skirt covered with bunched up mesh, topped with gold strands of beads.

068

A traditional tree skirt topped with bunched up mesh.

All of these things make the tree look so beautiful from top to bottom, before you put your gifts under the tree!  AND, OF COURSE, you want to make your gifts just as beautiful and coordinate the wrappings with the tree they are placed under!

Happy tree decorating…

“Wonder what I will come up with next”…

Unique tree toppers…

I don’t know about you, but I still like using a traditional tree topper…for a couple of my trees.  BUT, I have 11 trees decorated in my house, so a little diversity is so fun!

052

This tree has been named “SUGAR RUSH”!  It is filled with all sorts of sweet things, ie candy canes, ice cream cones, donuts, cupcakes, cakes, gingerbread houses, lollipops, etc.  It is the favorite tree of many friends!

057

This tree is red, white, & silver, with stars & snowflakes.  A simple star and some bling top this tree.

062

A traditional Santa tree topper with a few sprigs of cream & gold top this tree.  The rest of the tree is filled with lights and mesh…That’s all!

065

A mauve bow tops my burgandy, mauve, silver & gold sugared fruits tree.

069

A large flower with sprigs of beads top my blue & platinum tree.

077

Seaweed & green kelp looking things top my “under the ocean” tree that is in my kids “under the ocean” themed bathroom.

080

3 large purple and green flowers and purple bead sprigs top my purple and lime green tree.

083

Hot pink balls and green/hot pink sticks top my shoe & purse tree.

So you see, decorating Christmas trees can be so much fun!  I still cannot decide which tree is my favorite!

Happy decorating…

“Wonder what I will come up with next”…

Fun and Festive SIMPLE Wreaths…

Who said decorating a wreath had to be complicated?  You can create very SIMPLE wreaths with some unique touches!

048

Add a large shatter proof ornament with a simple bow.  Hang the bow onto the wreath hanger.  DONE!  SIMPLE AND FESTIVE!!

066

Group several shatter proof balls together with wire and attach to the wreath, just under the bow.  SIMPLE AND FANCY!!!

074

Use an extra fancy wreath hanger, and add a hanging angel, or whatever you choose.  SIMPLE AND SWEET!!

075

Hang a sign from the wreath hanger and add a bow to the bottom of the wreath.  SIMPLE AND CUTE!

086

Let your kids hang a wreath on their bedroom doors and decorate it with non breakable ornaments.  Let their creative juices flow!  PRICELESS AND ADORABLE!!!

Happy decorating…

“Wonder what I will come up with next”…

Raising a table to use for wrapping…

001 002

If you have been following my blog for a while, I have made one thing VERY clear…I LOVE gift wrapping!  I can get lost in a place of complete euphoria while I am wrapping a gift for someone.  I have a silly saying, “Just say NO to gift bags!”  Given all of my love of gift wrapping, the holiday time can definitely give my back a workout.  Bending over a gift on a table that is too low is torture!  And to do it over and over during this time of year is unbearable, even for someone who loves wrapping gifts as much as I do.  Given all of this, my husband came up with a solution!  He cut pieces of PVC pipe just the right length to raise my table so I don’t have to bend over while wrapping gifts.  OMG!!!  This has solved all of my back aches, and I wanted to share the genius solution with you!.  Simply cut the PVC pipe the appropriate length and slip the legs of the table into the holes of the PVC pipe.  You will be amazed how simple this is and how much your back with be thanking you!

Happy wrapping…

“Wonder what I will come up with next”…