Up-cycling Broken Pottery Planter

20200623_121947

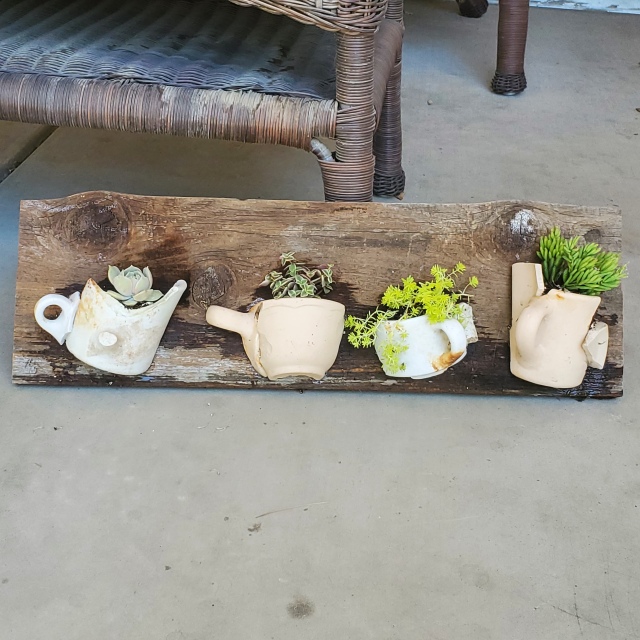
I love finding new ways to use things.  I picked up these broken mugs from a beach in California that has TONS of washed up pottery and china from an old manufacturer called Tepco China Company.  I decided to turn them into a succulent planter.

I started by gluing pieces onto a piece of used fence board, using E6000 glue.  I had to “piece” them together in order to create space for plants.

20200623_122007

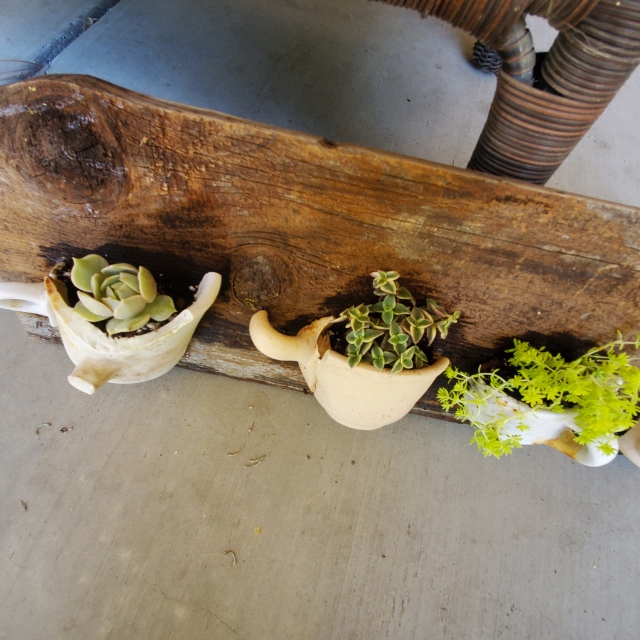
I purchased 2″ pots of succulents at the local nursery and planted them in the mugs.  Because the planting areas were pieced together, there were plenty of areas for water drainage.

It turned out really cool!  A great gift for a friend of mine!

20200623_121947

Happy Planting!

“Wonder what I will come up with next?”…

Painted Jars With Initials & Knobs

Happy Valentine’s Day!

imgsvr (1)

I love re-purposing jars!  I am constantly washing them & scraping off the labels.  Once I save up enough, I start dreaming of a creative way to use them.  Usually I am creating some sort of gift for the teachers & friends in my life.

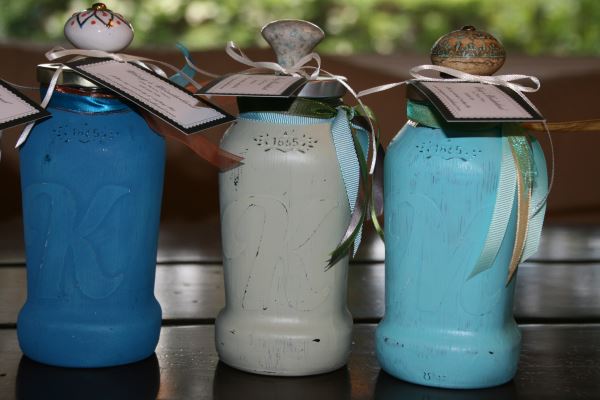
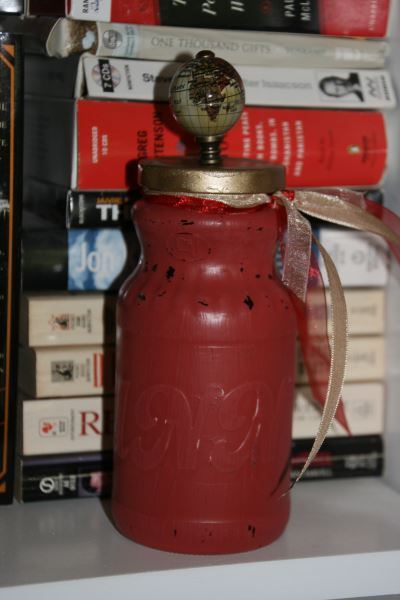
For this craft, I painted jars and added fun knobs.  These look great as home decor.  They can bring a unique element to a book case, or be used to store something.  I have cotton balls stored in a jar in the bathroom.

imgsvr (4)

Since I made these with the intention of gift giving, I decided to personalize them.  Prior to painting, I attached a sticker with the person’s initial.  I purchased the initial stickers at Hobby Lobby.  This gave each jar a little extra dimension.  After the paint dried, I “roughed” them up with a light sand paper.  This helped the initial become more prominent.

imgsvr (2)

In order to attach the fun knobs, I needed to drill holes in the lids.  I started by painting the lids colors that looked good with the paint color.  I kept it simple and painted lids black, white, silver, & gold.  After the paint dried, I used a drill to create the holes.

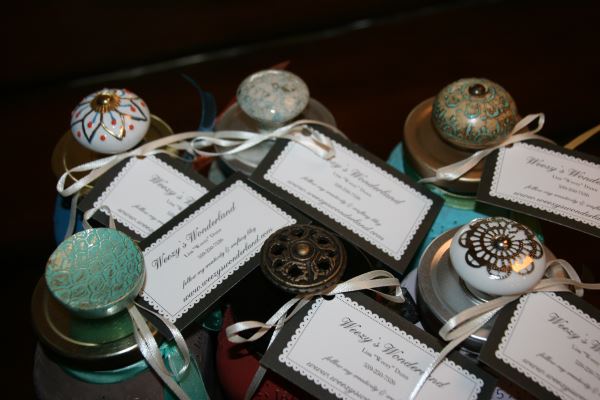
Once the holes were drilled, I attached the knobs.  I found fun inexpensive knobs at TJ Maxx, Home Goods, Hobby Lobby, & Lowes.

imgsvr (3)

I tied coordinating colored ribbon around the rim, just because it looked cute.

These jars were so fun to create & people enjoyed receiving them.  They especially liked that they were personalized.

Happy creating!

“Wonder what I will come up with next”…

Peter Pan Party Centerpieces

IMG_20190131_163401767

Oh, to never grow up!

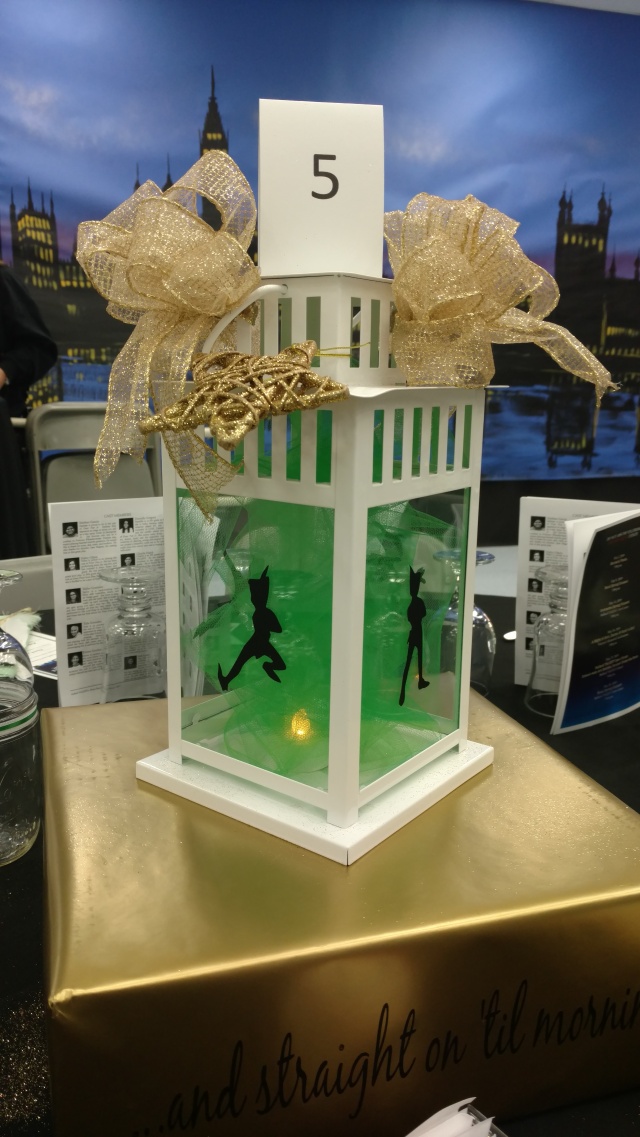
My daughter is currently performing in Peter Pan at her school.  This is quite a production!  There are 14 shows, with several of them being dinner & lunch shows.  To keep things festive, another mom & I created these DARLING lantern centerpieces to display on the tables.

We started with plain white lanterns, adding gold bows & gold stars.  We attached black vinyl silhouettes of Peter Pan on the glass.  Inside the lantern, we put a battery operated tea light and green tulle.  When the lights were off during the show, these lanterns left a hint of light in the room, which appeared to be Tinkerbell trapped in the lanterns.  SO ADORABLE!!!

The lanterns were placed on boxes covered with gold paper.  On each side of the box was a black vinyl letter “quote” from Peter Pan.  To finish the look, we sprinkled fine gold glitter on the box and table cloth immediately surrounding the centerpieces.  The total effect was AMAZING!

IMG_20190131_163401767

Of course, the play was amazing as well!

Happy Decorating!

“Wonder what I will come up with next”…

A Different Use for Crates…

In my last post, I showed you a clever headboard idea in my spare bedroom.  In this post, I will show you how I used crates as wall decor.

img_20190122_115824841

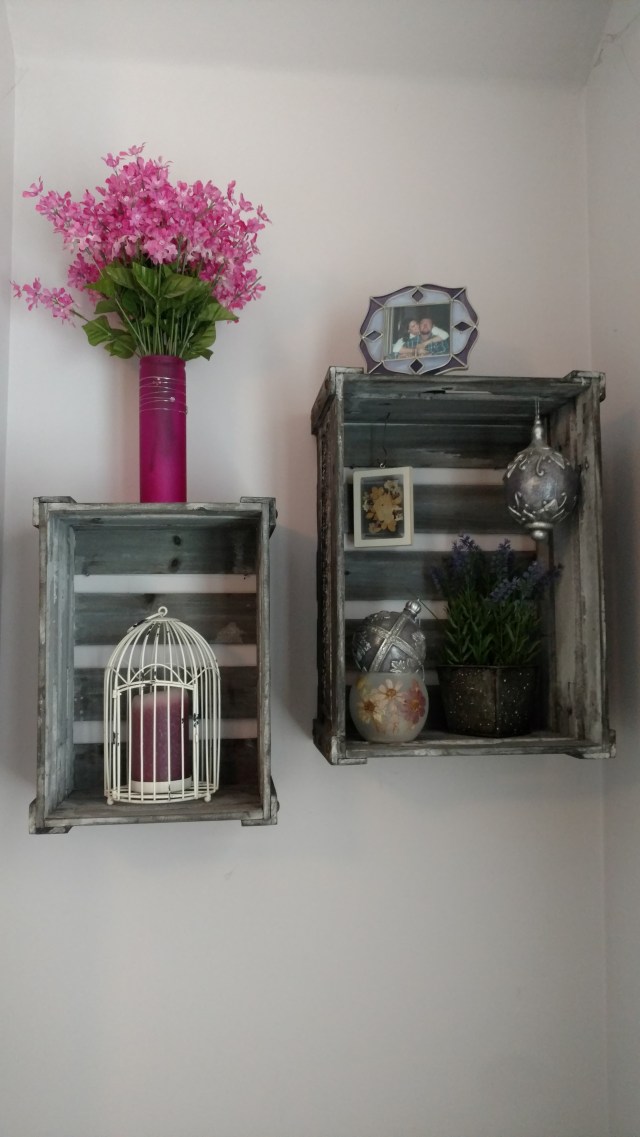
As I was decorating the spare bedroom, I wanted something unique on the walls.  I found these gray crates at TJ Maxx and fell in love!  They came in 3 sizes, so I bought them all.  I used the smallest size as a “platform” for a light next to the bed.  I turned it upside down on the night stand, then placed the light on top.  This allowed the light to be higher, making it easier for guests to read in bed.

The remaining two crates, I hung on the wall in a “nook” cut out next to the closet.  The extra depth of this space meant the depth of the crates wasn’t an issue.  I used the crates as shelves, placing some decorative items inside and on top.  I even hung a couple of items from the inside top, for variety.

The overall effect was exactly what I was looking for!

img_20190122_115824841

Happy decorating!

“Wonder what I will come up with next”…

Clever Headboard Idea…

img_20190122_115757125

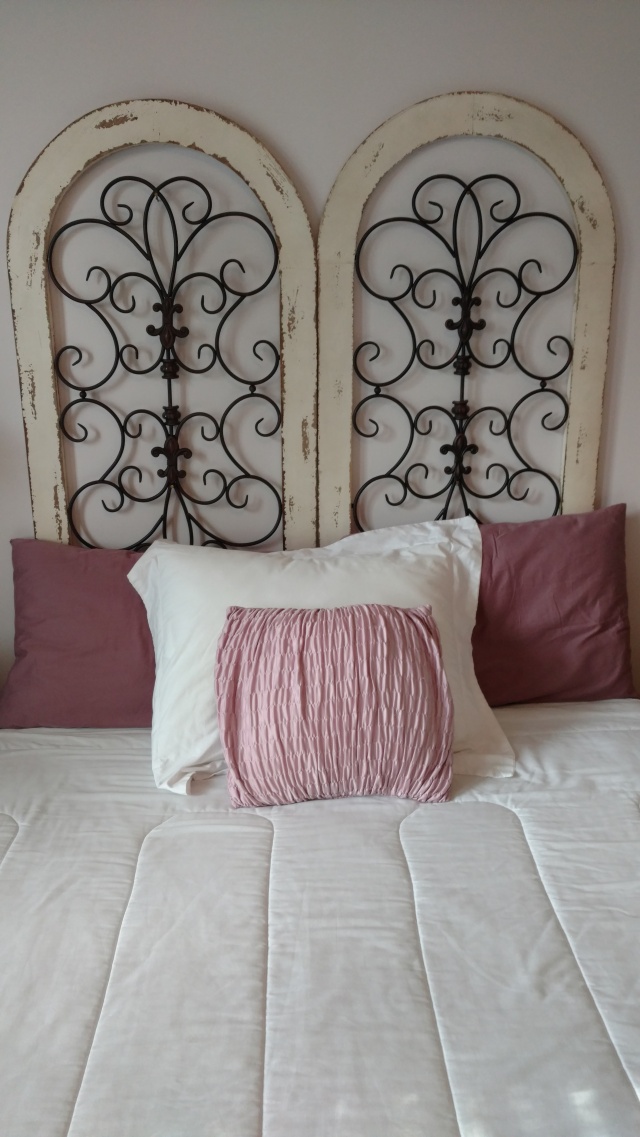
I don’t know about you, but I like to be creative with decorating ideas.  I was redecorating my spare bedroom, and was struggling with headboard ideas.  I didn’t want a traditional headboard, yet I wanted something cost effective.  I was shopping at Kirklands, and found these metal & wood pieces of art.  They had two, so I bought them.

I hung them side by side, so that they bottom of the frames rest just below the height of the bed.  They look amazing!  Quite a statement piece in the spare bedroom, yet so simple to create!

Happy decorating!

“Wonder what I will come up with next”…

A GIANT Bean Stalk…

imgsvr (43)

My daughter’s class was reading “Jack and the Bean Stalk”.  As they were reading the book, they were also learning about seed germination.  They started growing their own plants as projects.  These projects, and the process each child completed, were then displayed on poster boards and available for “show” to the parents at open house.

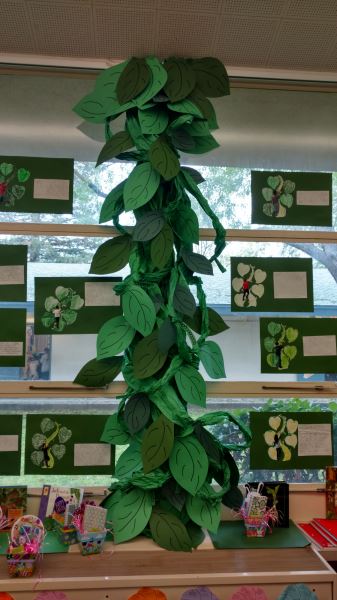
Since this project stemmed from the book, the teacher asked me to create a GIANT BEAN STALK in her room, also to be on display during open house.  OF COURSE, I said YES!!!  Then I began the task of creating the bean stalk in my head.  OH WHAT FUN it is to be a parent at times like this!!!

I started with long strips of green paper.  I measured the distance from the ceiling to the shelf where the bean stalk would rest, and added a few feet.  I used the paper on rolls that all schools have on hand.  I twisted the long strips of paper to create “cords”.  I then twisted the “cords” together and this became the base, or trunk.  I stapled the “cords” in several places so they would stay in together.  I attached the top of the trunk to a rod in the window sill using  large paper clips and binder clips.  The binder clips attached to the top of the trunk, then I looped the paper clips through the metal loop on the binder clip.  The paper clip was then looped over the rod in the window sill.  I taped the trunk to the window in a few places on the backside of the trunk, for stability.

Next, I twisted in more “cords”, but I allowed these to have BIG loops and gaps, so they were loose around the trunk.  I stapled these “cords” where they intersected the trunk.

imgsvr

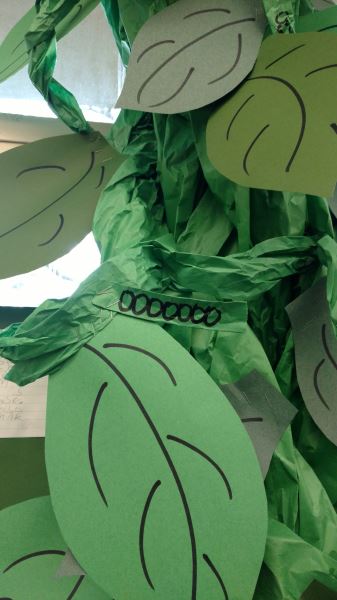
The next step was creating leaves for the bean stalk.  I used 3 different colors of green construction paper, and cut out a simple leaf shape.  I added lines with a black Sharpie for leaf “definition”.  Then I stapled the leaves all over the trunk.  I added numerous leaves to the top to hide the mounting in the window sill.

Using the rolled green paper, I created “bean pods”, and drew circles with black Sharpie.  I strategically stapled the pods onto the trunk.

This project only took about 2 hours from start to finish, but the impact was HUGE!!!  The kids LOVED their bean stalk and several other teachers at the school commented on it, as well.

imgsvr (43)

Have fun creating your GIANT bean stalk.  I wouldn’t recommend trying to climb it!

“Wonder what I will come up with next”…

Frames with Christmas Balls…

OMG!!!  I had the MOST FUN making these gifts for my kids teachers!  Based on the reactions from the recipients, they REALLY LIKED them also!

I realize this is a Christmas decor/gift idea, but I wanted to post it now so that you could be on the hunt for after Christmas sales on ball ornaments.  Now would be a great time to collect the ornaments and make gifts for Christmas this year.  Be sure to purchase balls with color, not just gold & silver, for the perfect effect.

Supplies needed for this project: frames, ball ornaments, wood initial, ribbon (both thin & wide with wire), spray paint, E6000 glue, short zip ties.

For the frames, you can find old beat up ones at yard sales for quite inexpensive.  I also made several from scrap wood that we had at the house.  Either way, spray paint the frames in fun Christmas colors.  Any kind of spray paint will work, so find the least expensive one you can.

Once the frames are dry, tie THIN ribbon strands around the top piece of wood, letting 7 total strands of ribbon hang all the way to the bottom.  This gives you extra ribbon so you can have the perfect length of each ball dangling.  You will want to mix up the lengths as you create your piece of art.  Next, tie the balls onto the ribbon and adjust the ribbon as necessary to get the appropriate varying lengths.  Be sure to triple knot the ribbon on the balls.  Cut the excess ribbon.

img_20190105_160023029

Paint the wood initial in a coordinating color.  Let dry.  Using E6000, glue the ribbon onto the back of the initial and let glue dry.  You may have a better idea on how to attach the initial to the ribbon.  If so, go for it!  Tie the initial on to the top piece of wood, just as you did with the balls.  Adjust the length of the ribbon as necessary.  Once all of the balls and initial are tied on, slide the ribbon to the center of the wood.

For the bow, use a coordinating wired ribbon and create a large full bow.  For bow making steps, look under the section of gift wrapping in my blog.  Attach the bow to the center of the top piece of wood.

To create a hanger on the back, I used small zip ties that I purchased at The Dollar Tree.  I created a small loop around the back of the ribbon, where it is attached to the frame.  Leave the zip tie loop large enough for a wreath hanger to fit through it.  By attaching the zip tie to the ribbon, it allows the ribbon to be shifted as necessary for centering, to the left or right, along the frame when hanging the frame on the wall.

img_20190105_160527730

You are now ready to hang your frame, or gift it to someone special.

Have fun creating!!!

“Wonder what I will come up with next”…
Simple 6 Point Snowflakes…

Making snowflakes is a fun craft for the entire family!  This year on Christmas Eve, my entire family got involved in the fun.

All you need is square paper and scissors, and you can create the most magnificent snowflakes.  I will show you how to make snowflakes with 6 points.

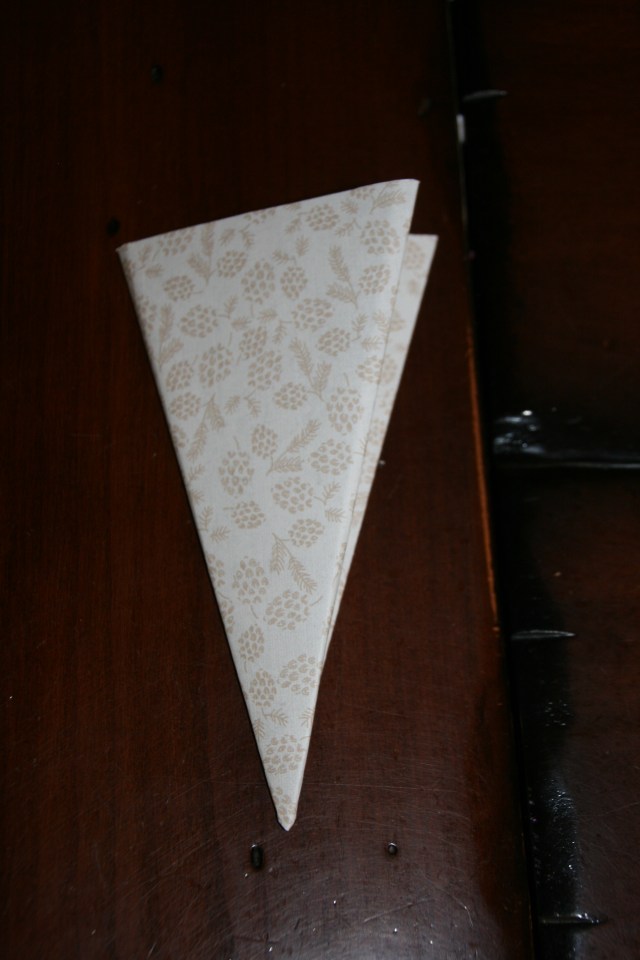
Start with a square piece of paper.  Here I used 12×12 scrapbook paper.  Fold the paper in half, corner to corner, as shown in the middle picture above, creating a triangle.  Then fold the triangle in half.

Hold your triangle with the main fold on the left, main point facing down and the top of the triangle the straight edge.  Fold from the bottom point, one third of the triangle towards the center (see picture #1 above).  You will have two thirds of the triangle folded over itself at this point.  Next, fold the remaining third, coming from the right side, over the fold you just made (see picture in the center above).  Flip the paper over and notice the area on top where there is a straight edge of paper with points sticking out from it.  It has the appearance of “fries” sticking out of a triangle shaped fry box. (See the last picture above)

img_8875

Cut the paper across the straight edge of the paper so you cut off the “fries”.

img_8876

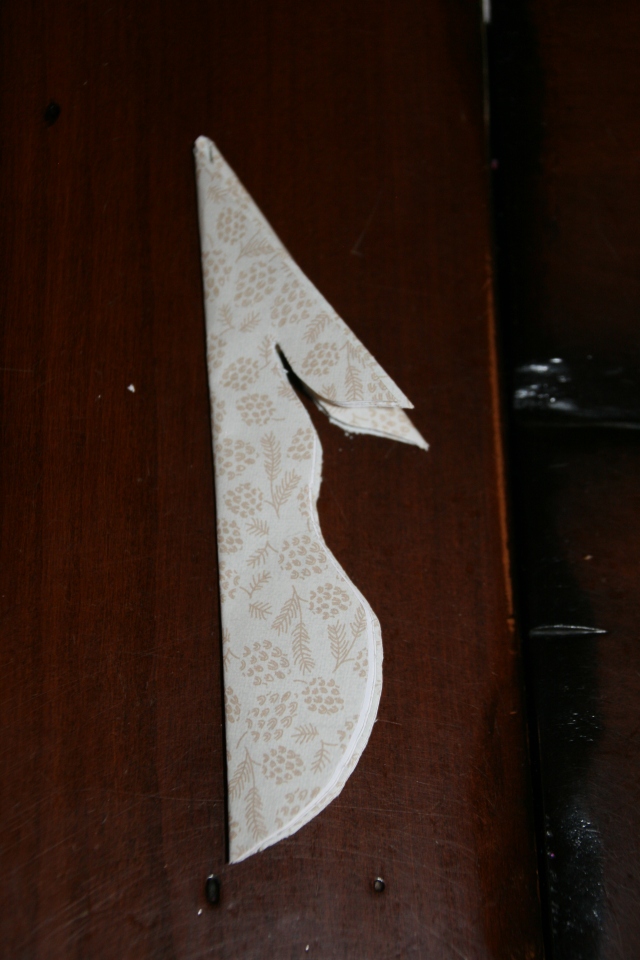
Now comes the fun part!!  In order to have dimension in your snowflake, you want the main folded area to remain longer and cut a shorter side where the open folds are.  See picture above.  This will become the main shape of your snowflake.

img_8877

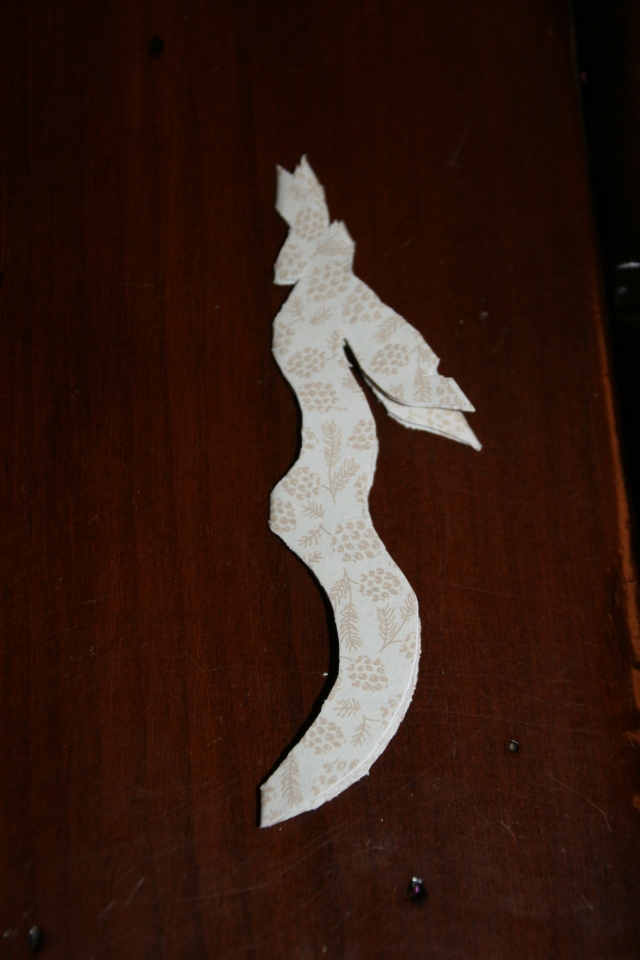
Now you will cut areas out to create the “holes” in the snowflake.  Be sure not to cut the entire folded area on either side.  If you do, your snowflake will fall apart.  See the picture above.  See the picture below to view the above cut opened up.

img_8878

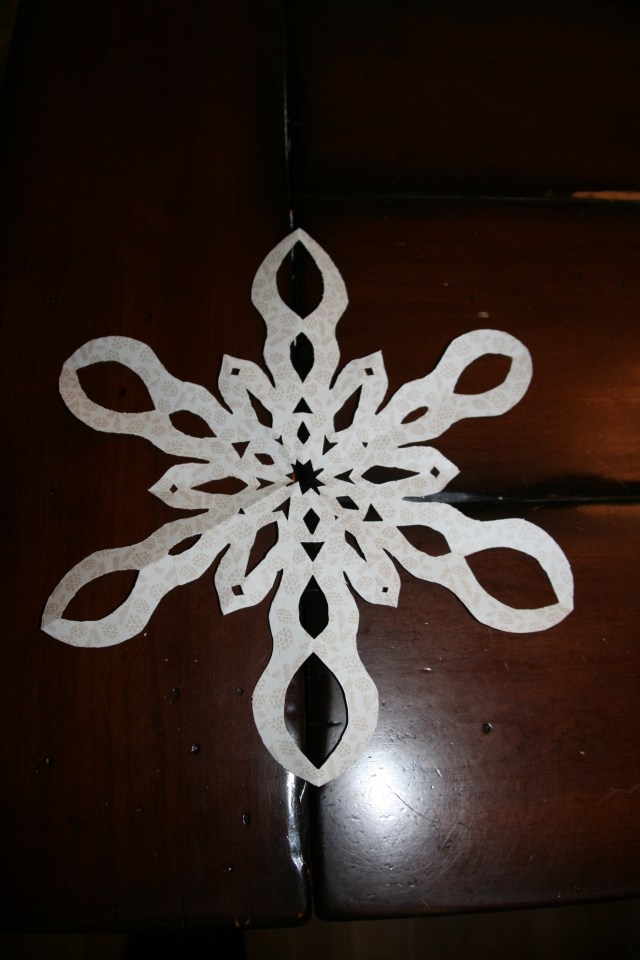
This is what the final snowflake looks like.

Here are the pictures shown again, but side by side, so you can compare the cut paper before and after.

Above is a 2nd snowflake with more narrow points.

This gives you an idea of what two different snowflakes will look like.

Have fun cutting!  See my next blog post for some fun and creative ideas on what to do with all of your snowflakes!

“Wonder what I will come up with next”…
How to create different heights on your table display…

051-5

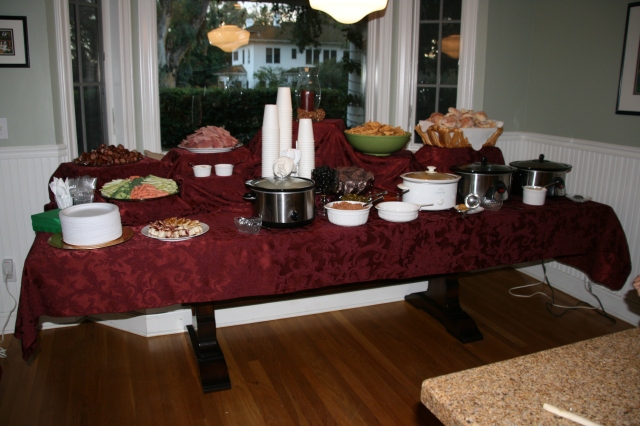
Whenever we have a large party, it is always a challenge to fit all of the food on the table.  I usually create different levels using boxes, which allows me to optimize the table space.

img_20161203_125756328_hdr

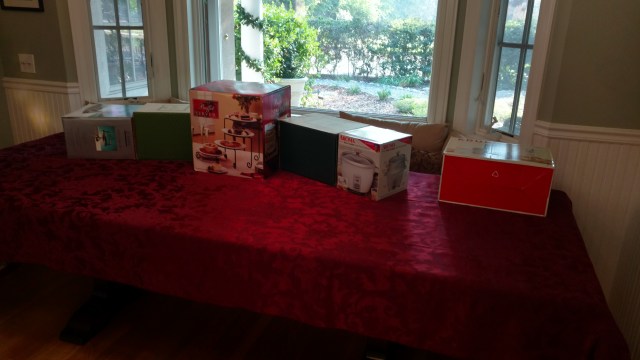
I first cover the table with a table cloth.  Then, I set up boxes to create the heights that I want.  Make sure to use sturdy boxes so they don’t cave in when you place platters full of food on them.

img_20161203_130356894

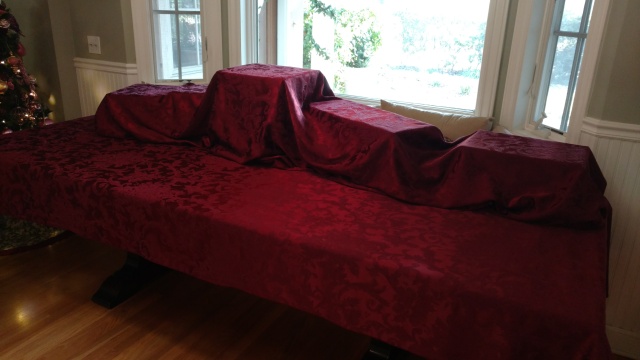
Cover the boxes with another table cloth that is the same as the flat table cloth.  Tuck under the edges and smooth it out onto the tops of the boxes.

Your table is ready for food!

051-5

Happy Celebrating!

“Wonder what I will come up with next”…

Bling Candle Holders

I love burning candles at home!  I even love having candles as decoration!  I made these bling candle holders as gifts, but I may need to make one for myself.  They were so unbelievably simple and inexpensive to make!!

119

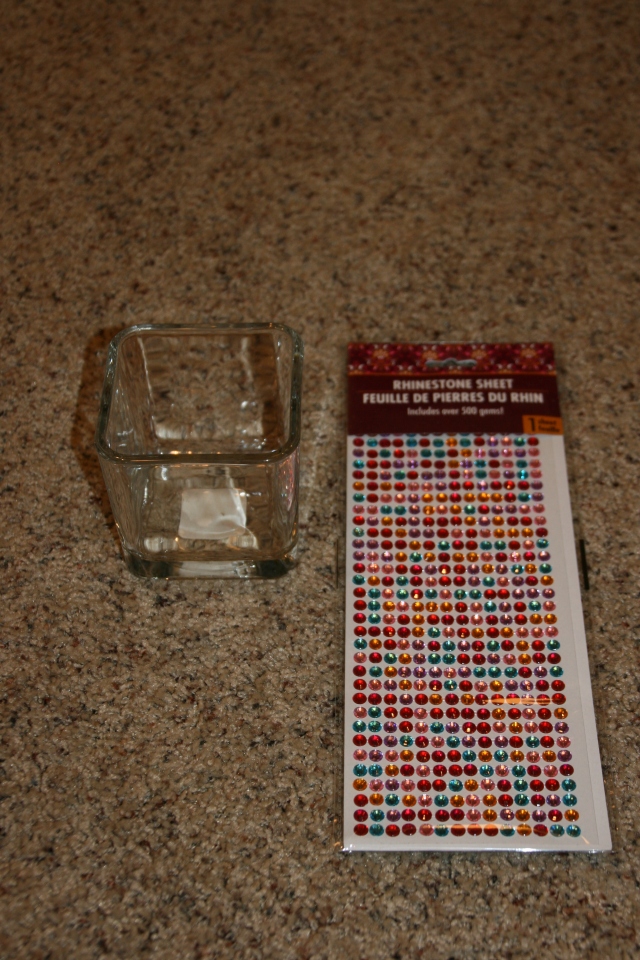
I purchased both the glasses and rhinestone stickers from The Dollar Tree.

117

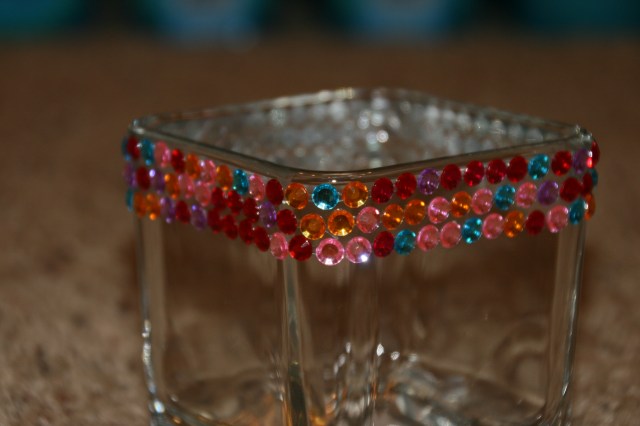
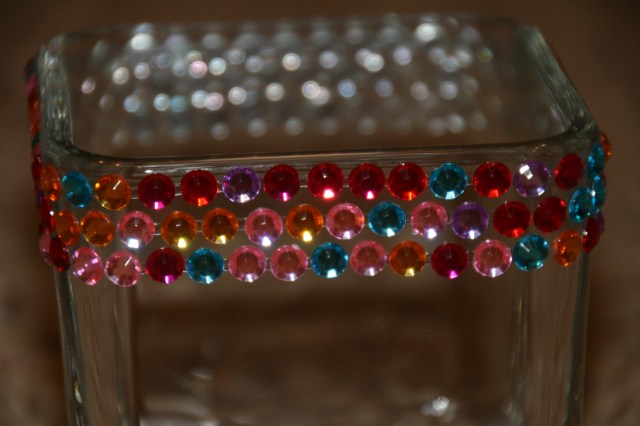
Each row of stickers are connected, so I tore off the rhinestones in strips and stuck them to the glass.  At the end of the strip, I started a new strip until I made it all the way around the glass.  I did this 3 times to create the look shown here.

118

So very easy, but pretty darn cool!

Happy sticking!

“Wonder what I will come up with next”…