Witch hats attached to jars…

imgsvr

This is a fun gift to create for teacher gifts.  It is the same concept as the ghosts that I put on top of jars in a previous post.  I used foam & pipe cleaners to create the witch hats.  Then I glued them onto a spray painted black lid.  I filled the jar with tootsie rolls.

A very easy gift to create!

Happy Halloween…

“Wonder what I will come up with next”…

“Grave Yard” cupcakes…

035046

Who doesn’t LOVE a festive cupcake?!?!  I made these cupcakes for my kids classes.  They are sure to be a hit on Halloween!

032

Start by writing “RIP” on the smooth side of the orange slice candies with black decorating gel.  Let the gel dry over night.

031

Bake the cupcakes and frost them with chocolate frosting.  Place the orange slice candy on the cupcake and add the sprinkles so that it looks like dirt from a fresh grave.  Add bones & skull candies on top of the dirt sprinkles.

033

To make the “Grave Yard” cupcake platter, start with a large lid from a box.  Cover the lid with aluminum foil.  Make the back side of the foil taller.  This will keep the glitter, etc from the backdrop trees from dropping onto the cupcakes.

038043

I bought the tree branch picks at the 99cent store.  I taped them to the side & bottom of the lid.

041042

I added a strand of black mesh around the outside of the lid and tied it in a knot in front.

045

Add the cupcakes to the lid and you are ready to display your “Grave Yard”.

046

Happy Halloween…

“Wonder what I will come up with next”…

How to create a simple, yet festive photo booth…

013

My daughter had a Cheerleading Birthday party, and I thought it would be fun to create a photo booth for the girls to take pictures in.

156

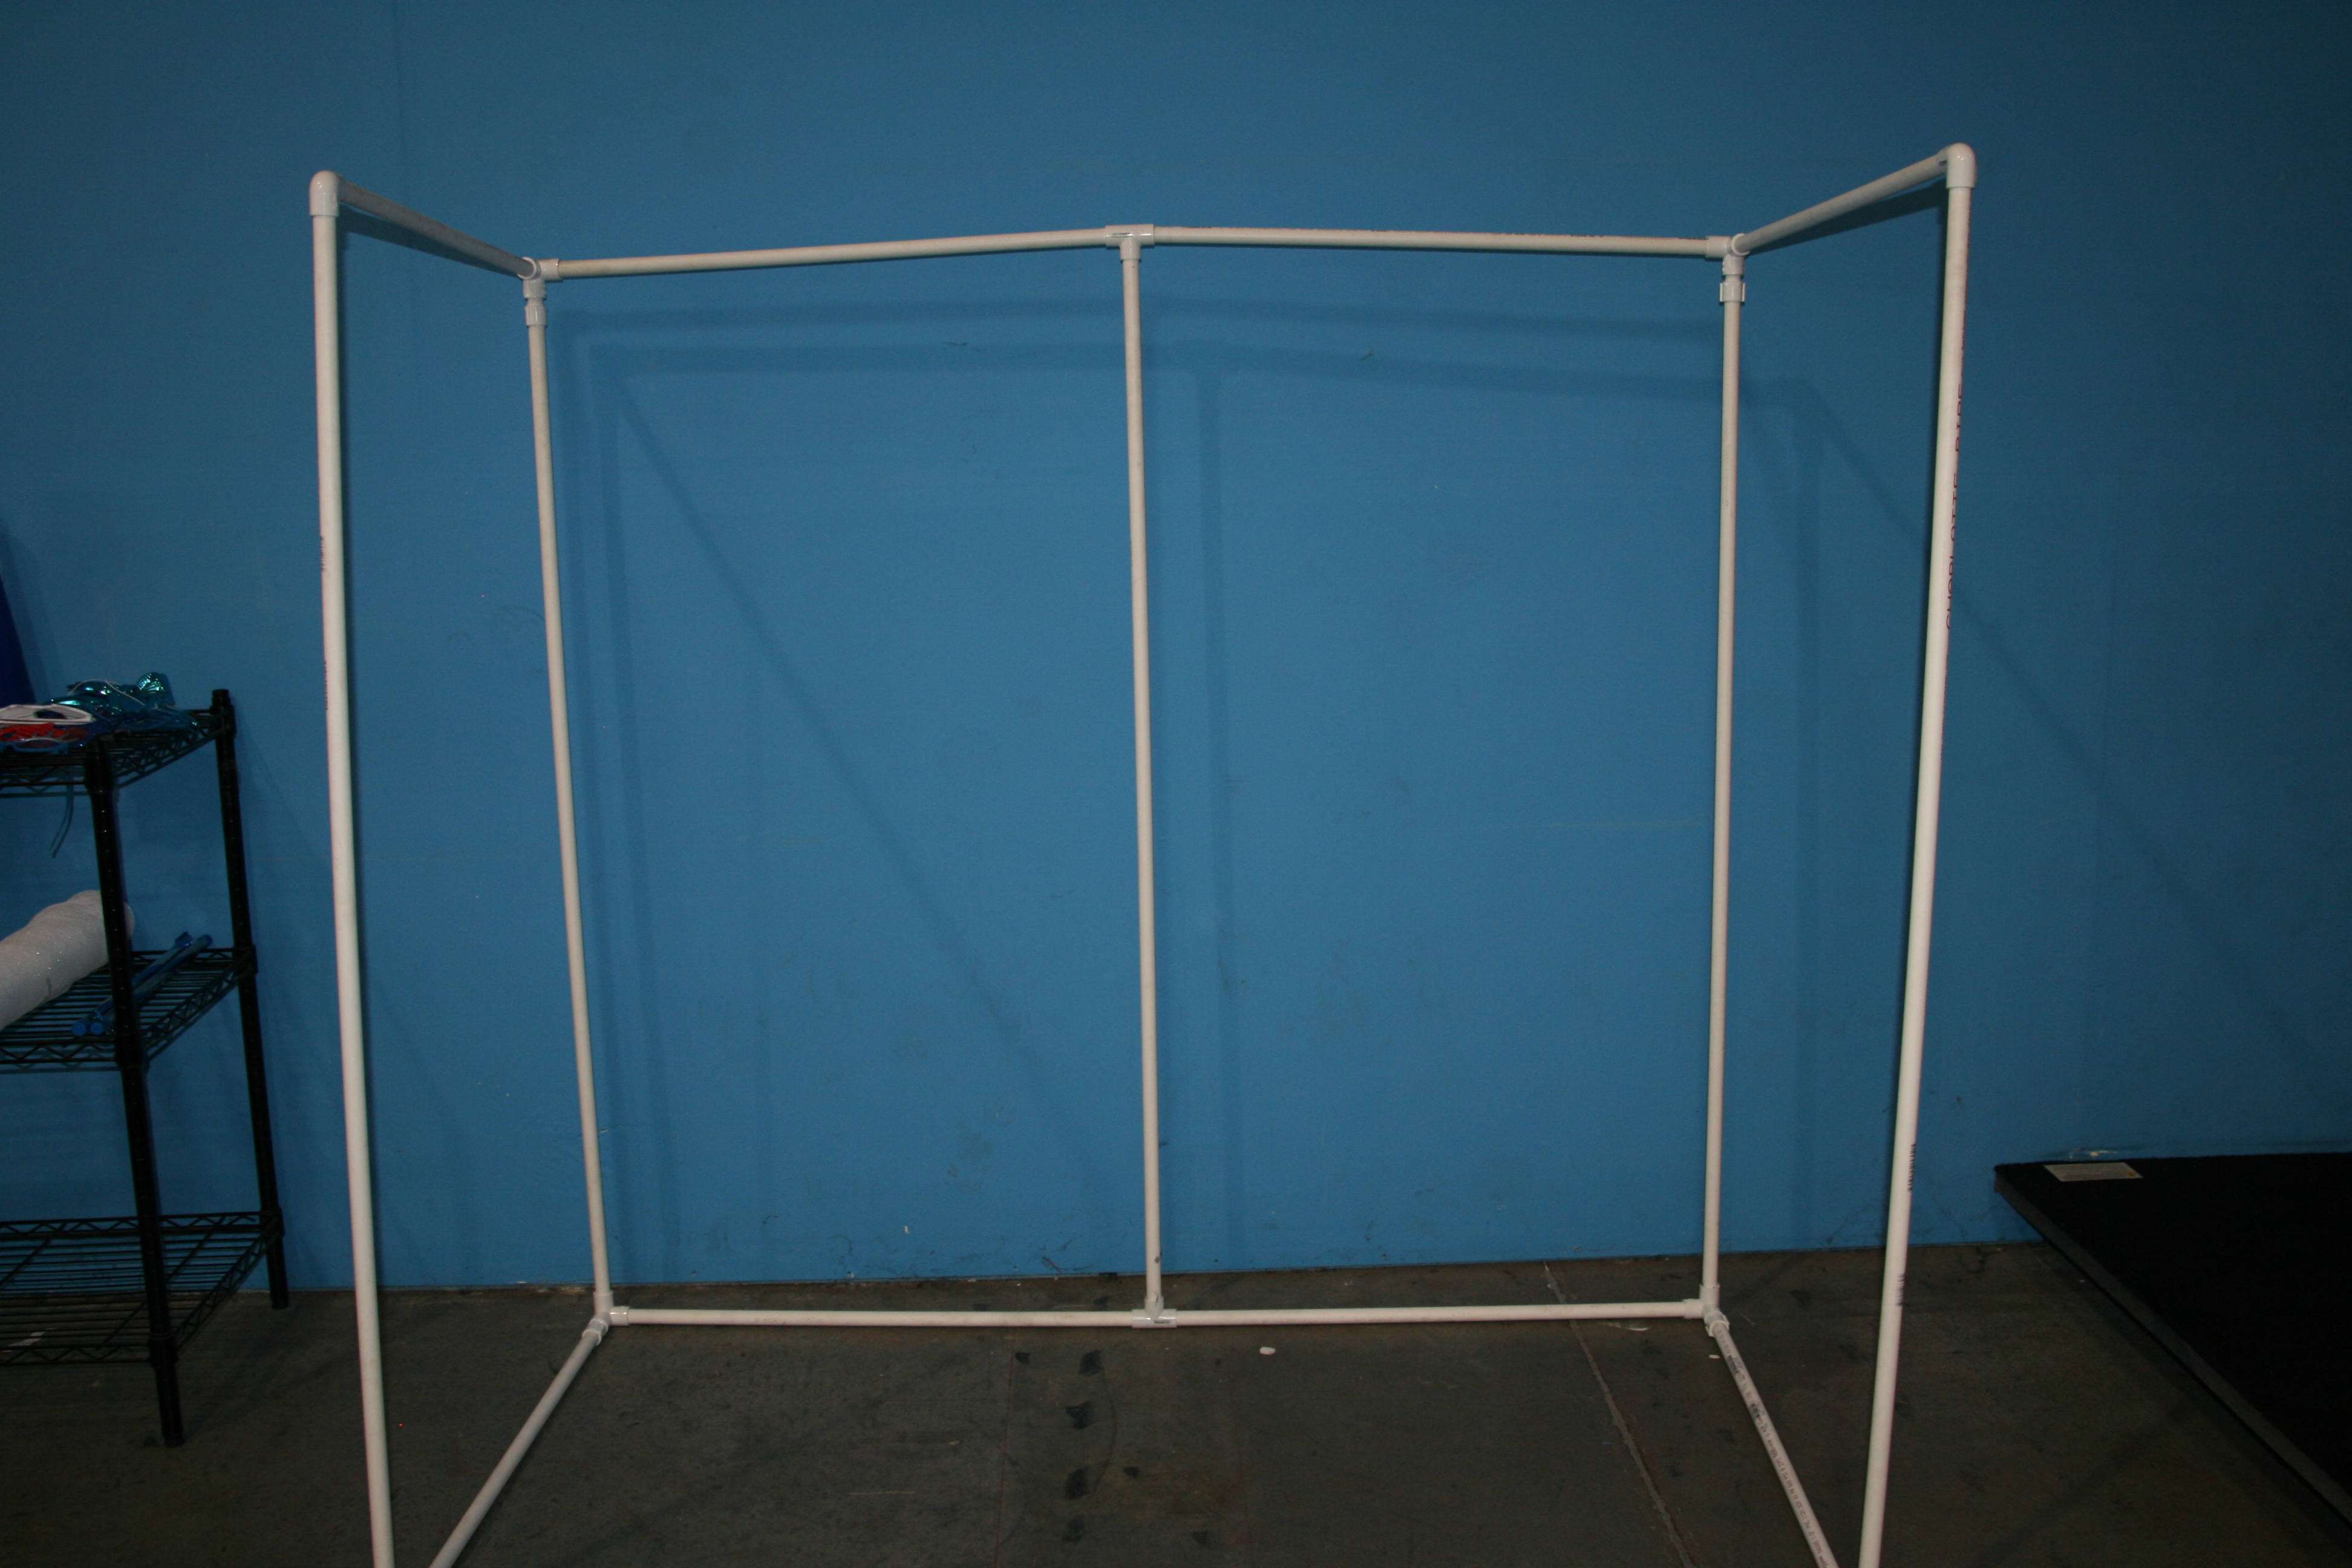
I started with a simple pvc pipe frame.

071 072

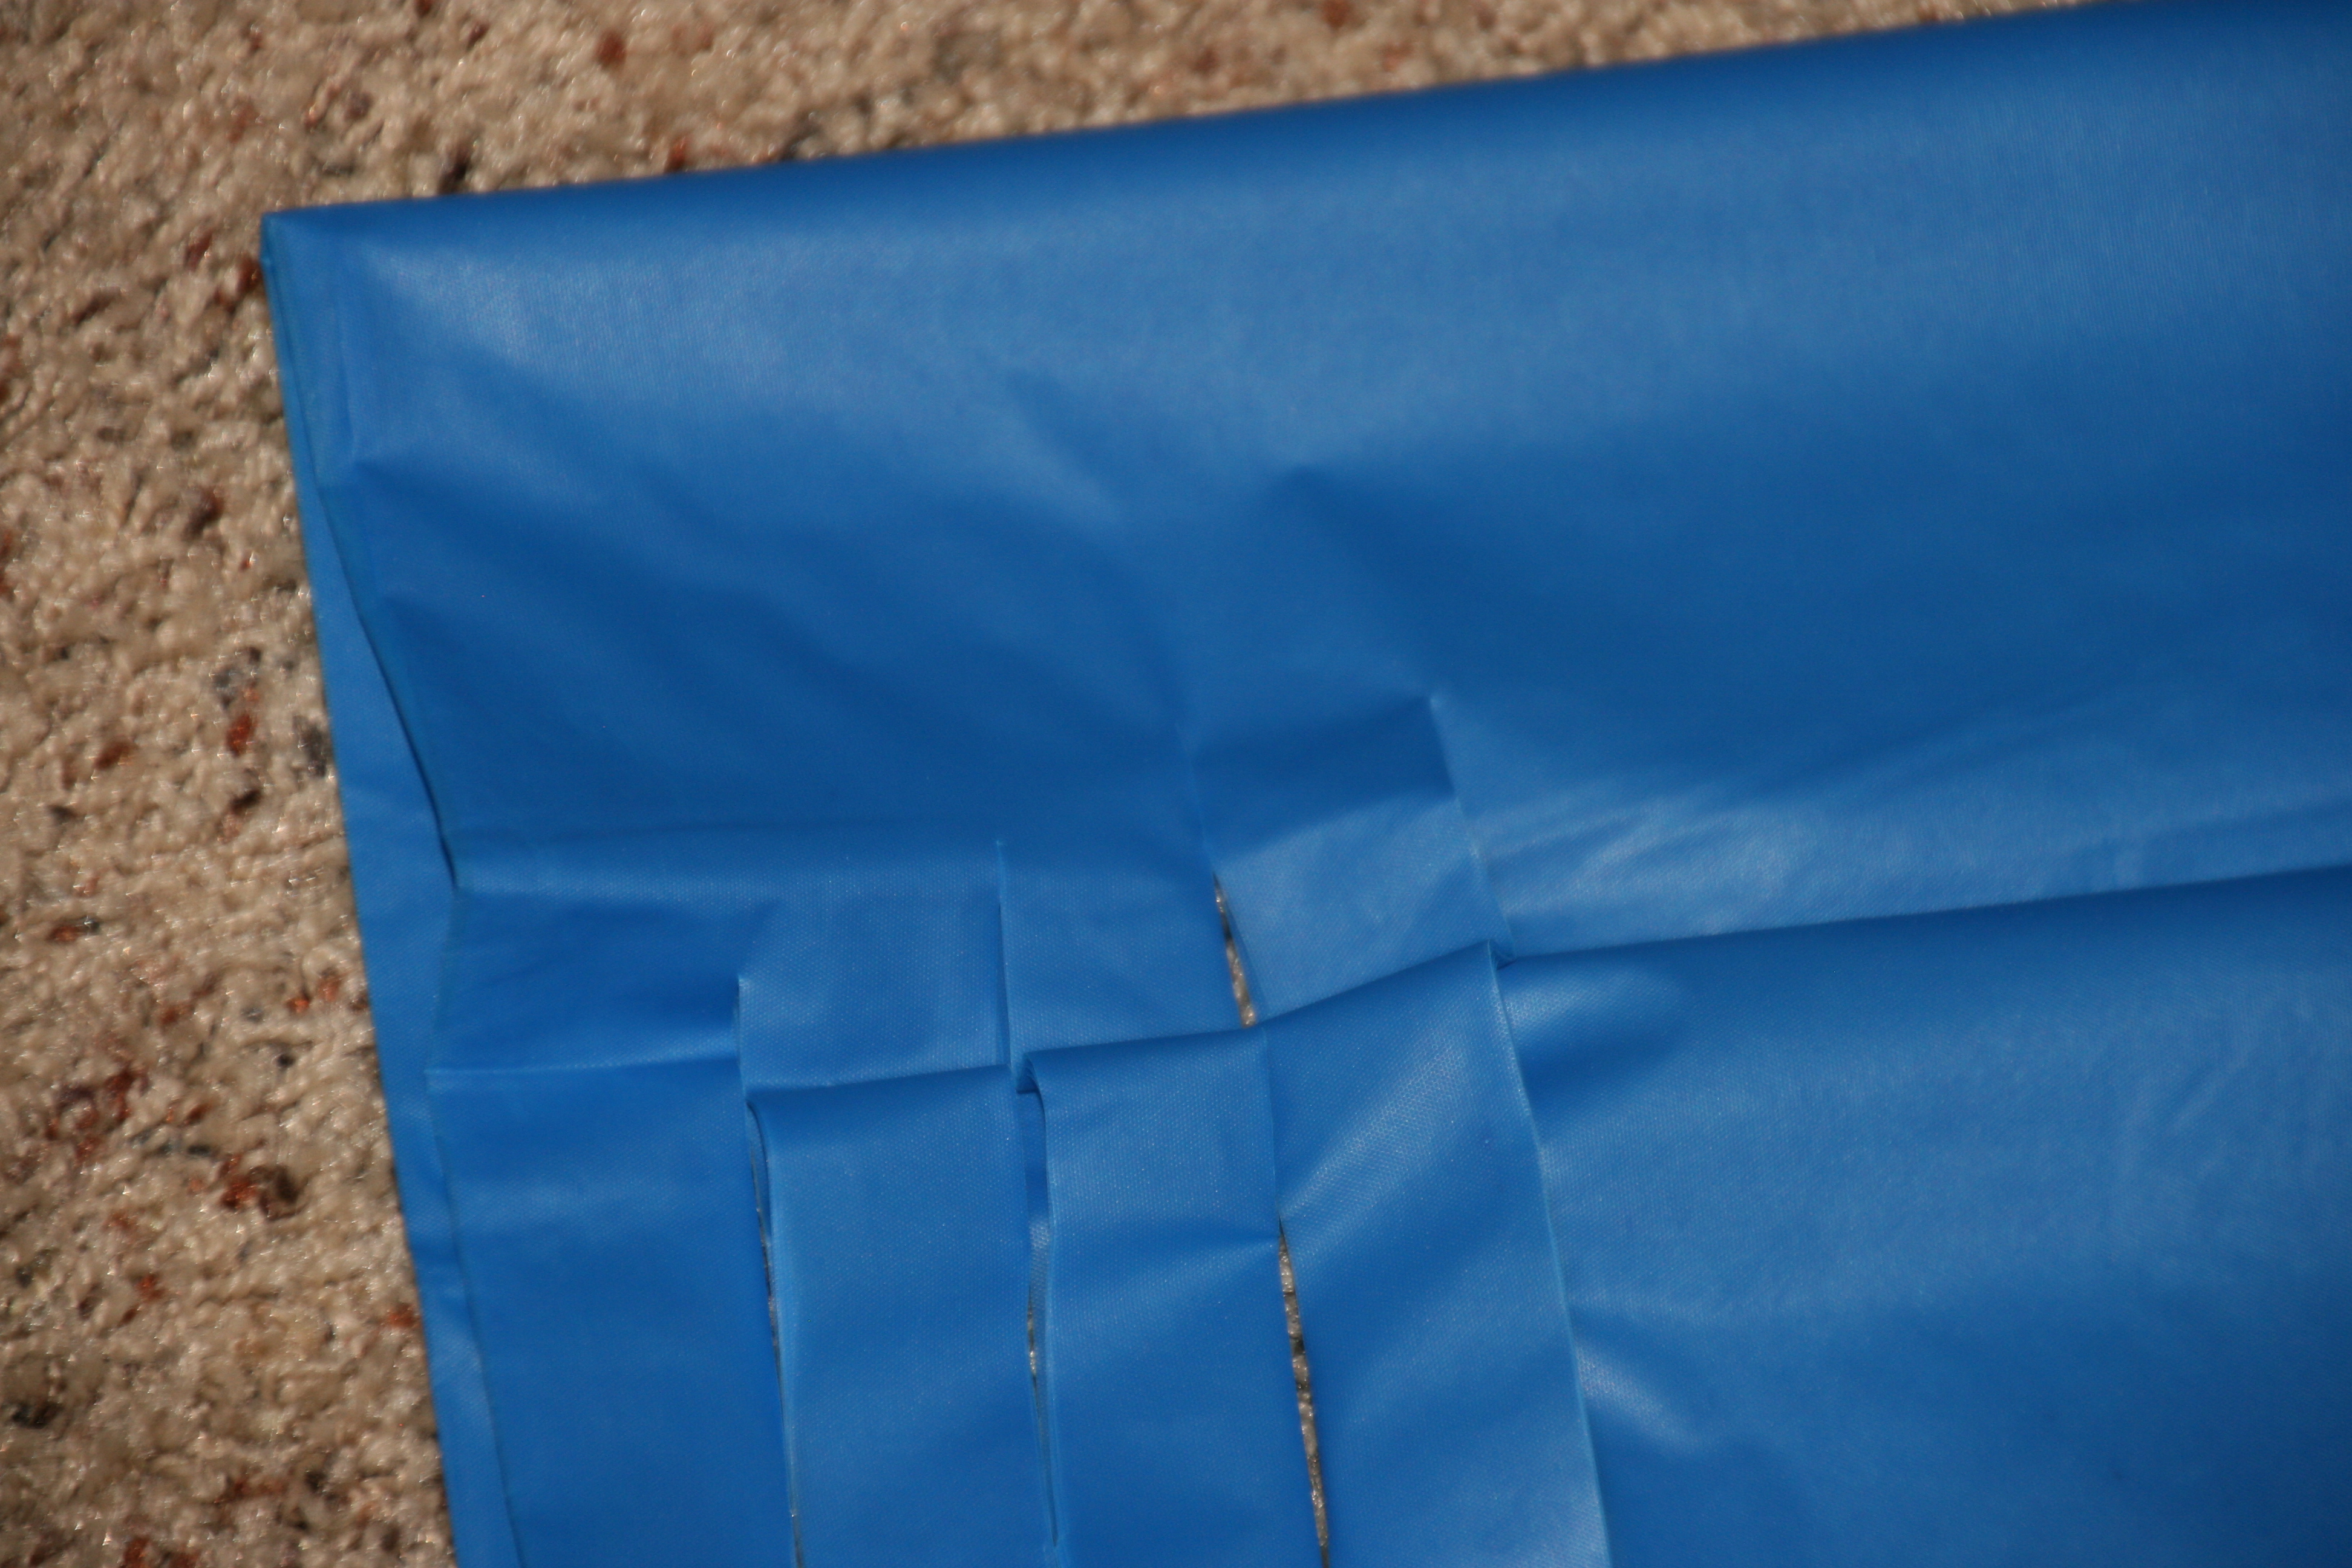
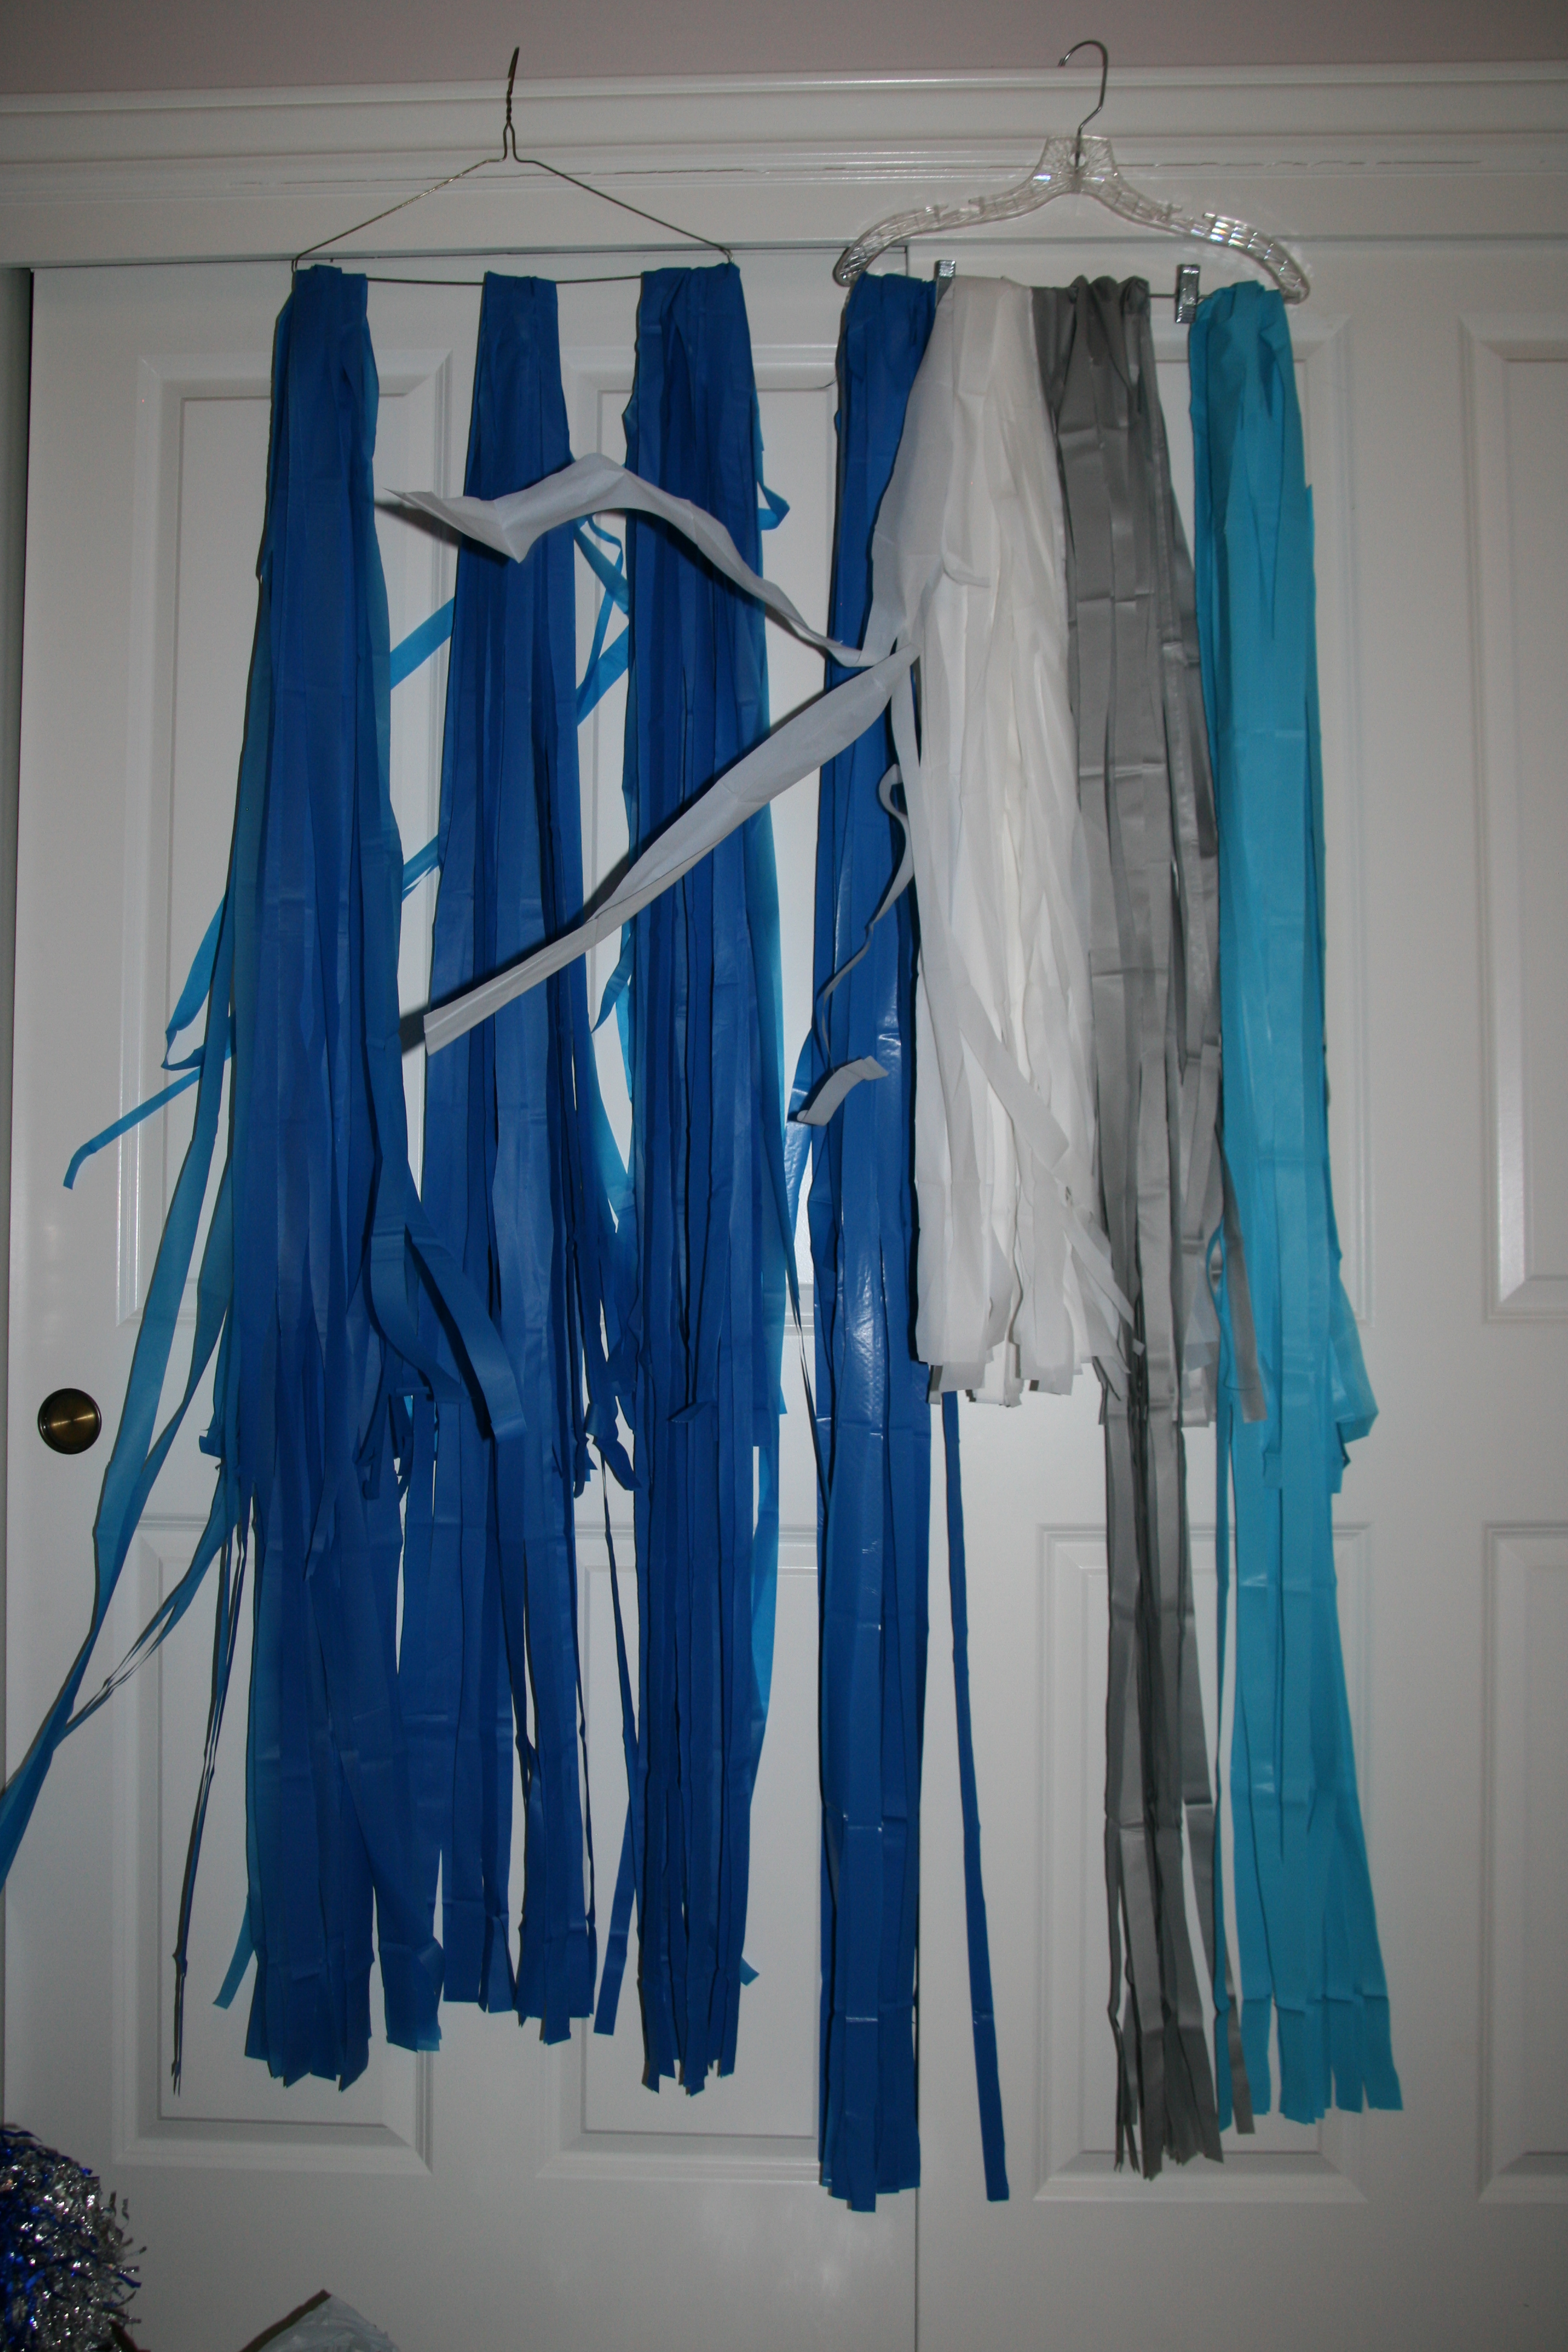
I cut plastic rectangle table cloths into strips, leaving a folded area at the top.  This folded area is where I draped the table cloth over the pvc pipe frame.

073

I stored the table cloths on hangers until I was ready to create the photo booth.

013016

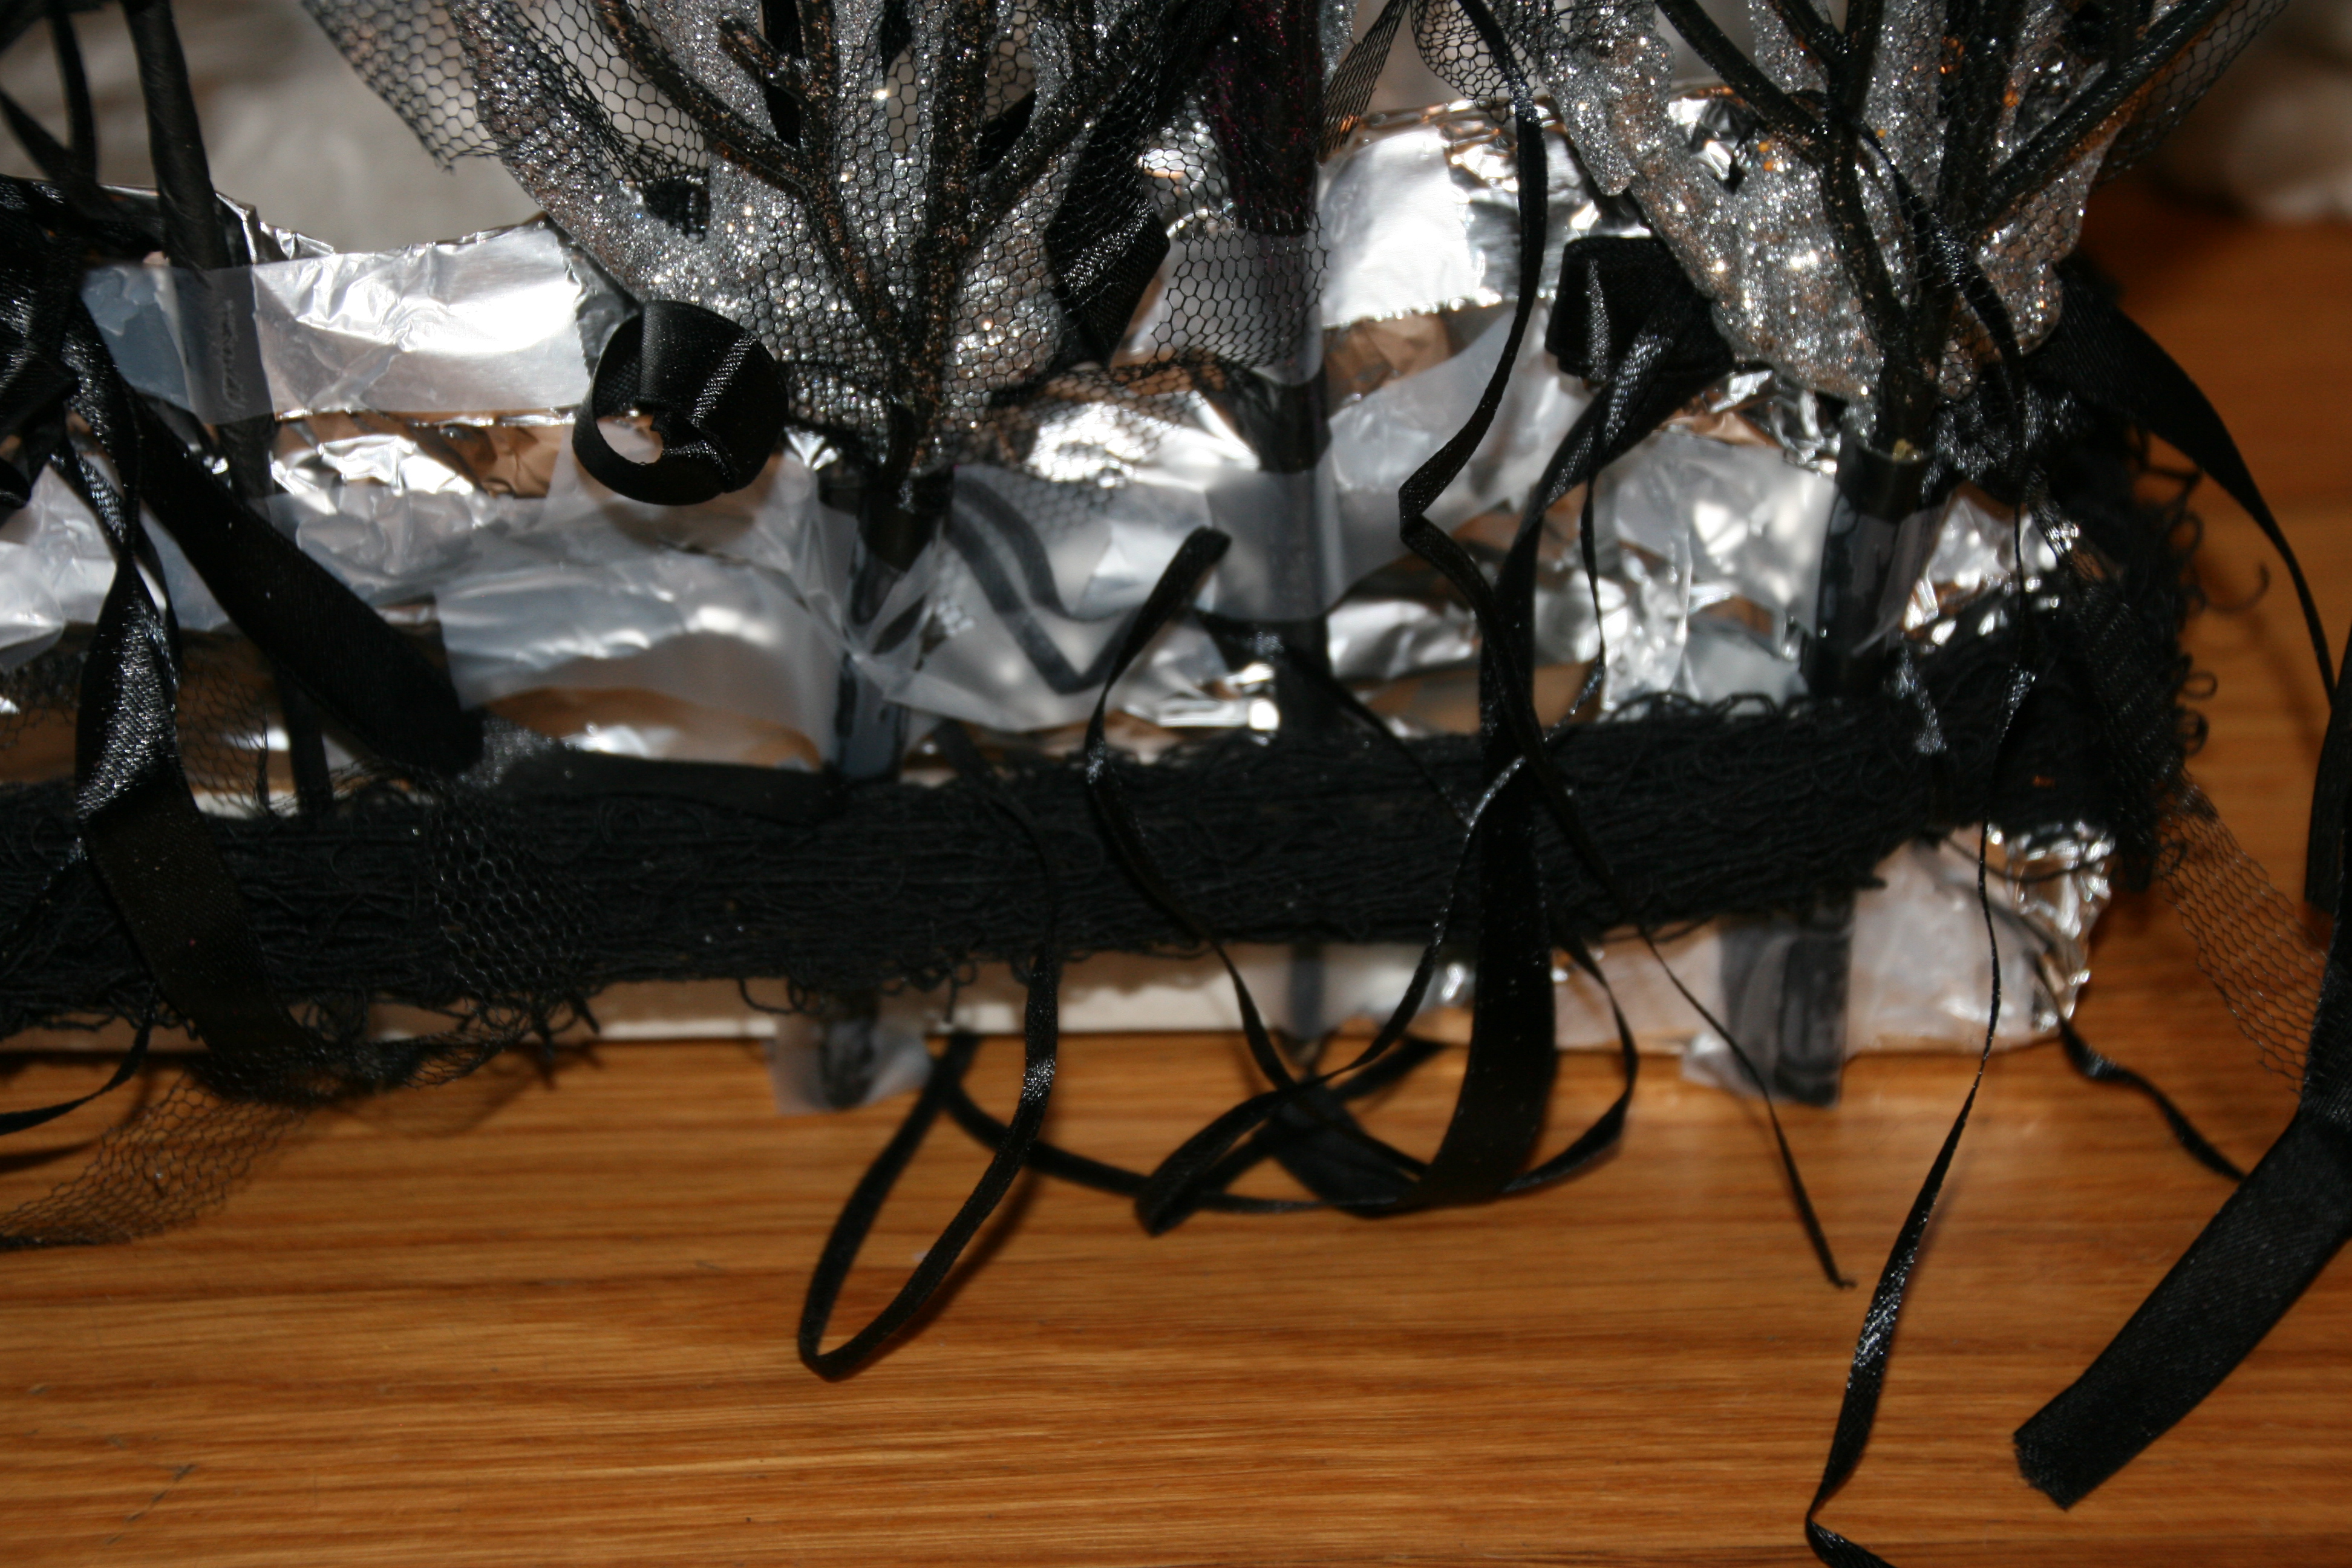
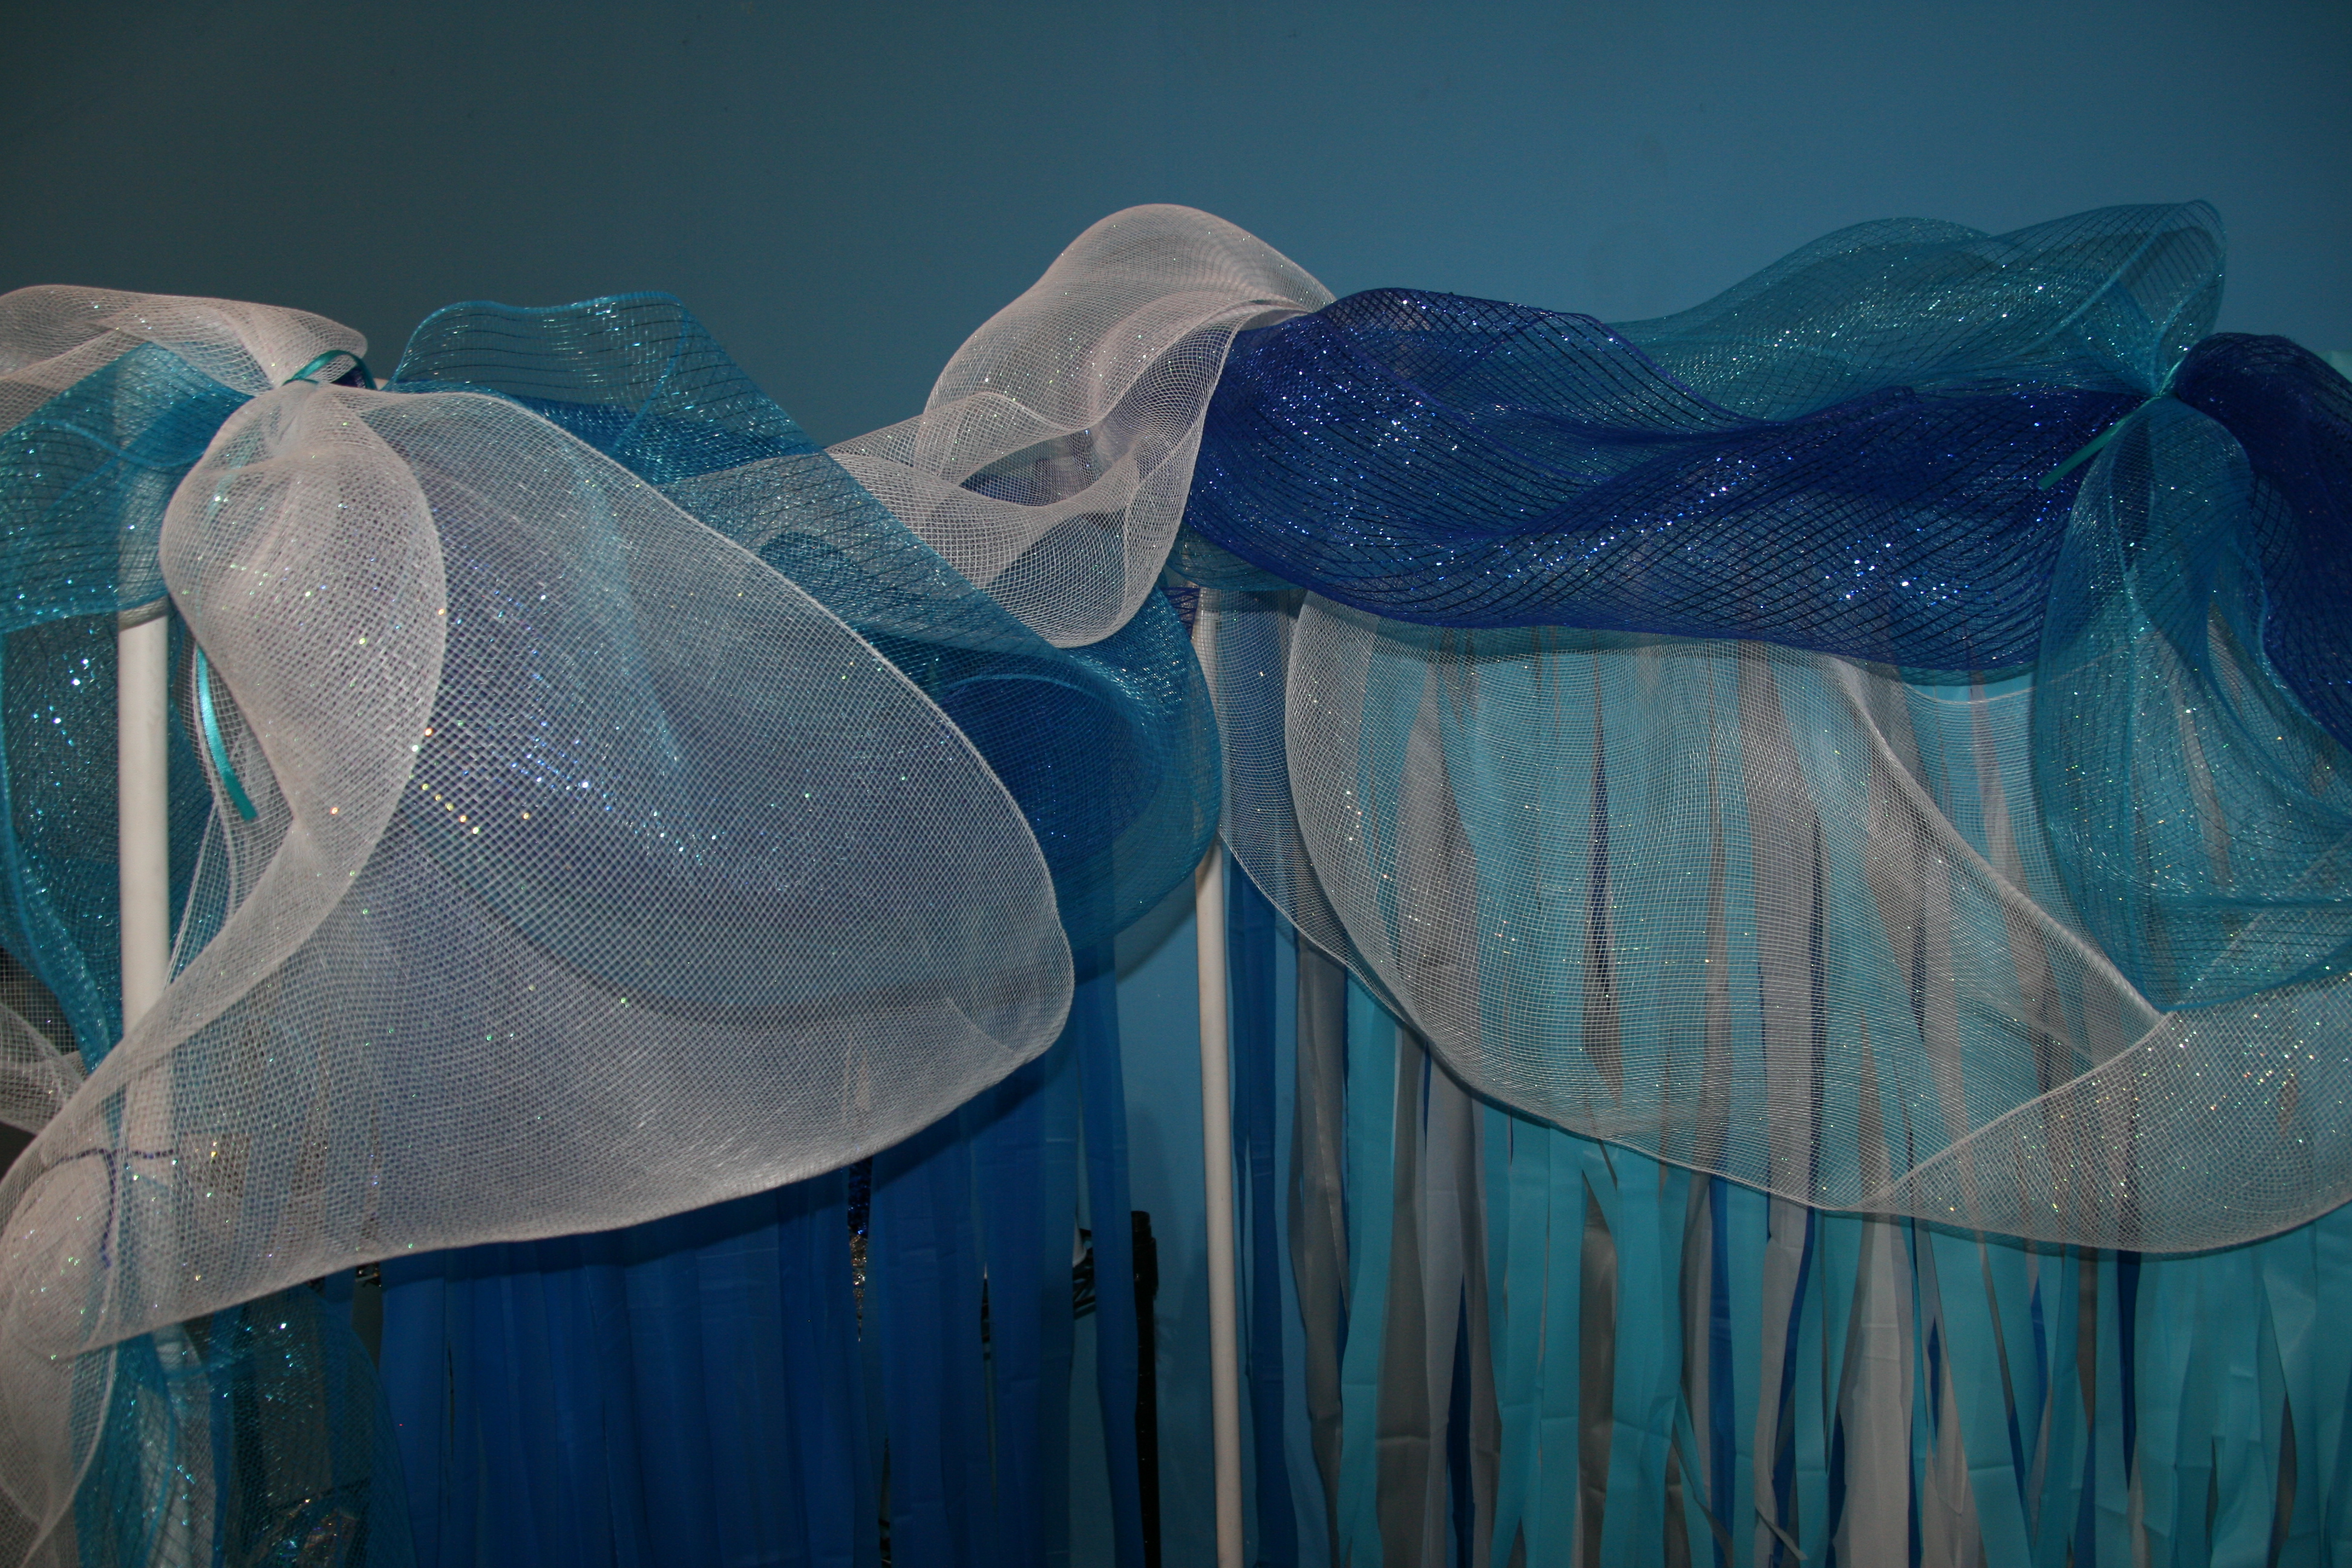
I staggered the length and colors of the table cloths on the frame to create interest.  Then I used mesh, that comes on a roll, to hide the pvc pipe in front, and to add dimension to the top of the booth.  I purchased silly masks, glasses, pom poms, megaphones, & ribbon twirlers as accessories for the girls to wear in the pictures.

015

The girls had a blast, and the photo booth was so simple to create.

Happy photographing…

“Wonder what I will come up with next”…

Chocolate covered Bugles…

008

Chocolate covered Bugles can be used to decorate cupcakes.

005

You will need a bag of Bugles, Chocolate Melts (I buy these at Michaels or Joanns), a microwave safe bowl, & parchment paper.

007

Start by melting the Chocolate Melts as the directions specify.  Once the chocolate is melted, individually dip the Bugles into the chocolate.  Gently use your fingers to remove the Bugle, shake off the excess chocolate, and place on parchment paper to dry.  If you want a drizzle, as I did here, melt a different color of chocolate and dip a fork into the chocolate.  Shake the fork over the Bugles to create the drizzles.  Let the Bugles dry.

011

Once the Bugles are dry, use them to decorate your cupcakes, or whatever tasty treat you choose.  Here, I used them as “mega phones” for a Cheerleading birthday party.  Chocolate dipped Bugles would also make great witch hats, witch fingers, ice cream cones, or mountain peaks.

Happy dipping…

“Wonder what I will come up with next”…

How to store baking sprinkles & supplies…

001

My last post was about storing cupcake papers.  Well, if you are going to bake cupcakes, you NEED sprinkles to decorate them.  Again, I am addicted to sprinkles and decorating items.  The plastic jars have a tendency to fall over and do not stack well.  I solved this problem by storing them in a tray from the Dollar Tree.  This makes them easily accessible and they  store neatly on a shelf in my pantry.

Happy decorating…

“Wonder what I will come up with next”…

How to store cupcake papers…

002 004

I don’t know about you, but I am addicted to all of the fun cupcake papers that are available these days.  Gone were the days of white, yellow, light pink, and soft blue papers!!!  Not only do we have tons of standard size papers available, but we have access to MINI cupcake papers also!  It’s so exciting!  The problem with all of these cupcake papers is How To Store Them!

I store them in plastic trays that I purchased at the Dollar Tree.  Once I open a package of papers, if there are still some left, I wrap them in fold top sandwich bags, then line them in the trays.  This keeps them clean, and organized so they won’t get smashed.

Happy baking…

“Wonder what I will come up with next”…

Paint can creations…

001

I published the “how to” for these back in March under “Gift Ideas”, but here is another version that can be easily created.

Start with a new paint can (these can be purchased at Home Depot).  Cover the can with fun coordinating scrapbook paper.  Add ribbon and embellishments and you are done.  On the lid I used a drawer knob.  I drilled a hole in the lid with a drill, then screwed on the knob.

002005

004

Happy canning…

“Wonder what I will come up with next”…

Sticker fun on gifts that are being shipped…

122

If you are shipping a gift to someone, it is difficult to put a big fancy bow on the gift.  It makes the packaging larger or it will get smashed during transit.  I love to use stickers for these gifts.  Here I used stickers from The Dollar Tree and created a flower garden gift for a 5 year old girl.  After the stickers were in place, I covered the package with brown shipping paper.  You can imagine the excitement when she started to open this gift!!!

Happy wrapping…

“Wonder what I will come up with next”…

Paper bag luminaries…

002

My girls absolutely LOVE doing crafts.  These paper bag luminaries are to simple to create.

Start by cutting a circle or oval on both sides of the paper bag.  Tape a piece of orange tissue paper on the inside of the bag, covering the entire hole you cut.

003

Use black paper or cardstock and cut shapes for the eyes, nose, mouth, eyebrows, etc and glue or tape them onto the outside of the orange tissue paper.  Place a battery operated candle inside the bag and you have a festive, kid friendly luminary.

Happy Lighting…

“Wonder what I will come up with next”…

Fancy fake pumpkins…

https://www.youtube.com/embed/ZC2qqAano-A“>youtube “how to” video

005

Fake pumpkins can be transformed into beautiful pieces of Fall decor with a few simple steps.

002004

Start by cutting the fabric in a 3’x3′ square.  Place the pumpkin in the center of the square.  Grab all 4 corners and bunch the fabric tightly at the top.  Tie with a ribbon.  Be sure to pull the fabric tight before you tie it, and then tug at the top once you have tied the ribbon.

005006

Using a pretty ribbon, tie a bow.  Glue on Fall leaves, berries, etc.  I used E6000 to adhere the leaves and berries.

Happy Fall…

“Wonder what I will come up with next”…