Harry Potter Birthday Party…

imgsvr (36)

The Harry Potter “CRAZE” hit our house, so we had no other option but to have a Harry Potter themed birthday party.  As you all know if you have been following my blog for very long, I LOVE to have parties!!!  My brain LOVES to prepare for all of the decorations and details!

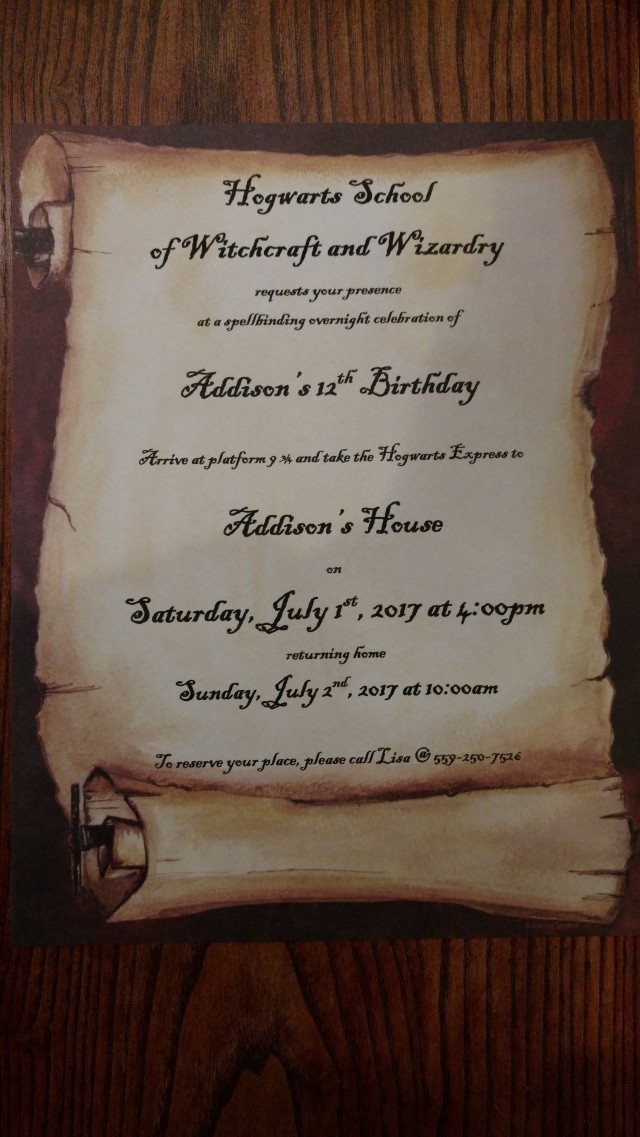
I will start with the invitation that I created.  I had a blast deciding on the font!  I also included a paper “ticket” for the guests.

IMG_20190223_183804634

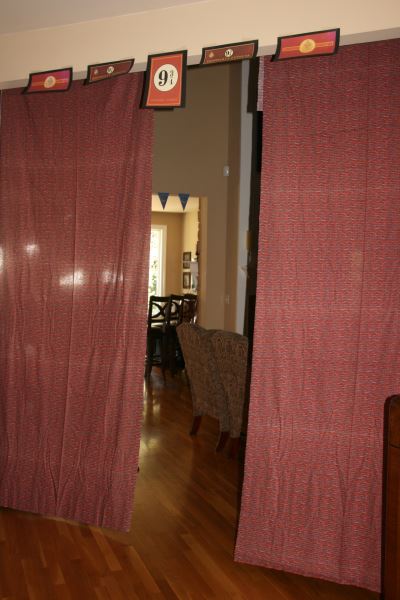
When the guests arrived, they got to walk through a “brick wall” that I created by hanging brick printed fabric.

imgsvr (26)

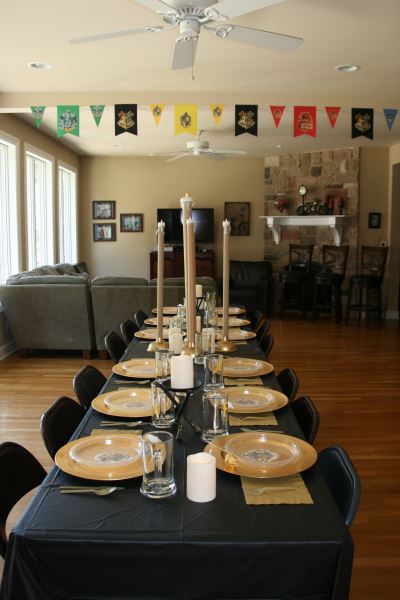
As they entered “Hogwarts” they could see the “dining room” that I created, which included banners from all of the houses.

imgsvr (36)

The table place settings were decorated with gold chargers, clear plastic plates, and personalized mugs, for butter beer, of course!  I printed Hogwarts logos and placed them between the gold chargers and clear plates.

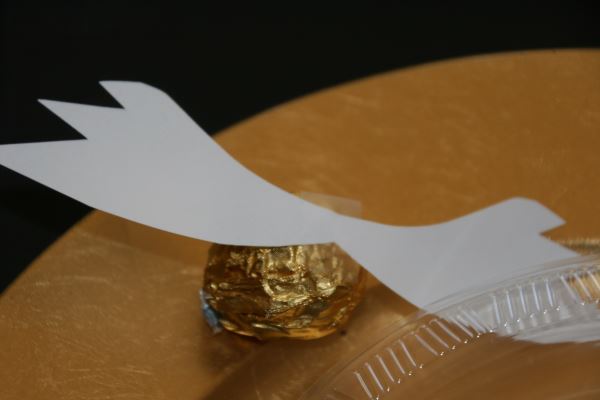
Each place setting also had a golden snitch that I made with paper wings and Ferrero Rocher candies.

imgsvr (31)

The center piece was a “candelabra” that I made with plungers and wrapping paper rolls.  I spray painted the plungers gold and taped battery operated tea lights to the top of the wrapping paper rolls.

imgsvr (35)

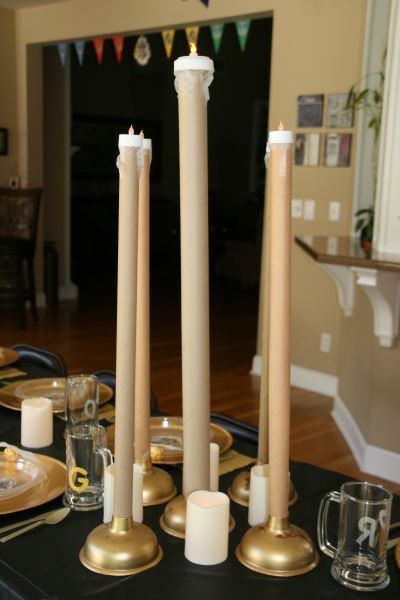
I added several battery operated candles from The Dollar Tree to the table, as well.

imgsvr (32)

I got out my Halloween decorations, and created an area for “spells”.

imgsvr (21)

imgsvr (23)

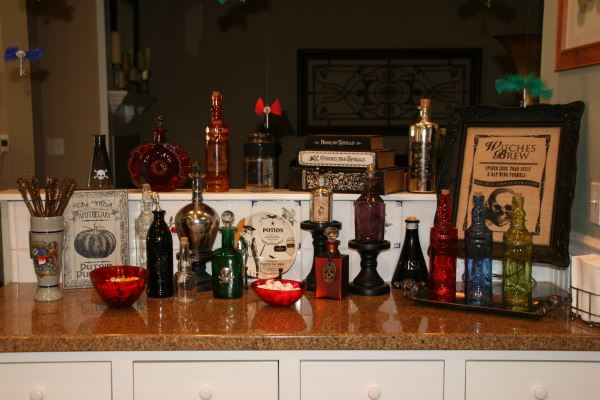
There were even “eyeball” gum balls and candy “bones”!

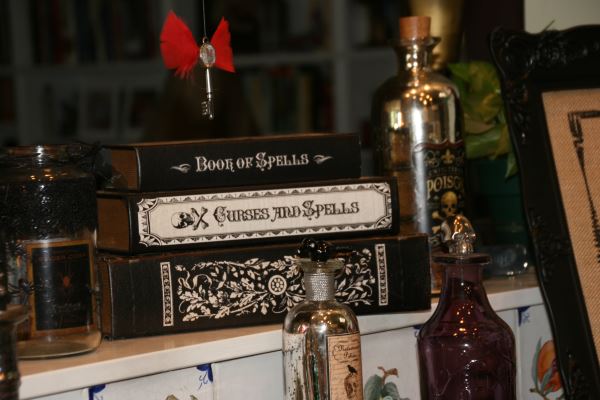
I made flying keys with colored feathers and keys I purchased at Michaels Crafts.  I hung them above the “spell” display.

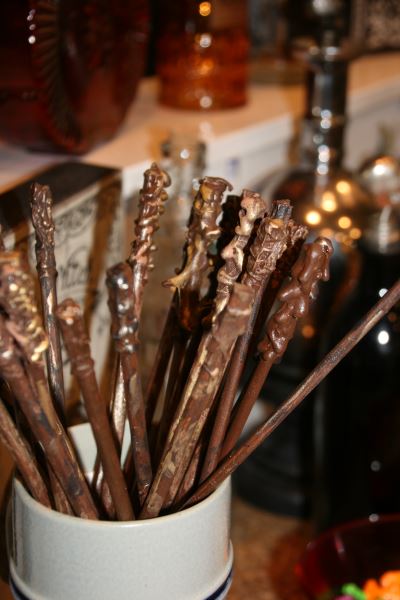
Each guest was able to choose there own unique wand.  I made these with chop sticks, glue gun & paint.  I will post a “how to make” entry separately.

imgsvr (22)

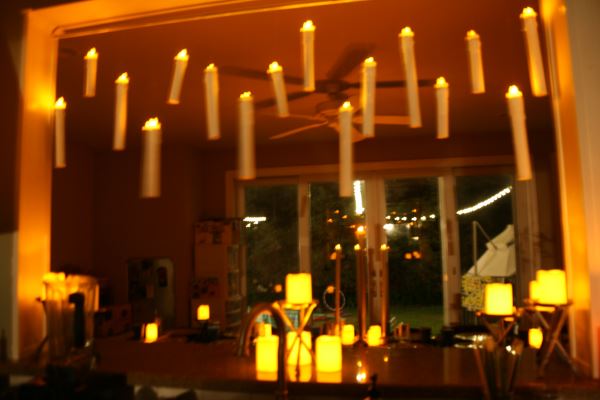
Here are the “floating candles” that I created.  I will share the “how to make them” in another blog post.  I hung them from a stretcher rod and they looked amazing when they were lit up!

imgsvr (8)

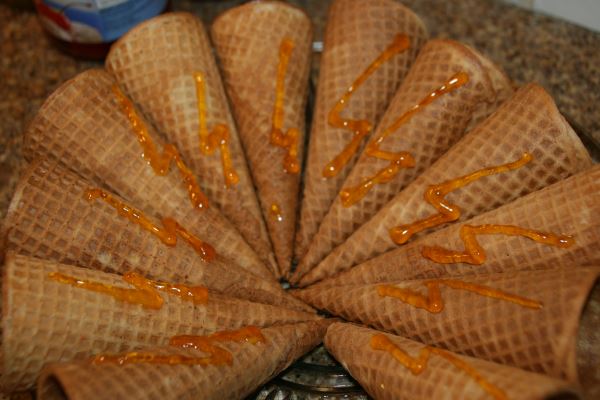
We made butter beer, and ate ice cream.  I made lightening bolt designs on the sugar cones.

imgsvr (40)

We even had a mirror, and color changing candles to increase the festivity!

The girls stayed up all night watching Harry Potter movies, and scaring each other with tales.  I’d say fun was had by all!

Happy Hogwarts!

“Wonder what I will come up with next”…


Simple Pop-Up Card…

Happy President’s Day weekend!  Valentine’s Day has come and gone, and my creative brain is thinking about what comes next.  St. Patrick’s Day!  A day that doesn’t get as much publicity, but is still an important day.  This is a great day to tell special people in our lives how “LUCKY” we are to know them.

IMG_4692

That being said, I took this opportunity to make a few pop-up cards for some special people in my life and wanted to share how EASY it is to create them.

Supplies needed: 8.5×11″ green & white card stock, glue stick, scissors, & shamrocks (I purchased these at The Dollar Tree)


To begin, fold an 8.5×11″ piece of white card stock in half.  Make 2 cuts on the folded edge approx 2″ apart, each cut being about 1″ in length.  Unfold the paper, push the “cut” area inside, so that it creates a “pop-up” cube inside the card.


Fold a green 8.5×11″ piece of card stock in half and glue it to the outside of the white piece of paper, see above.


Glue (or you can use glue dots) the top of the shamrock to the pop-up cube inside the card.

IMG_20190216_145811363

Glue a second shamrock on the front of the card.  DONE!!!  It’s that simple!!!

IMG_20190216_145930192

Now you can make pop-up cards for all the special people in your life.  Be sure to write inside how “LUCKY” you are to have them in your life!

IMG_4694

Happy card making!

“Wonder what I will come up with next”…

Painted Jars With Initials & Knobs

Happy Valentine’s Day!

imgsvr (1)

I love re-purposing jars!  I am constantly washing them & scraping off the labels.  Once I save up enough, I start dreaming of a creative way to use them.  Usually I am creating some sort of gift for the teachers & friends in my life.

For this craft, I painted jars and added fun knobs.  These look great as home decor.  They can bring a unique element to a book case, or be used to store something.  I have cotton balls stored in a jar in the bathroom.

imgsvr (4)

Since I made these with the intention of gift giving, I decided to personalize them.  Prior to painting, I attached a sticker with the person’s initial.  I purchased the initial stickers at Hobby Lobby.  This gave each jar a little extra dimension.  After the paint dried, I “roughed” them up with a light sand paper.  This helped the initial become more prominent.

imgsvr (2)

In order to attach the fun knobs, I needed to drill holes in the lids.  I started by painting the lids colors that looked good with the paint color.  I kept it simple and painted lids black, white, silver, & gold.  After the paint dried, I used a drill to create the holes.

Once the holes were drilled, I attached the knobs.  I found fun inexpensive knobs at TJ Maxx, Home Goods, Hobby Lobby, & Lowes.

imgsvr (3)

I tied coordinating colored ribbon around the rim, just because it looked cute.

These jars were so fun to create & people enjoyed receiving them.  They especially liked that they were personalized.

Happy creating!

“Wonder what I will come up with next”…

Peter Pan Party Centerpieces

IMG_20190131_163401767

Oh, to never grow up!

My daughter is currently performing in Peter Pan at her school.  This is quite a production!  There are 14 shows, with several of them being dinner & lunch shows.  To keep things festive, another mom & I created these DARLING lantern centerpieces to display on the tables.

We started with plain white lanterns, adding gold bows & gold stars.  We attached black vinyl silhouettes of Peter Pan on the glass.  Inside the lantern, we put a battery operated tea light and green tulle.  When the lights were off during the show, these lanterns left a hint of light in the room, which appeared to be Tinkerbell trapped in the lanterns.  SO ADORABLE!!!

The lanterns were placed on boxes covered with gold paper.  On each side of the box was a black vinyl letter “quote” from Peter Pan.  To finish the look, we sprinkled fine gold glitter on the box and table cloth immediately surrounding the centerpieces.  The total effect was AMAZING!

IMG_20190131_163401767

Of course, the play was amazing as well!

Happy Decorating!

“Wonder what I will come up with next”…