Glass jar lanterns

As I have stated before, I love using glass jars for many things.  I store ribbon in them, wrap them in tissue paper, and make hanging tealight lanterns with them.  The beautiful thing about glass jars is that they are free!  Simply save the food jars you have emptied.  You will be amazed how many you can save from the recycle bin, and all of the fun things you can do with them!

025

For this hanging lantern, you will need a jar (of course), zip ties, wire (I used 20 gauge from Joann’s), ribbon, glue, round tip pliers, and a tealight.

013

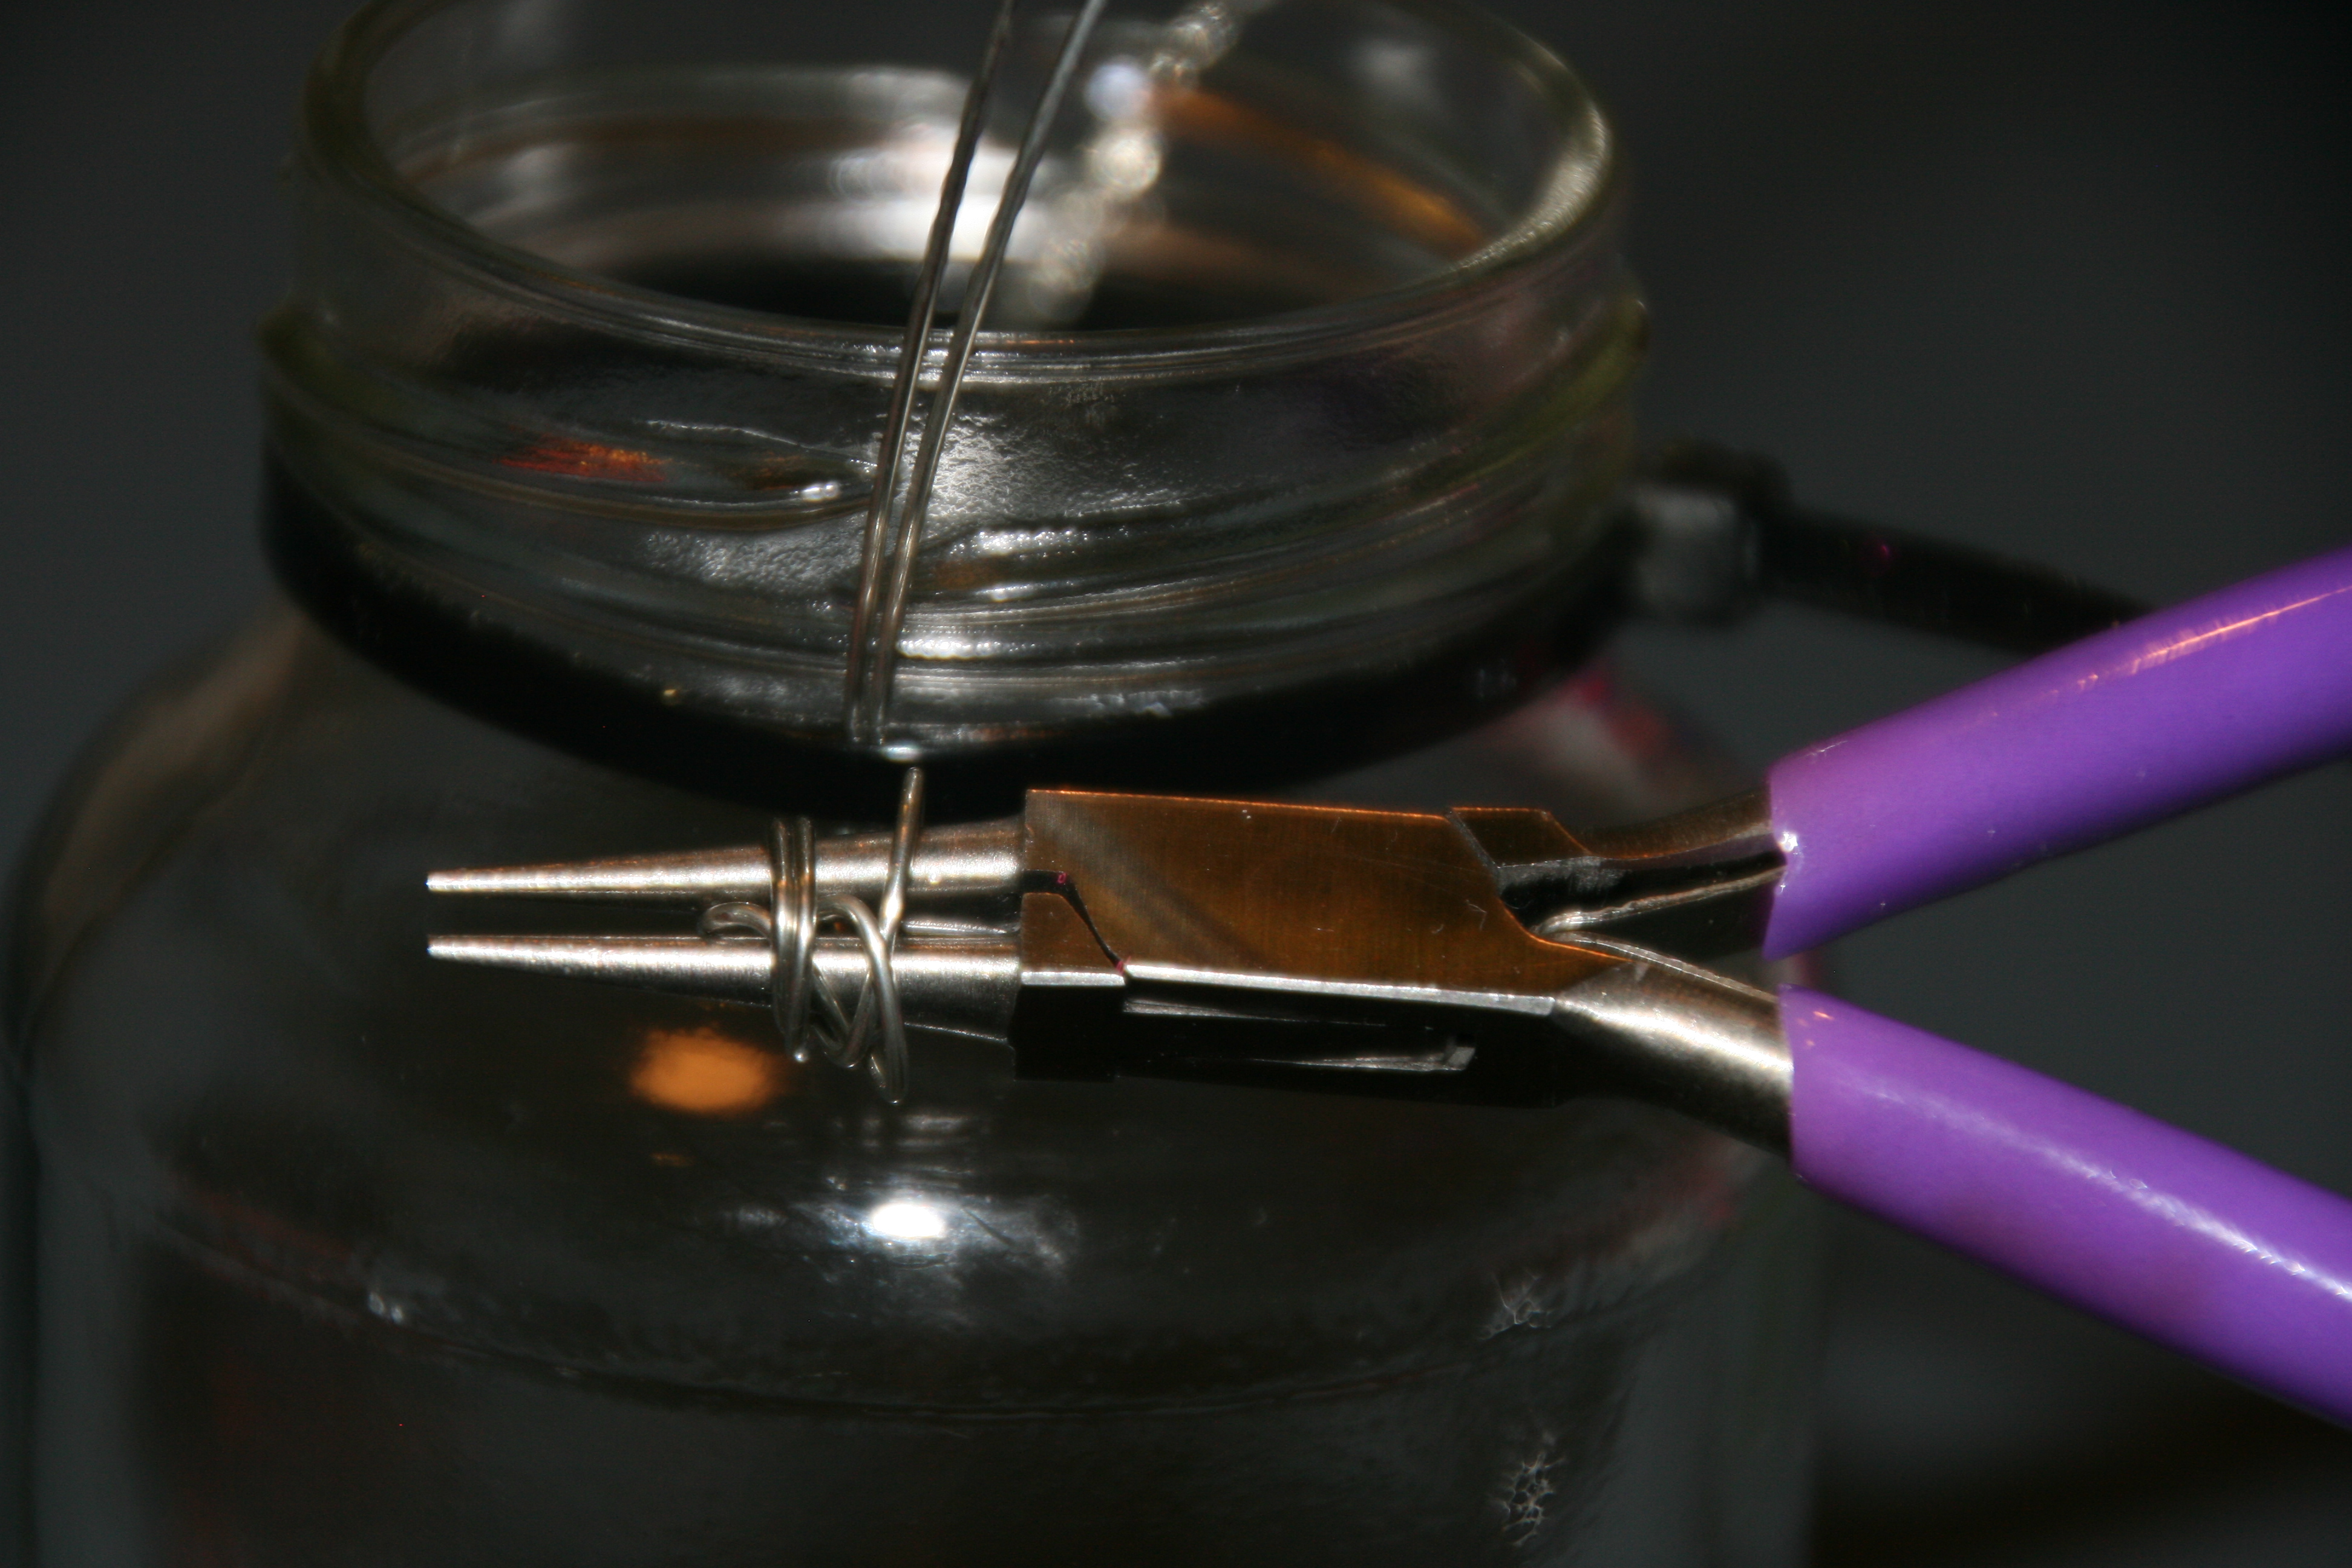
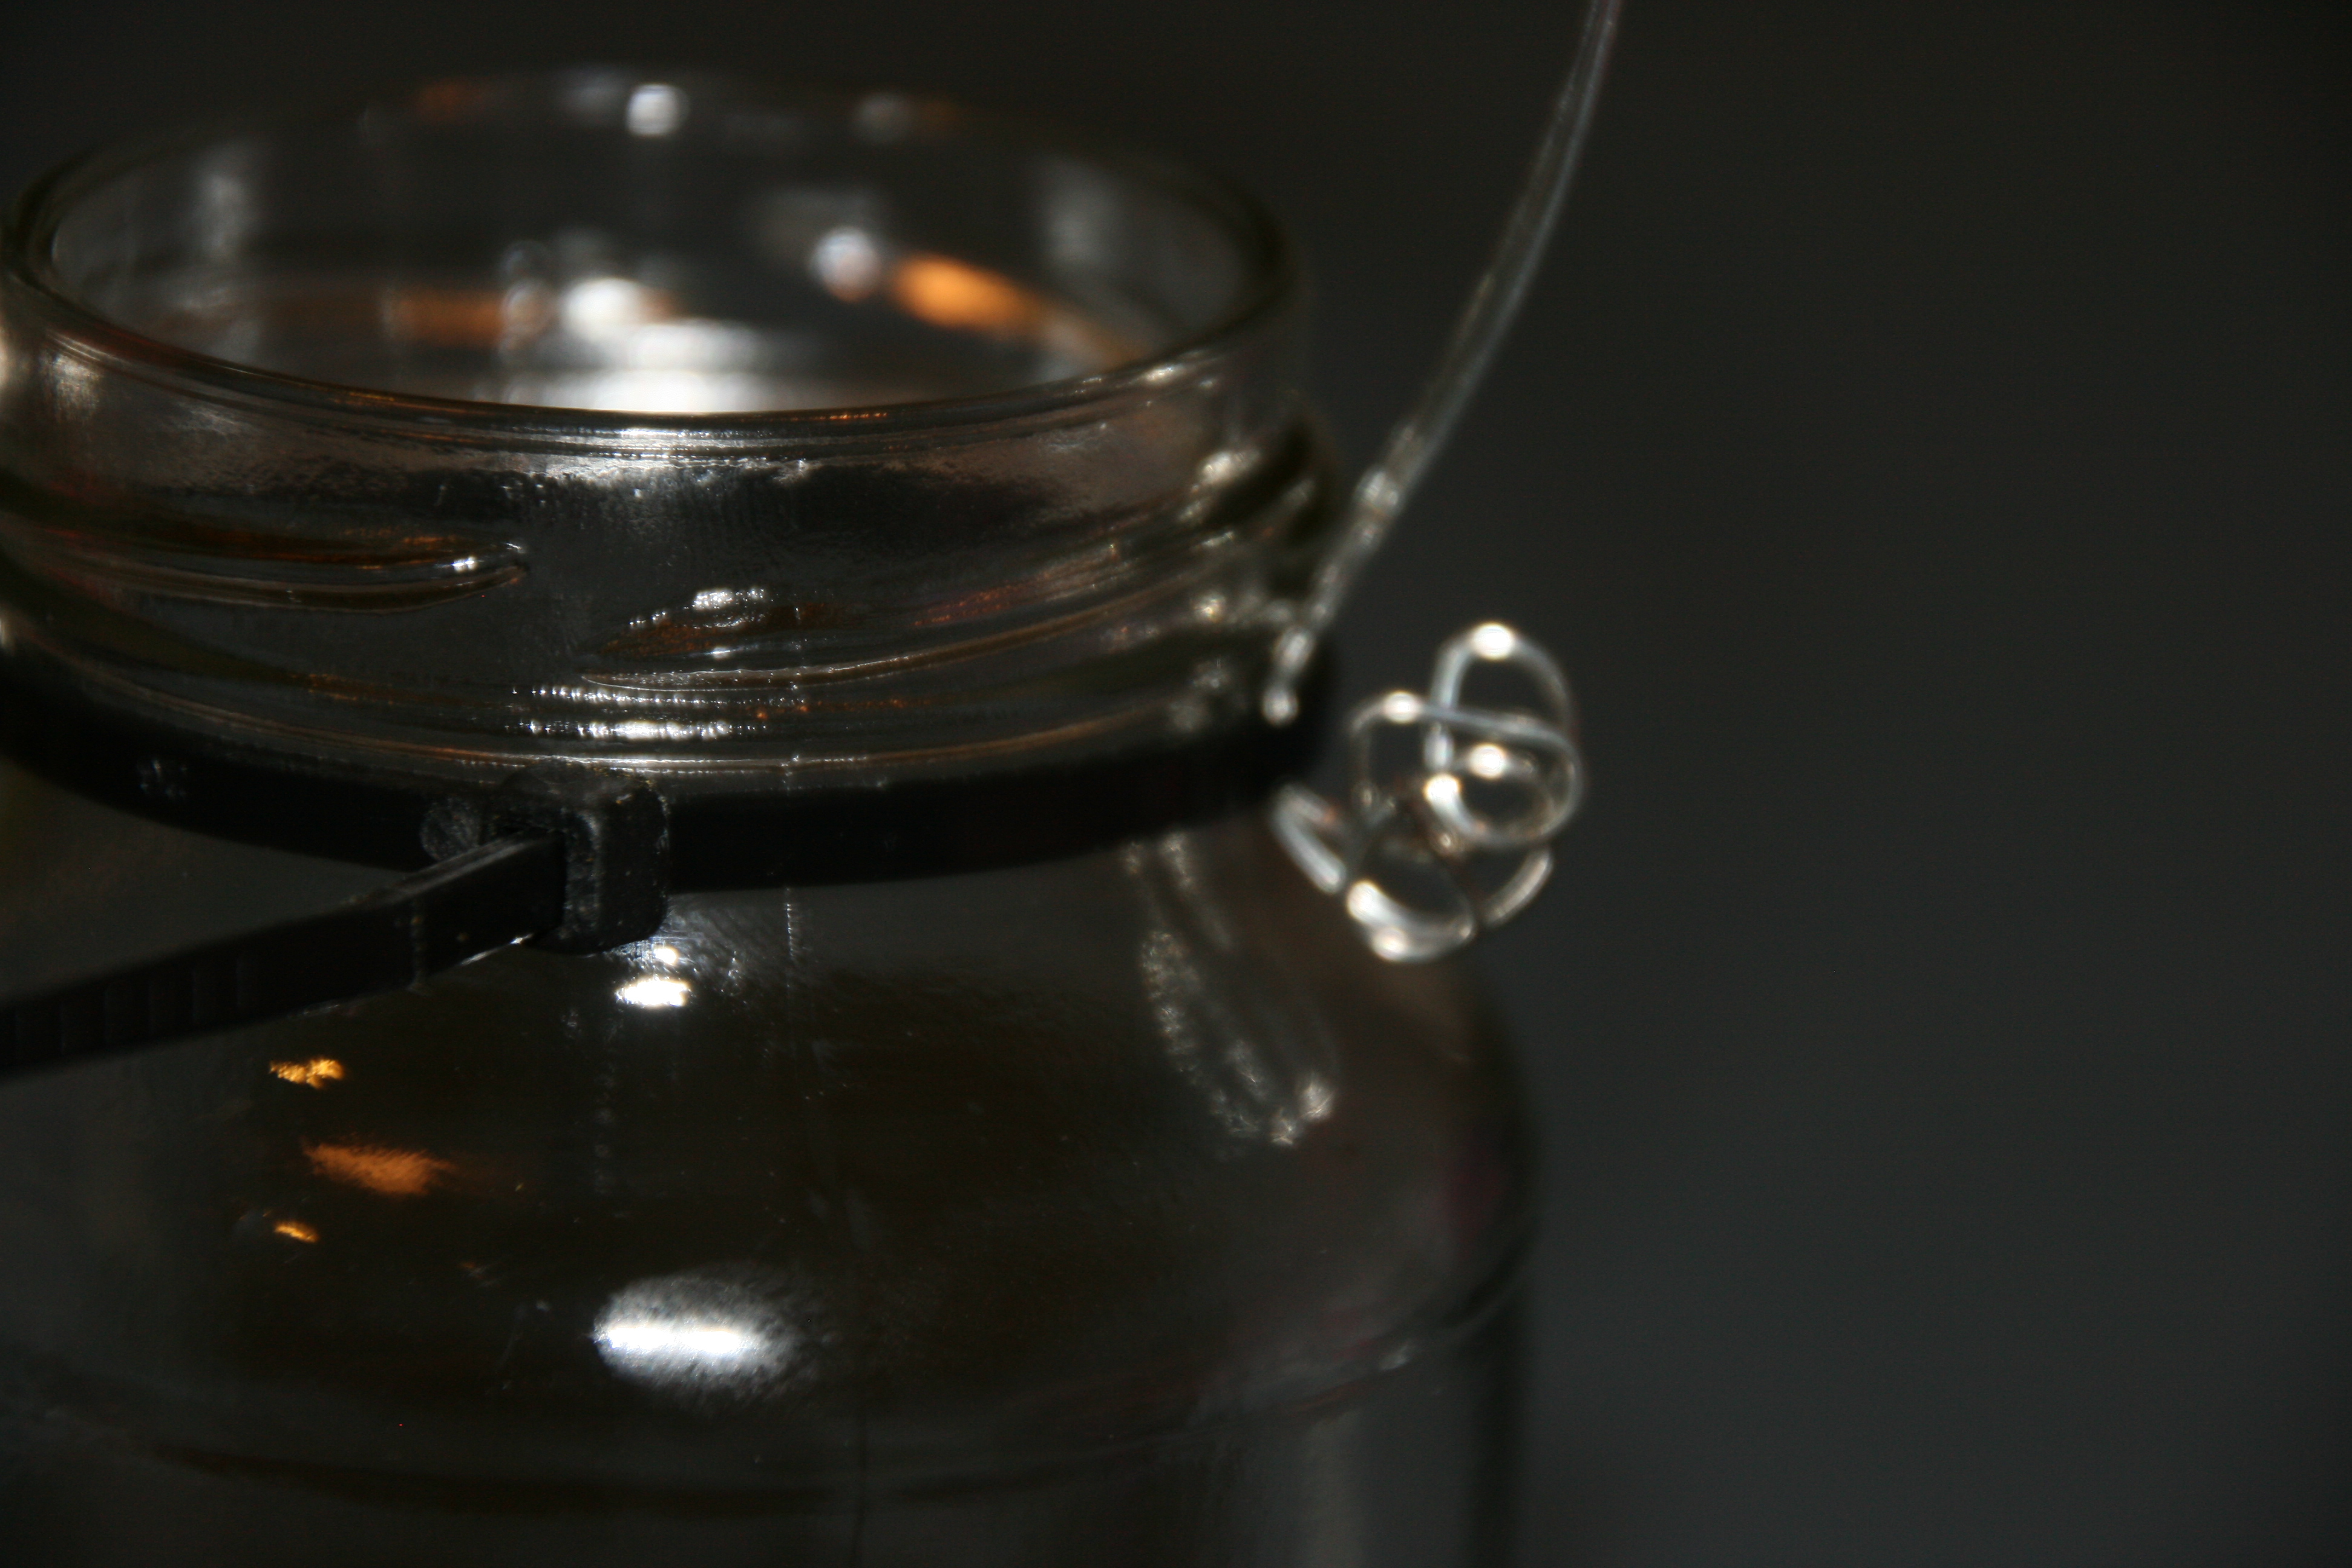
Start by cutting 2 pieces of wire the length you want your handle to be, with extra for the curl (approximately 12″).  Loop the wire at the top with the round pliers.  Form an arch with the wire and secure it to the jar with the zip tie.

014015

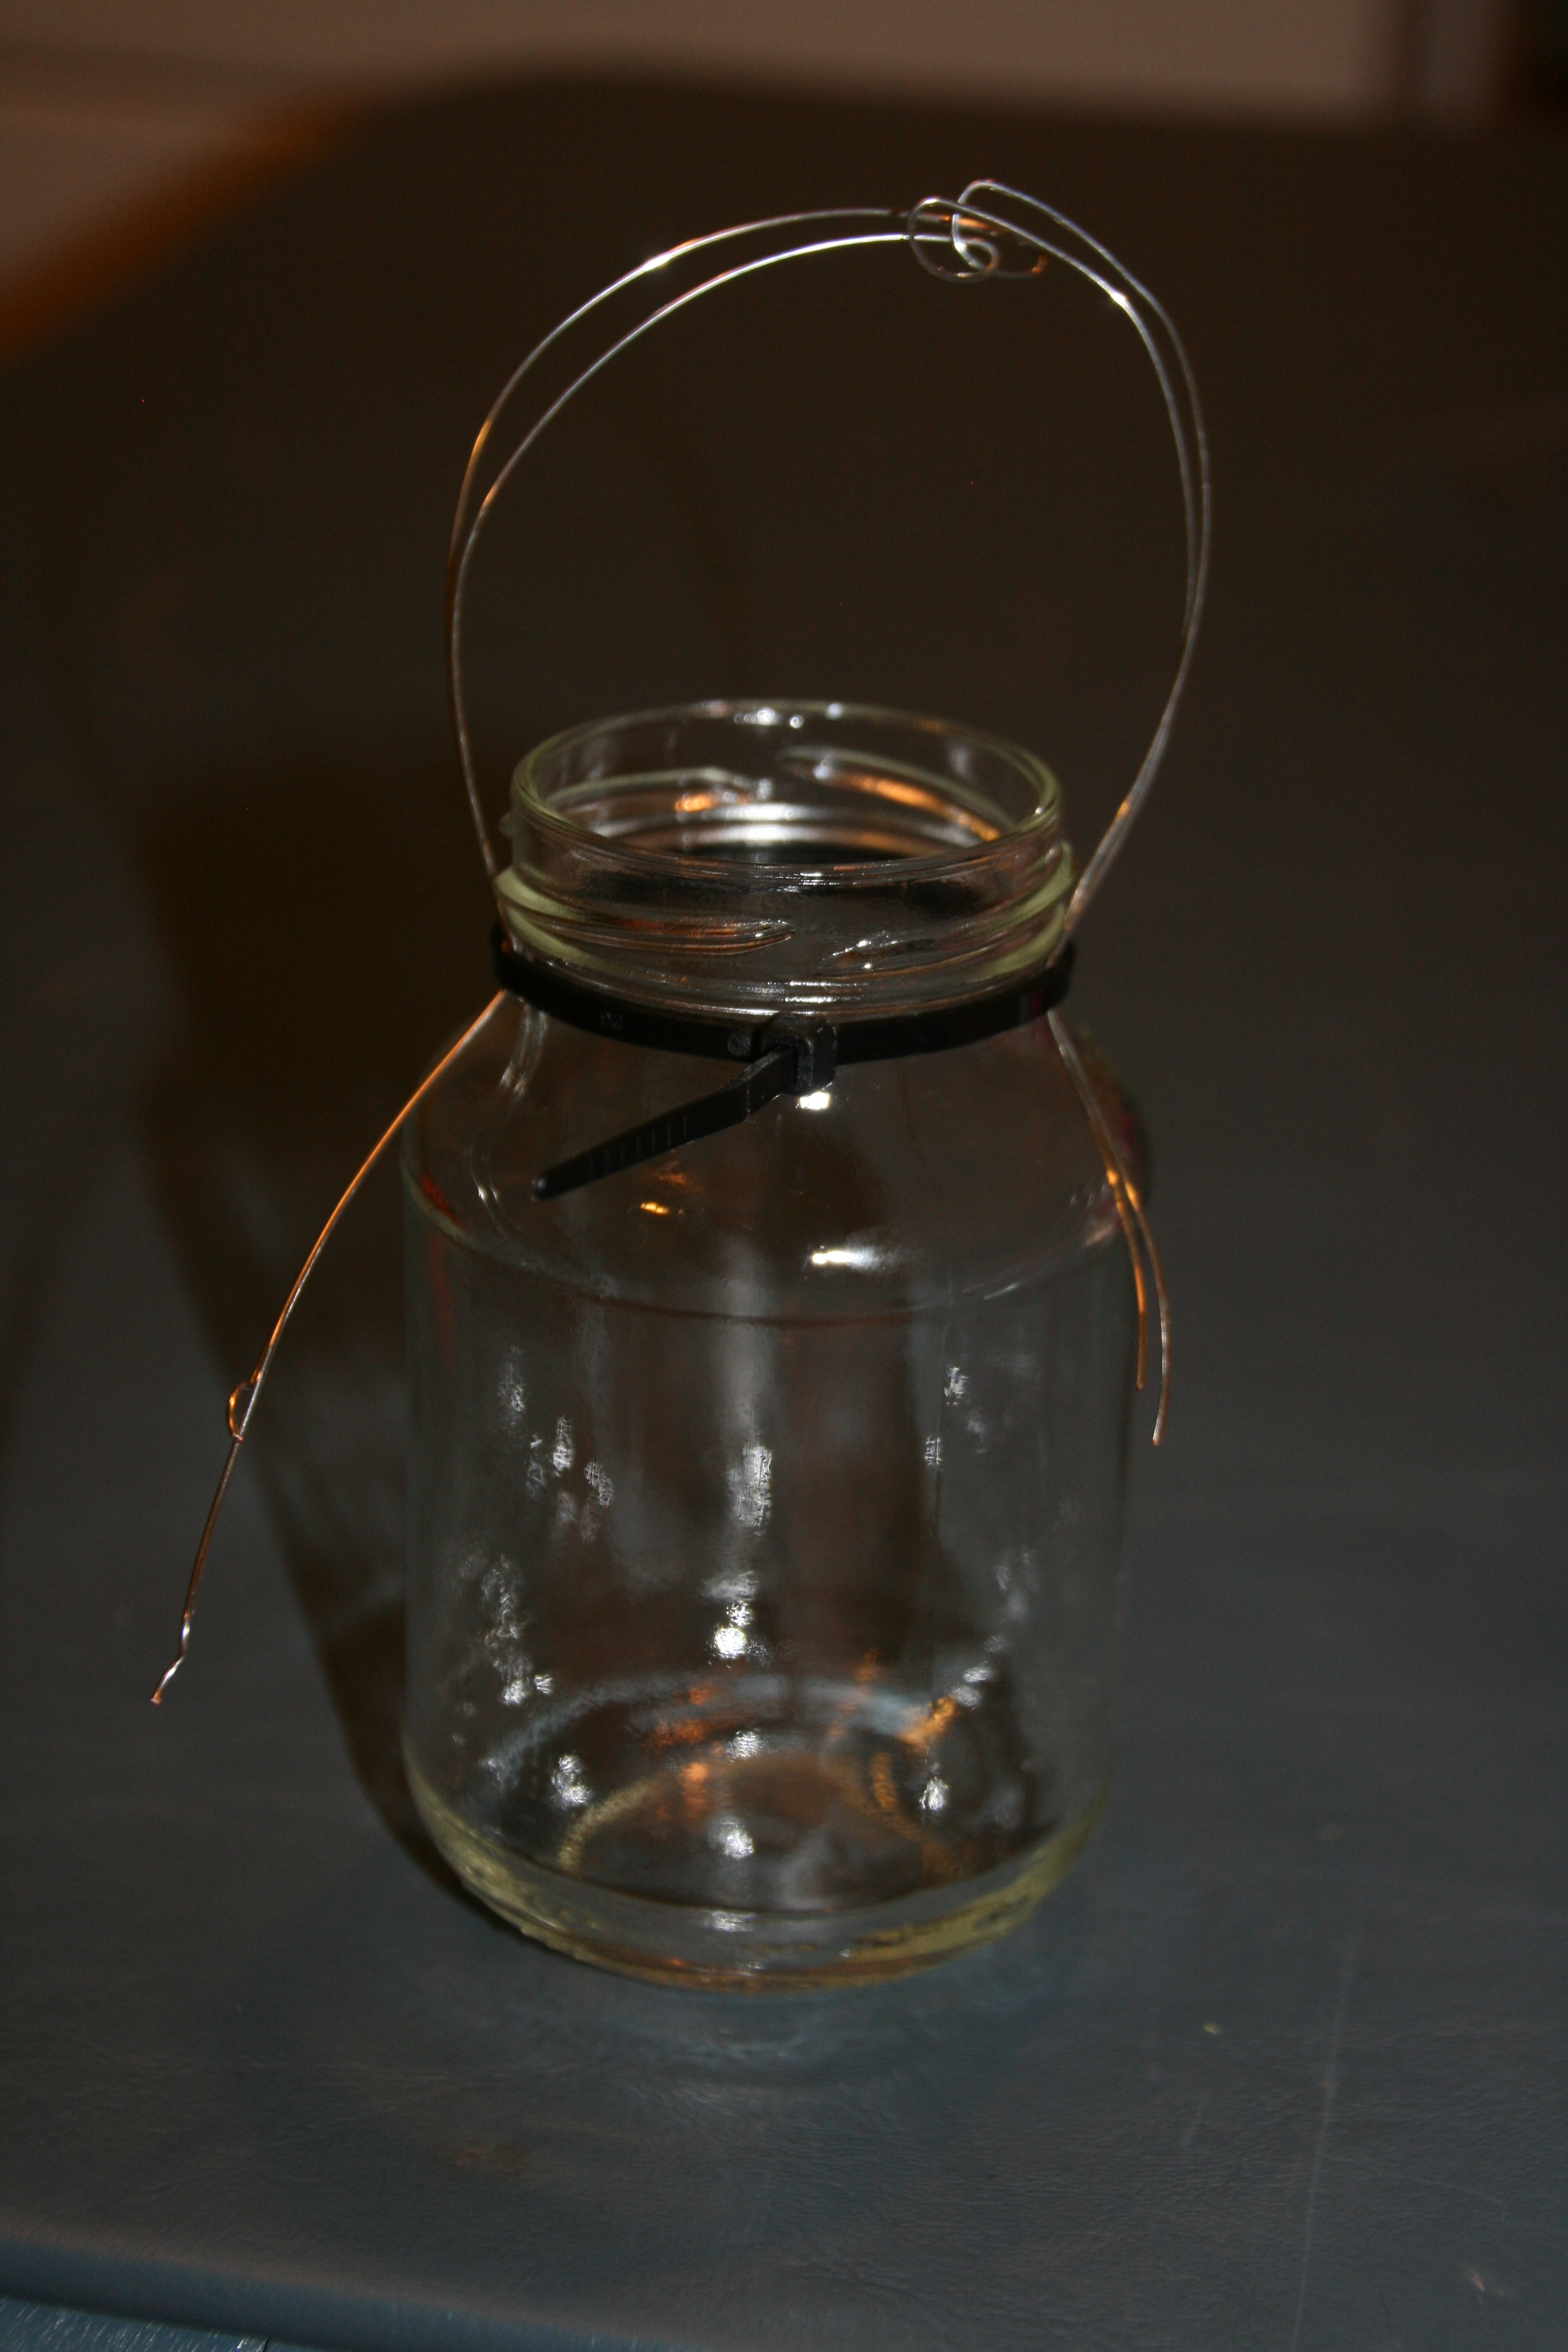
Use the round pliers to curl the ends of the wire that are hanging below the zip tie.  This will not only add cuteness, it will also prevent the wire from slipping under the zip tie.

018019

016

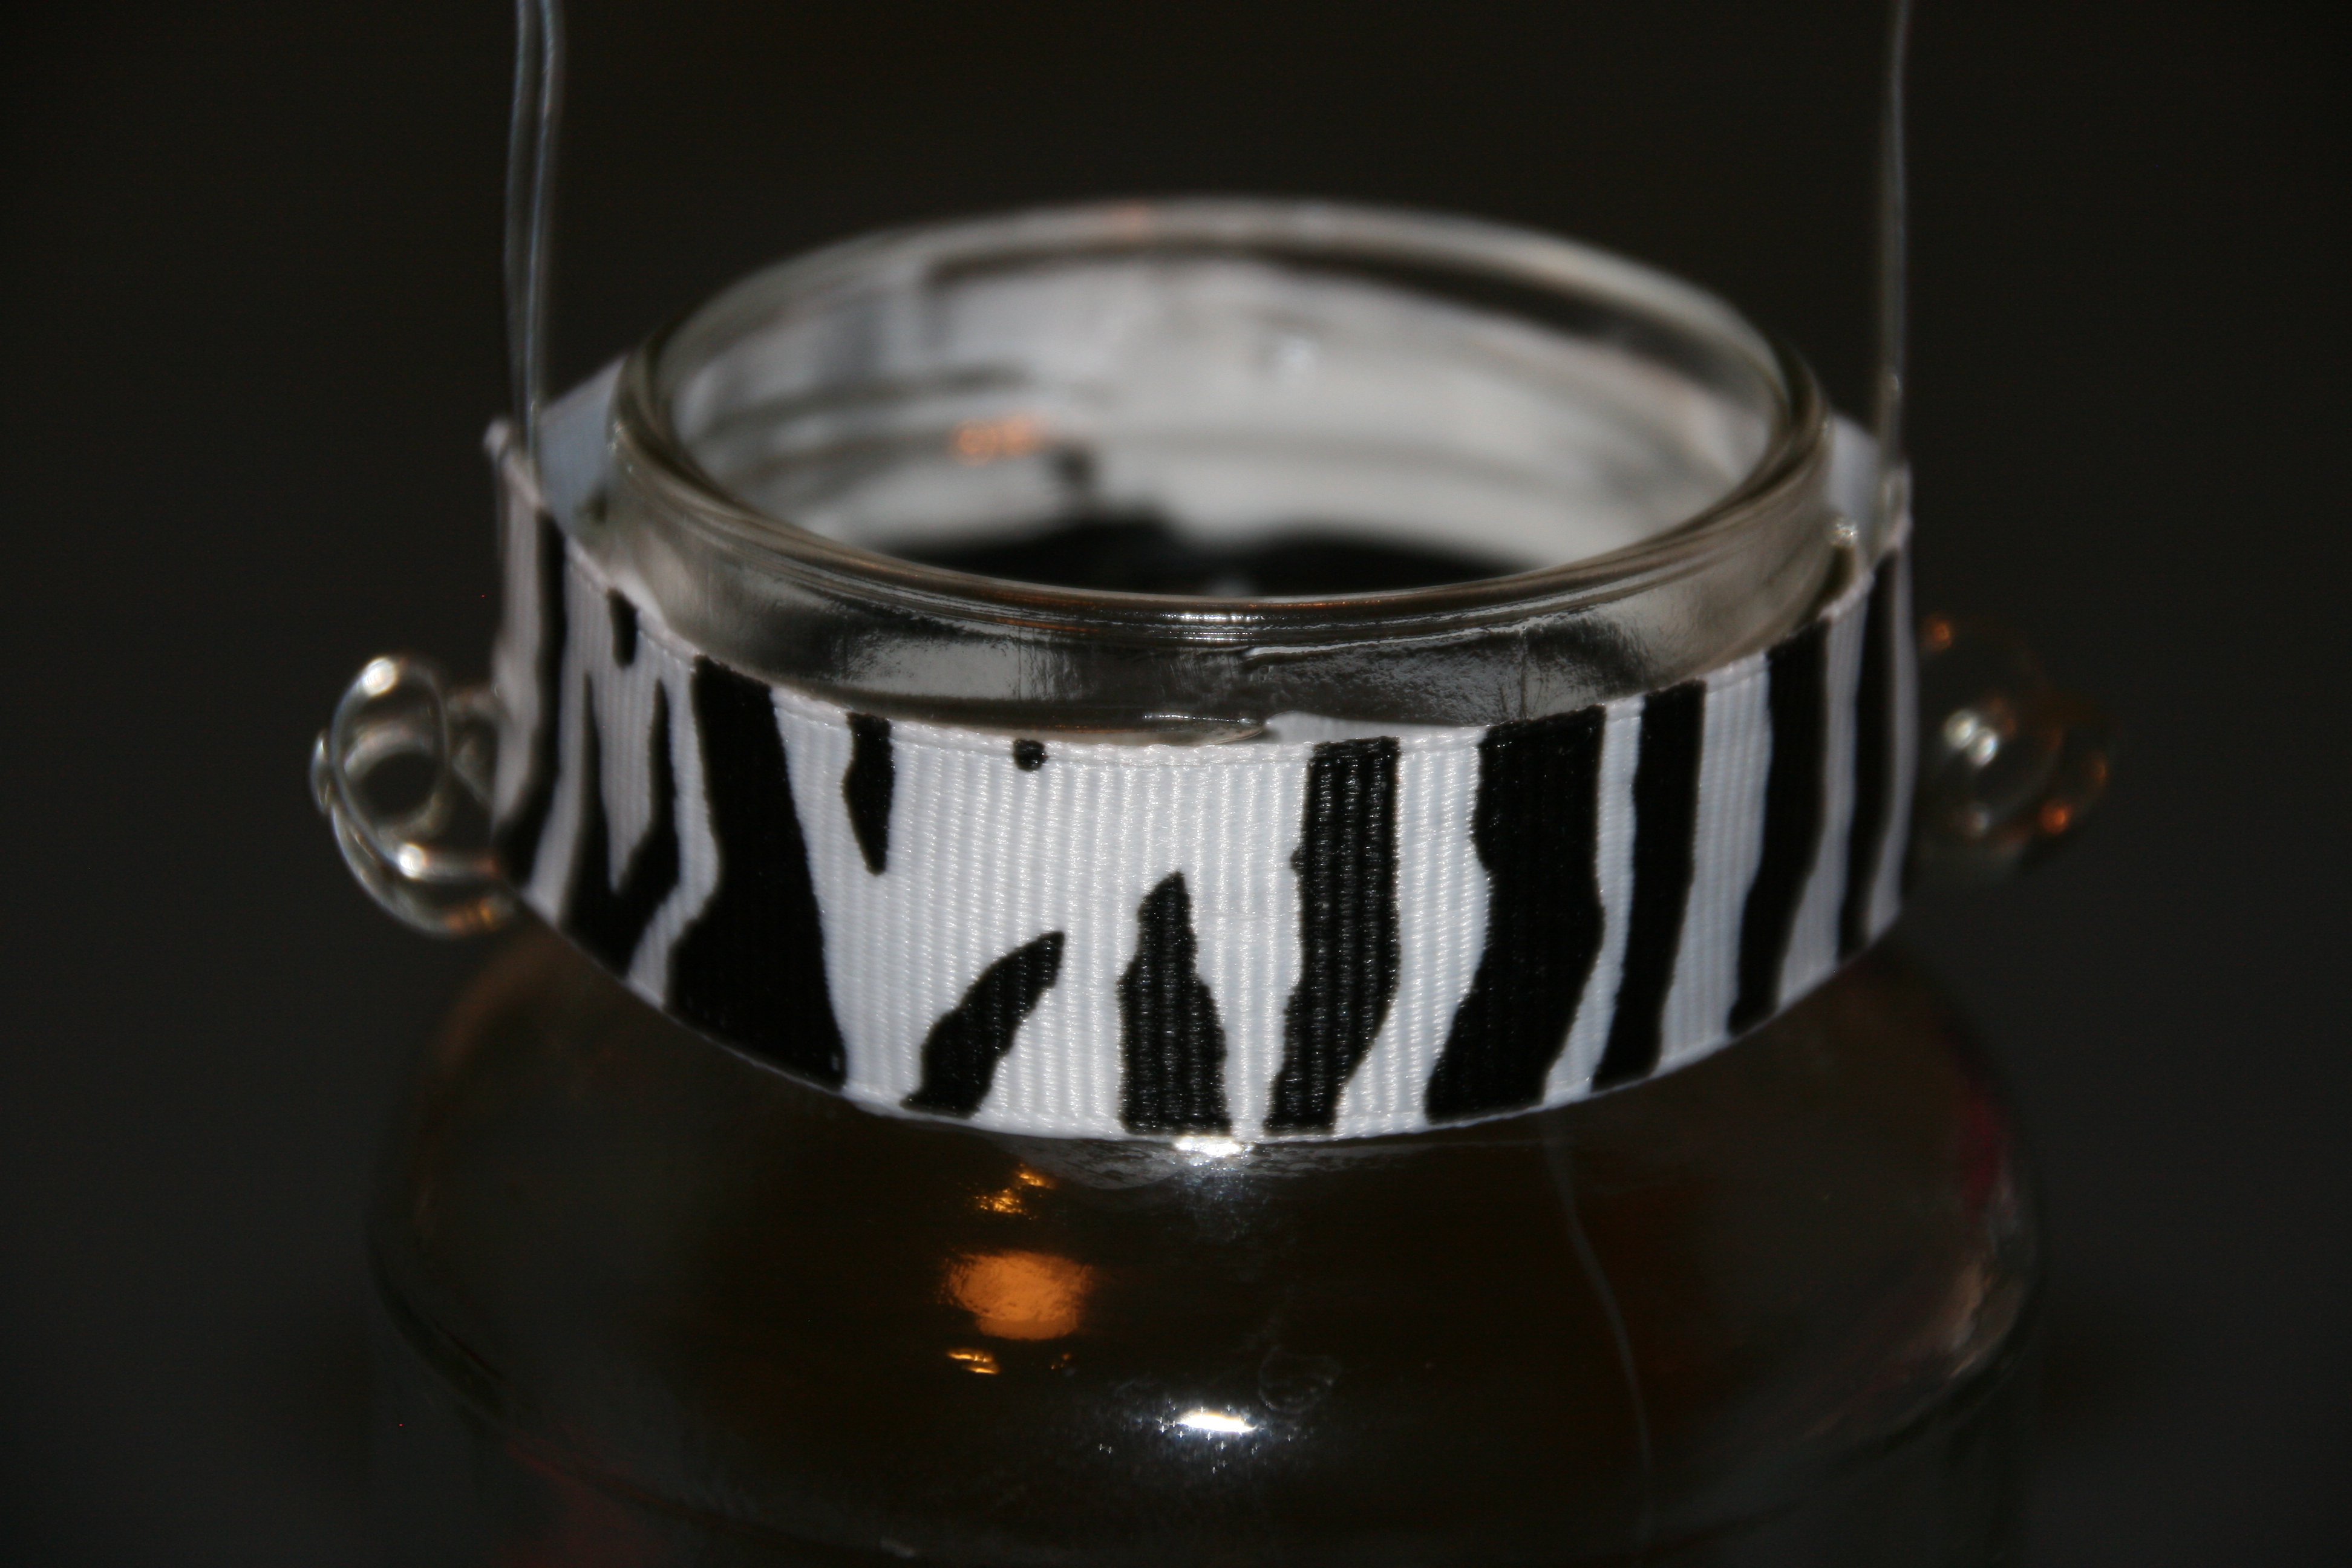
Cut the extra part of the zip tie.  Measure the circumference of the jar and cut the ribbon accordingly.  Be sure to leave extra for overlap.  Glue the ribbon around the jar using Tacky glue.

020

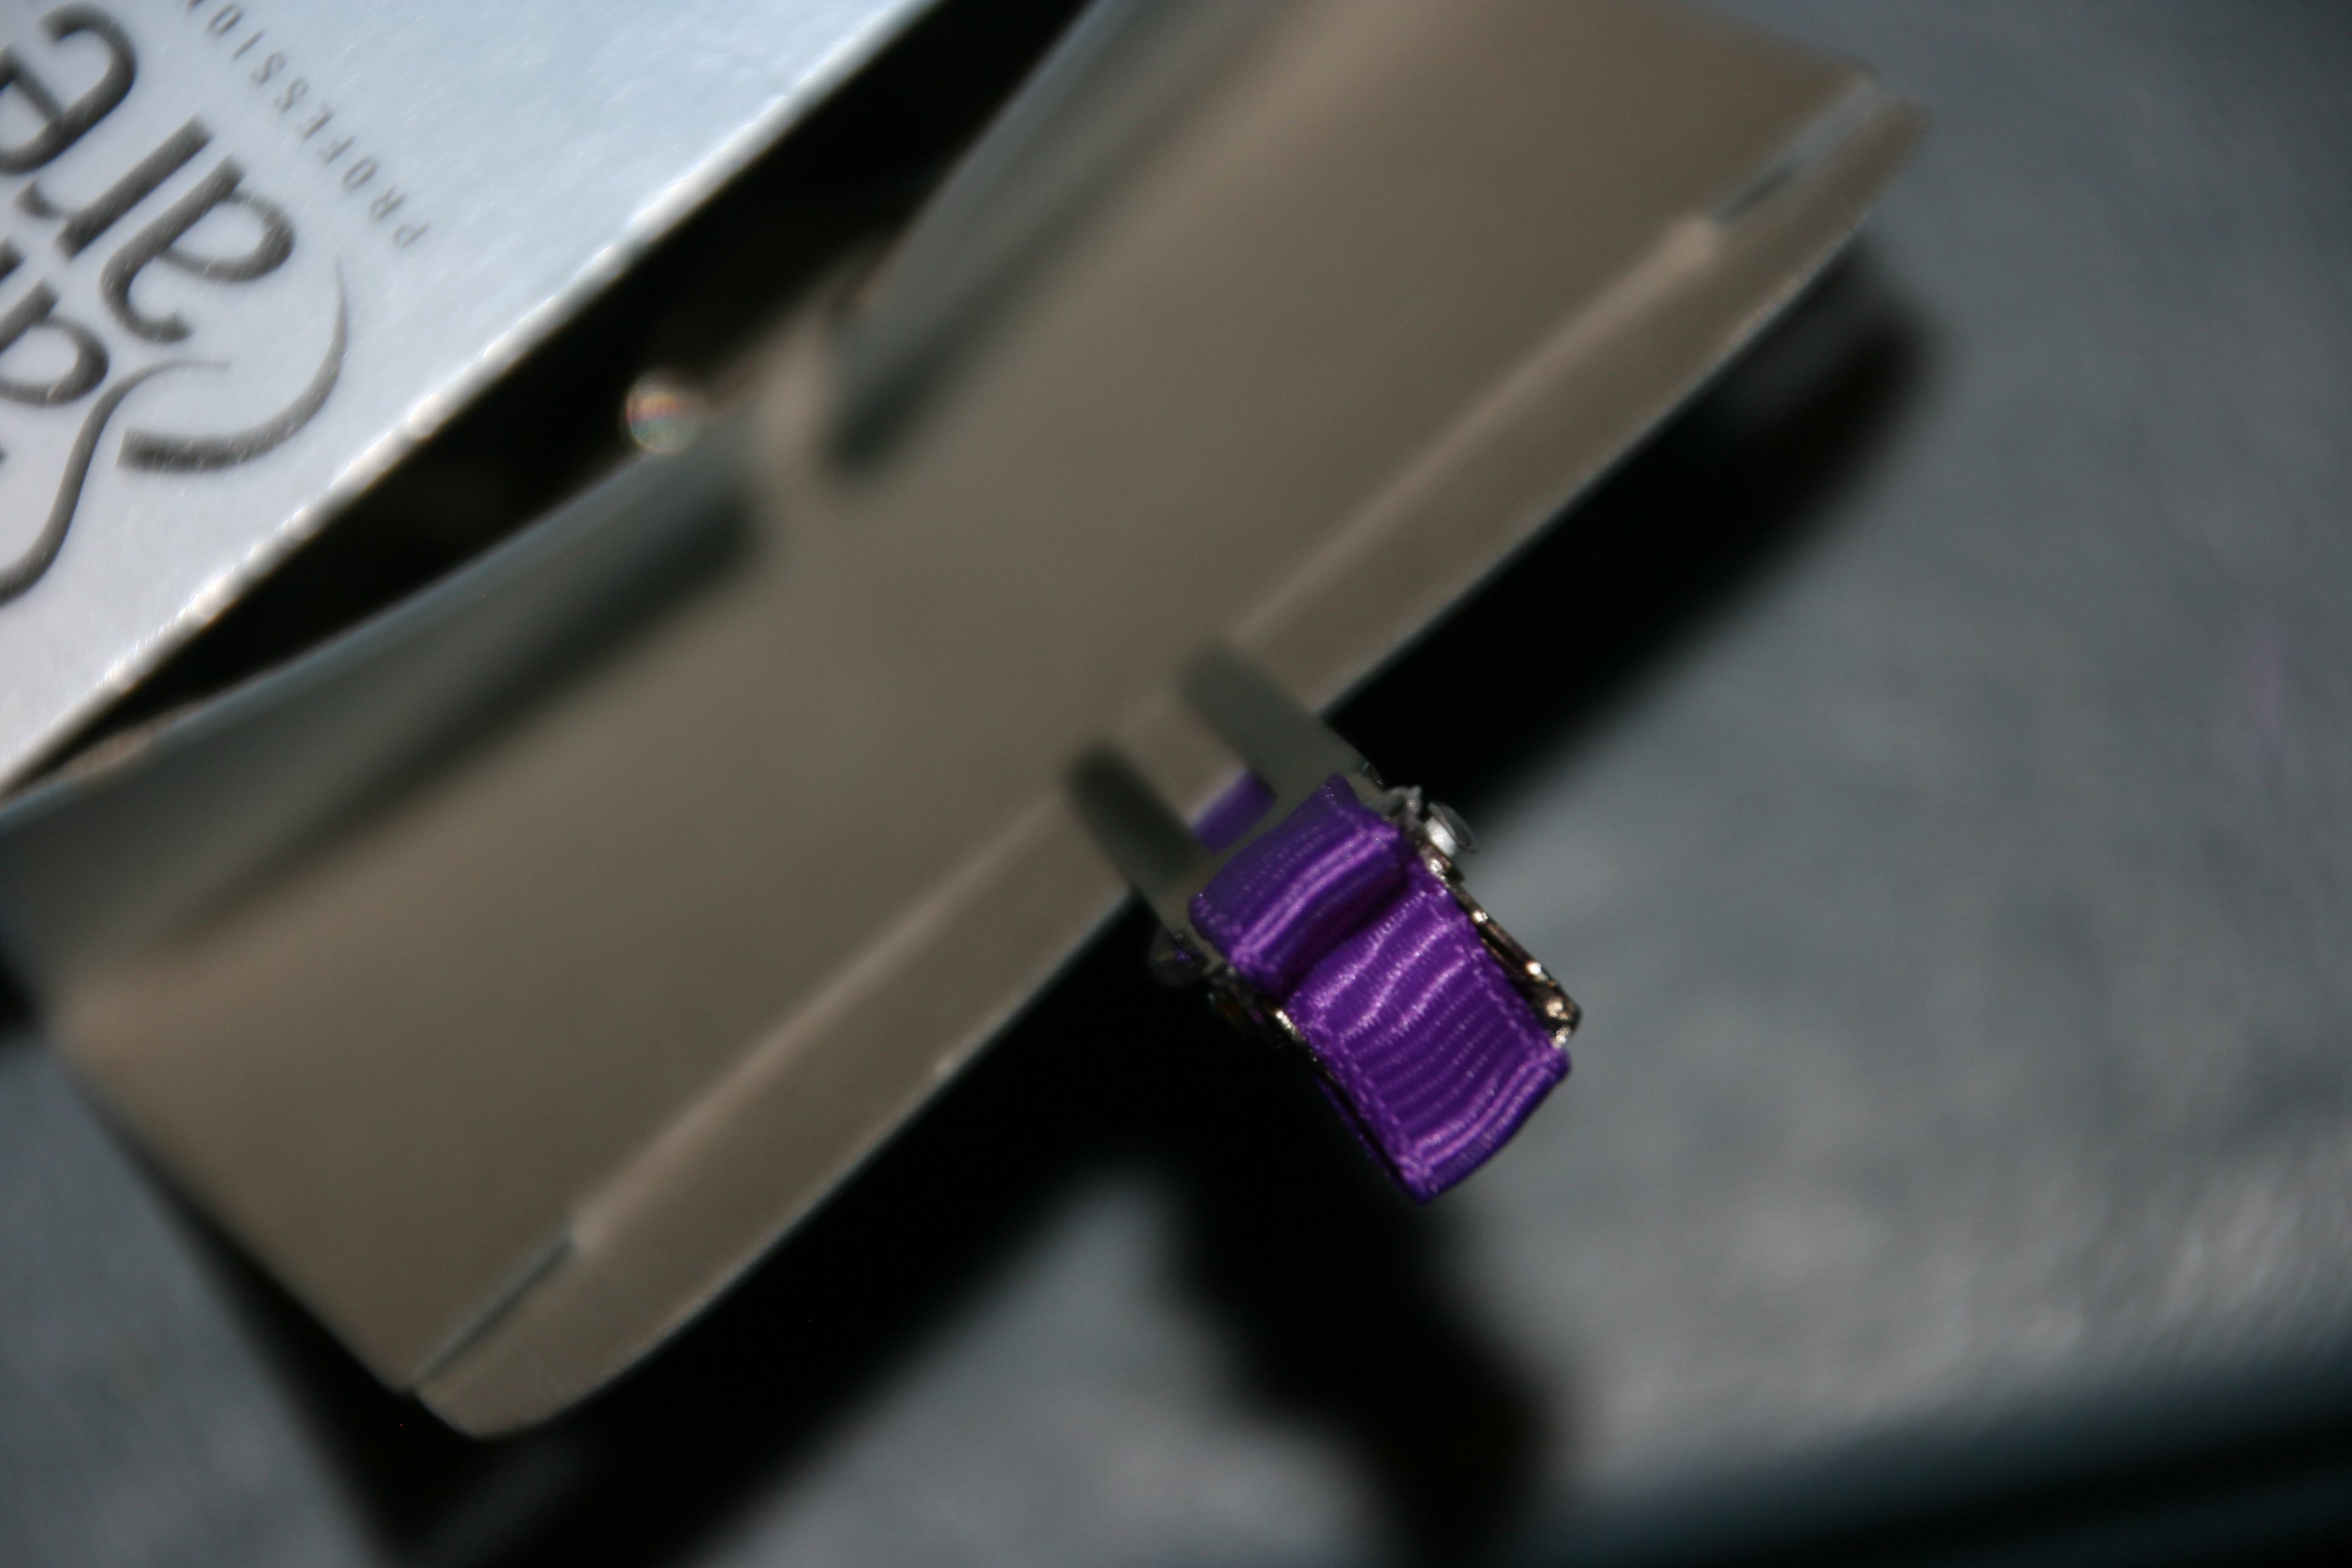
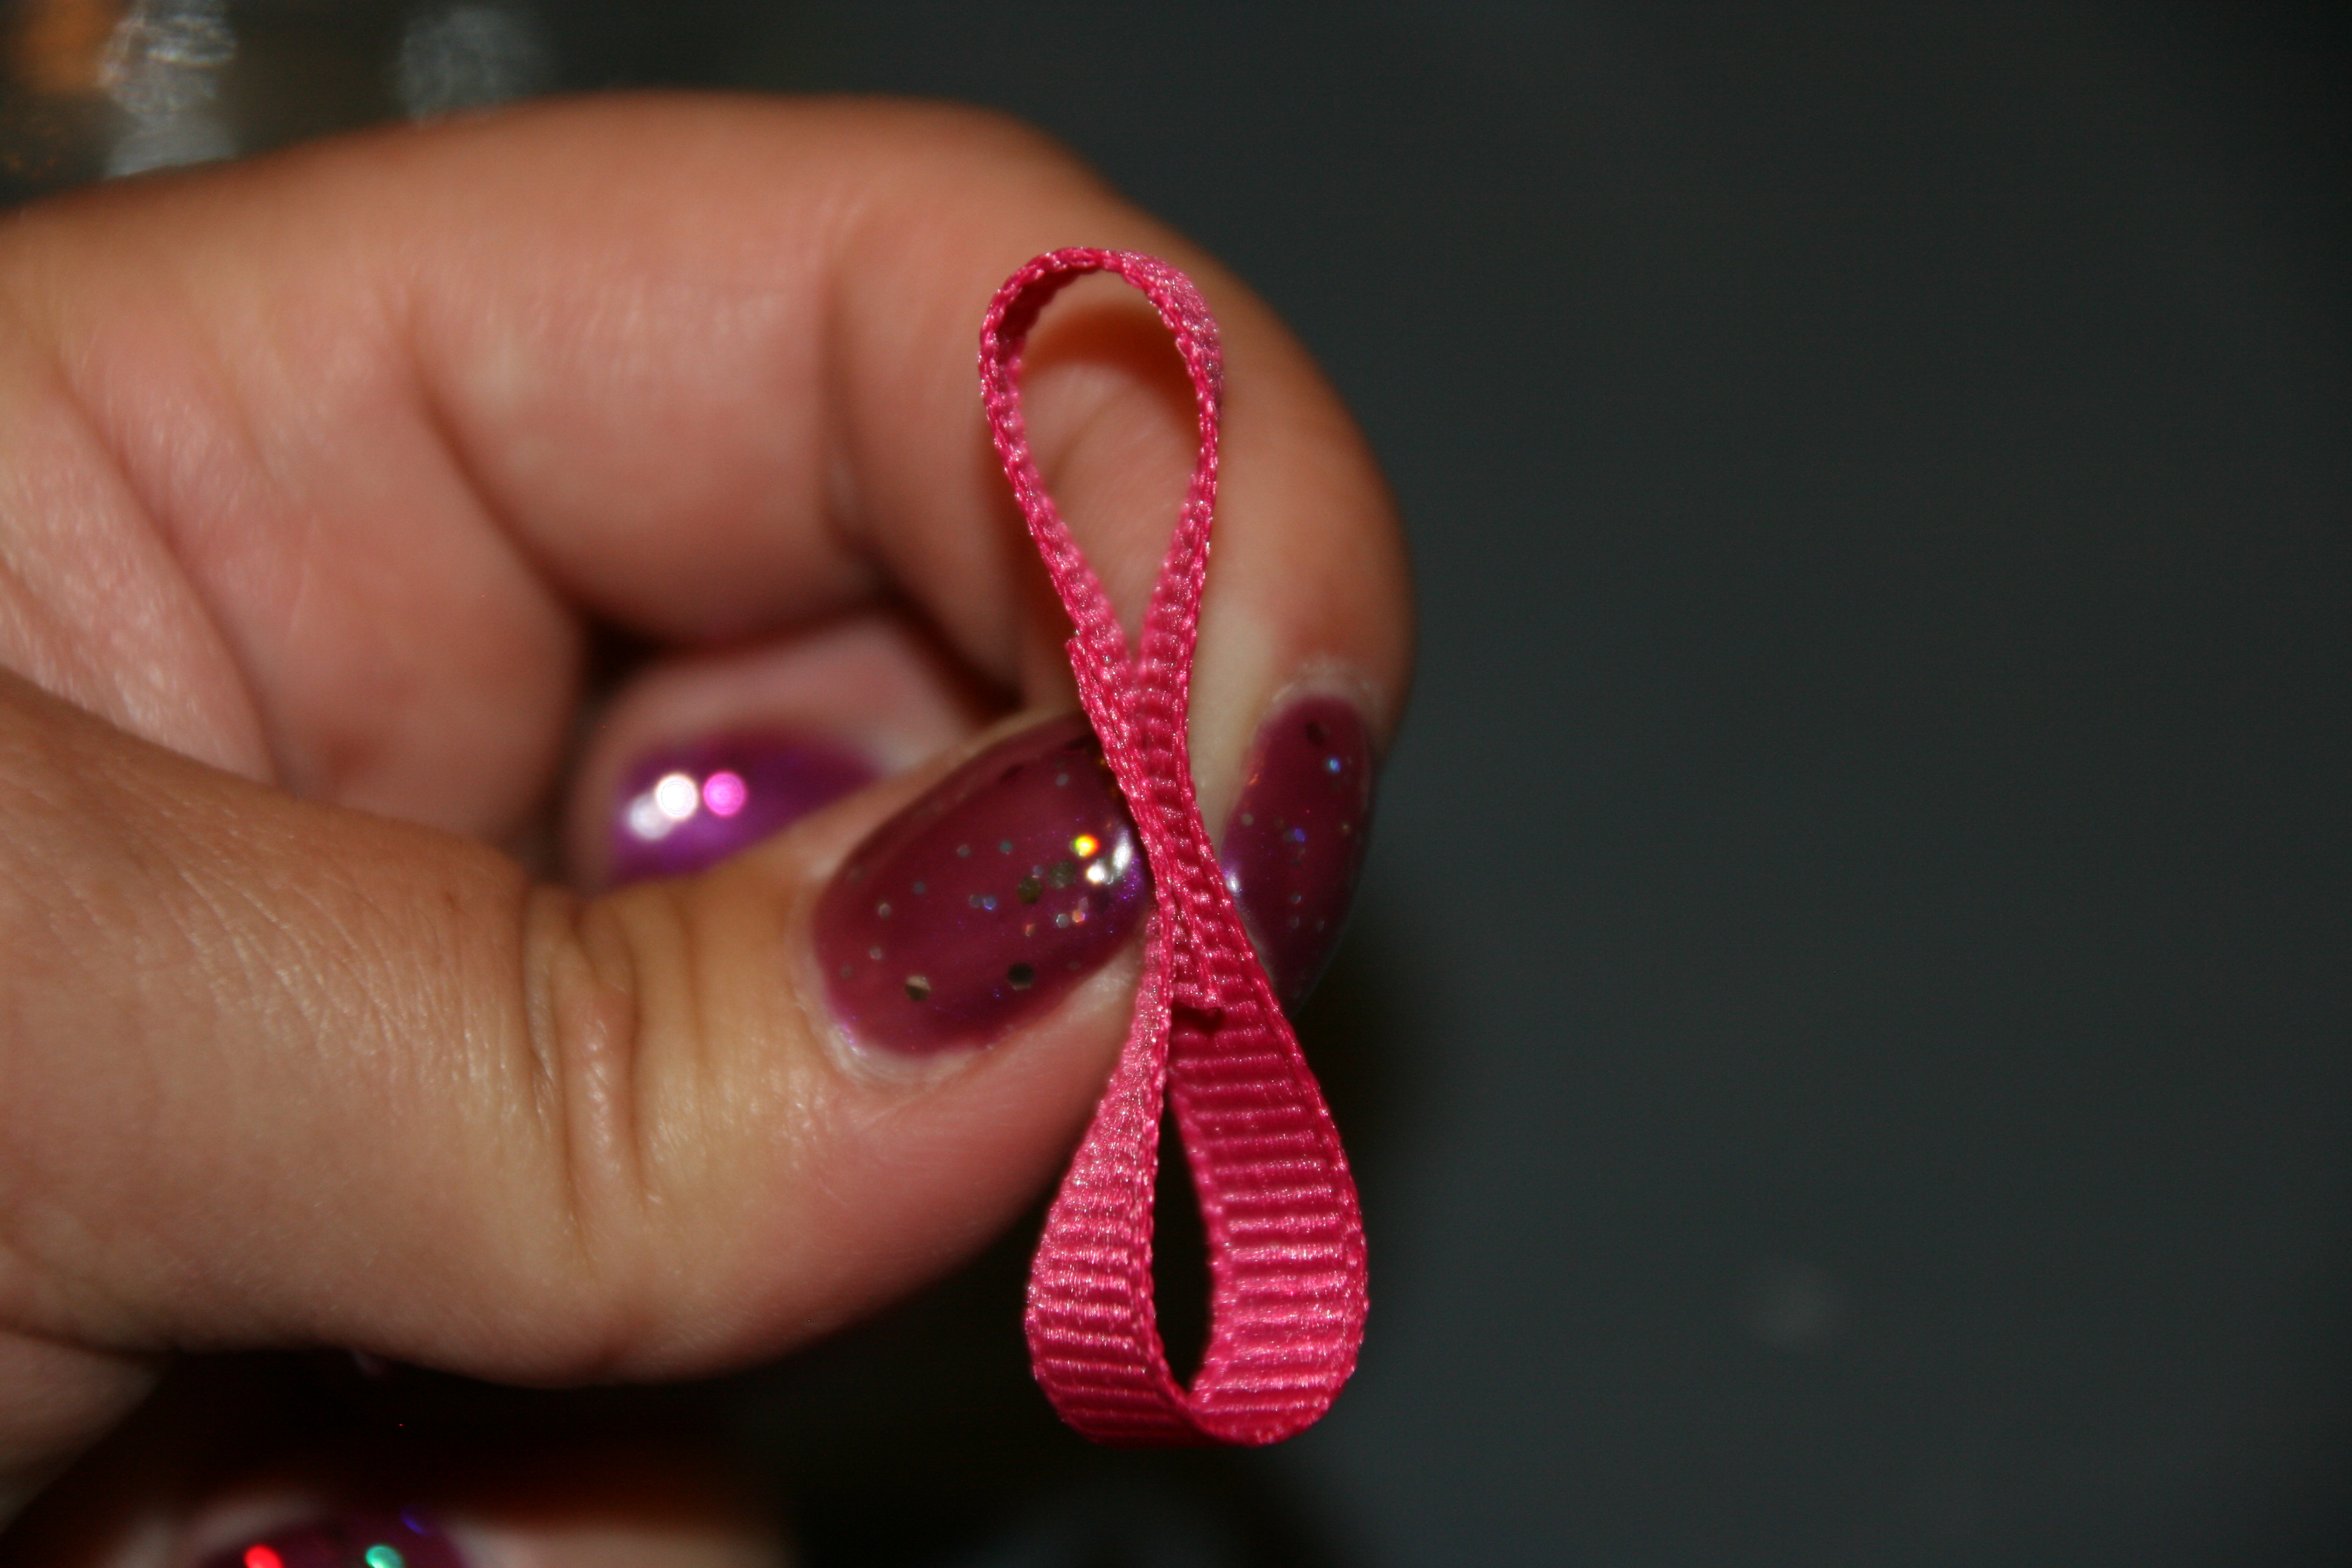
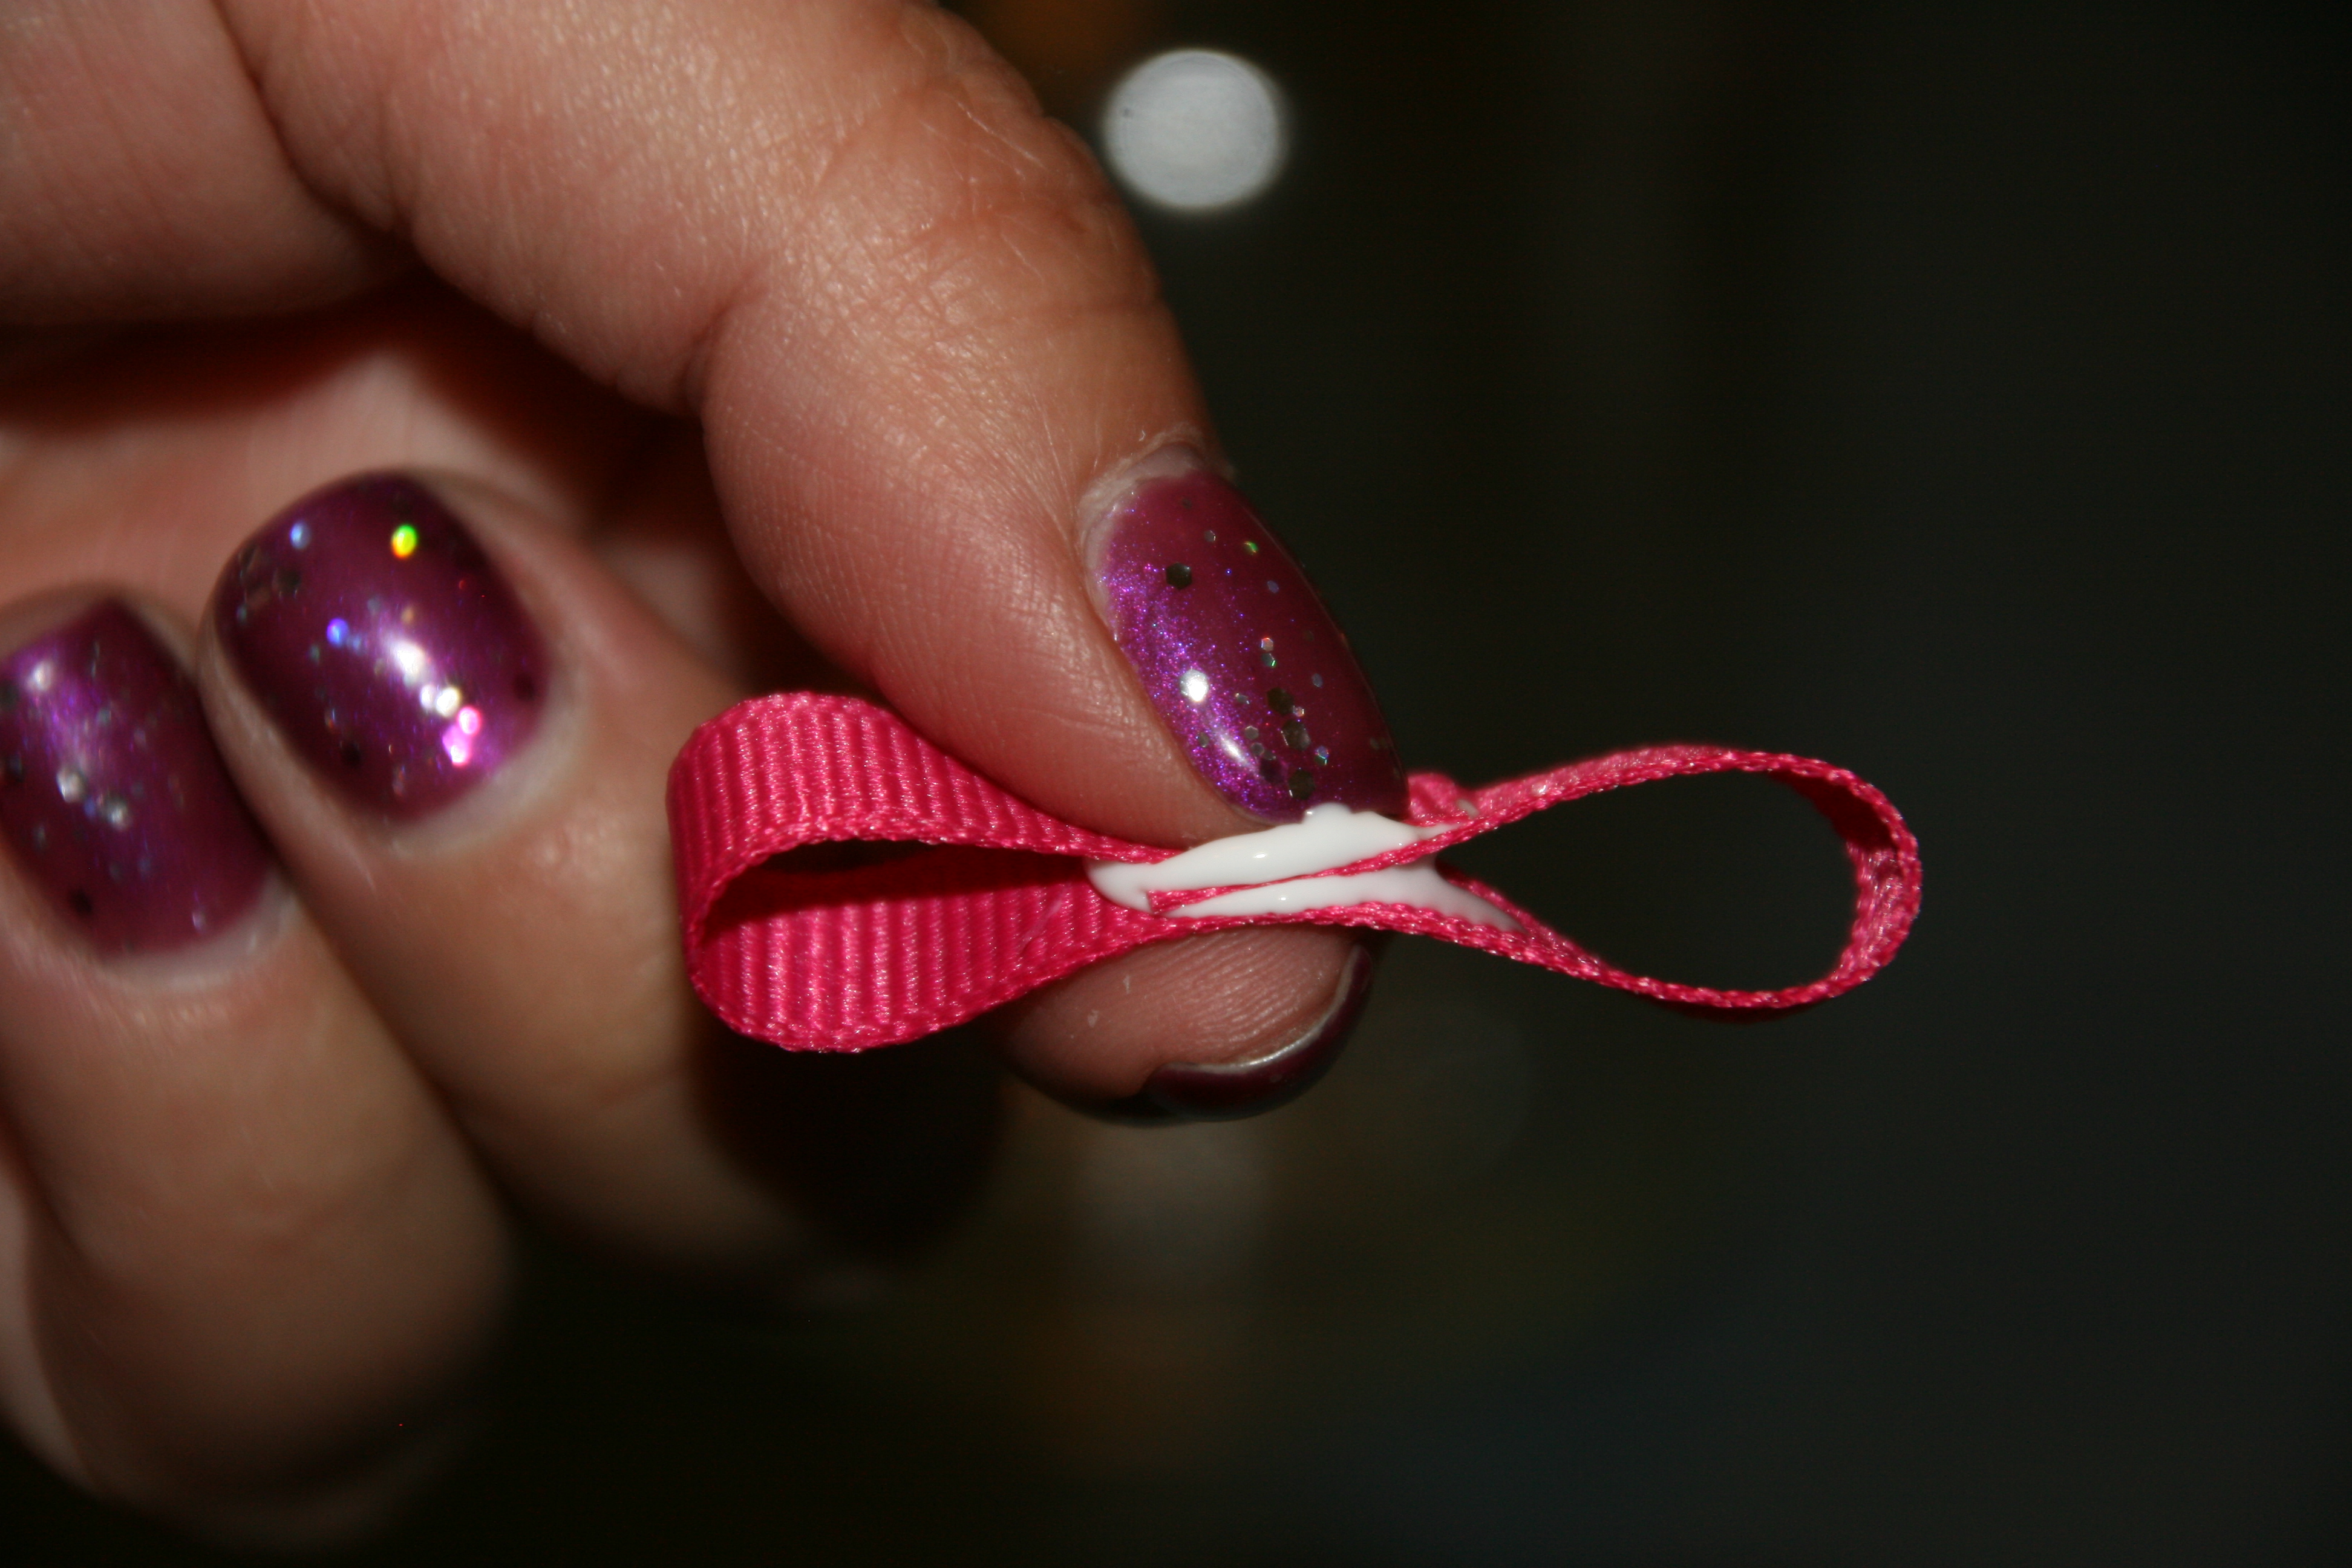
Cut a piece of a coordinating ribbon and fold over twice to create a bow.  Glue the ends and center.

021022

Glue the bow to the lantern and add a rhinestone.

023

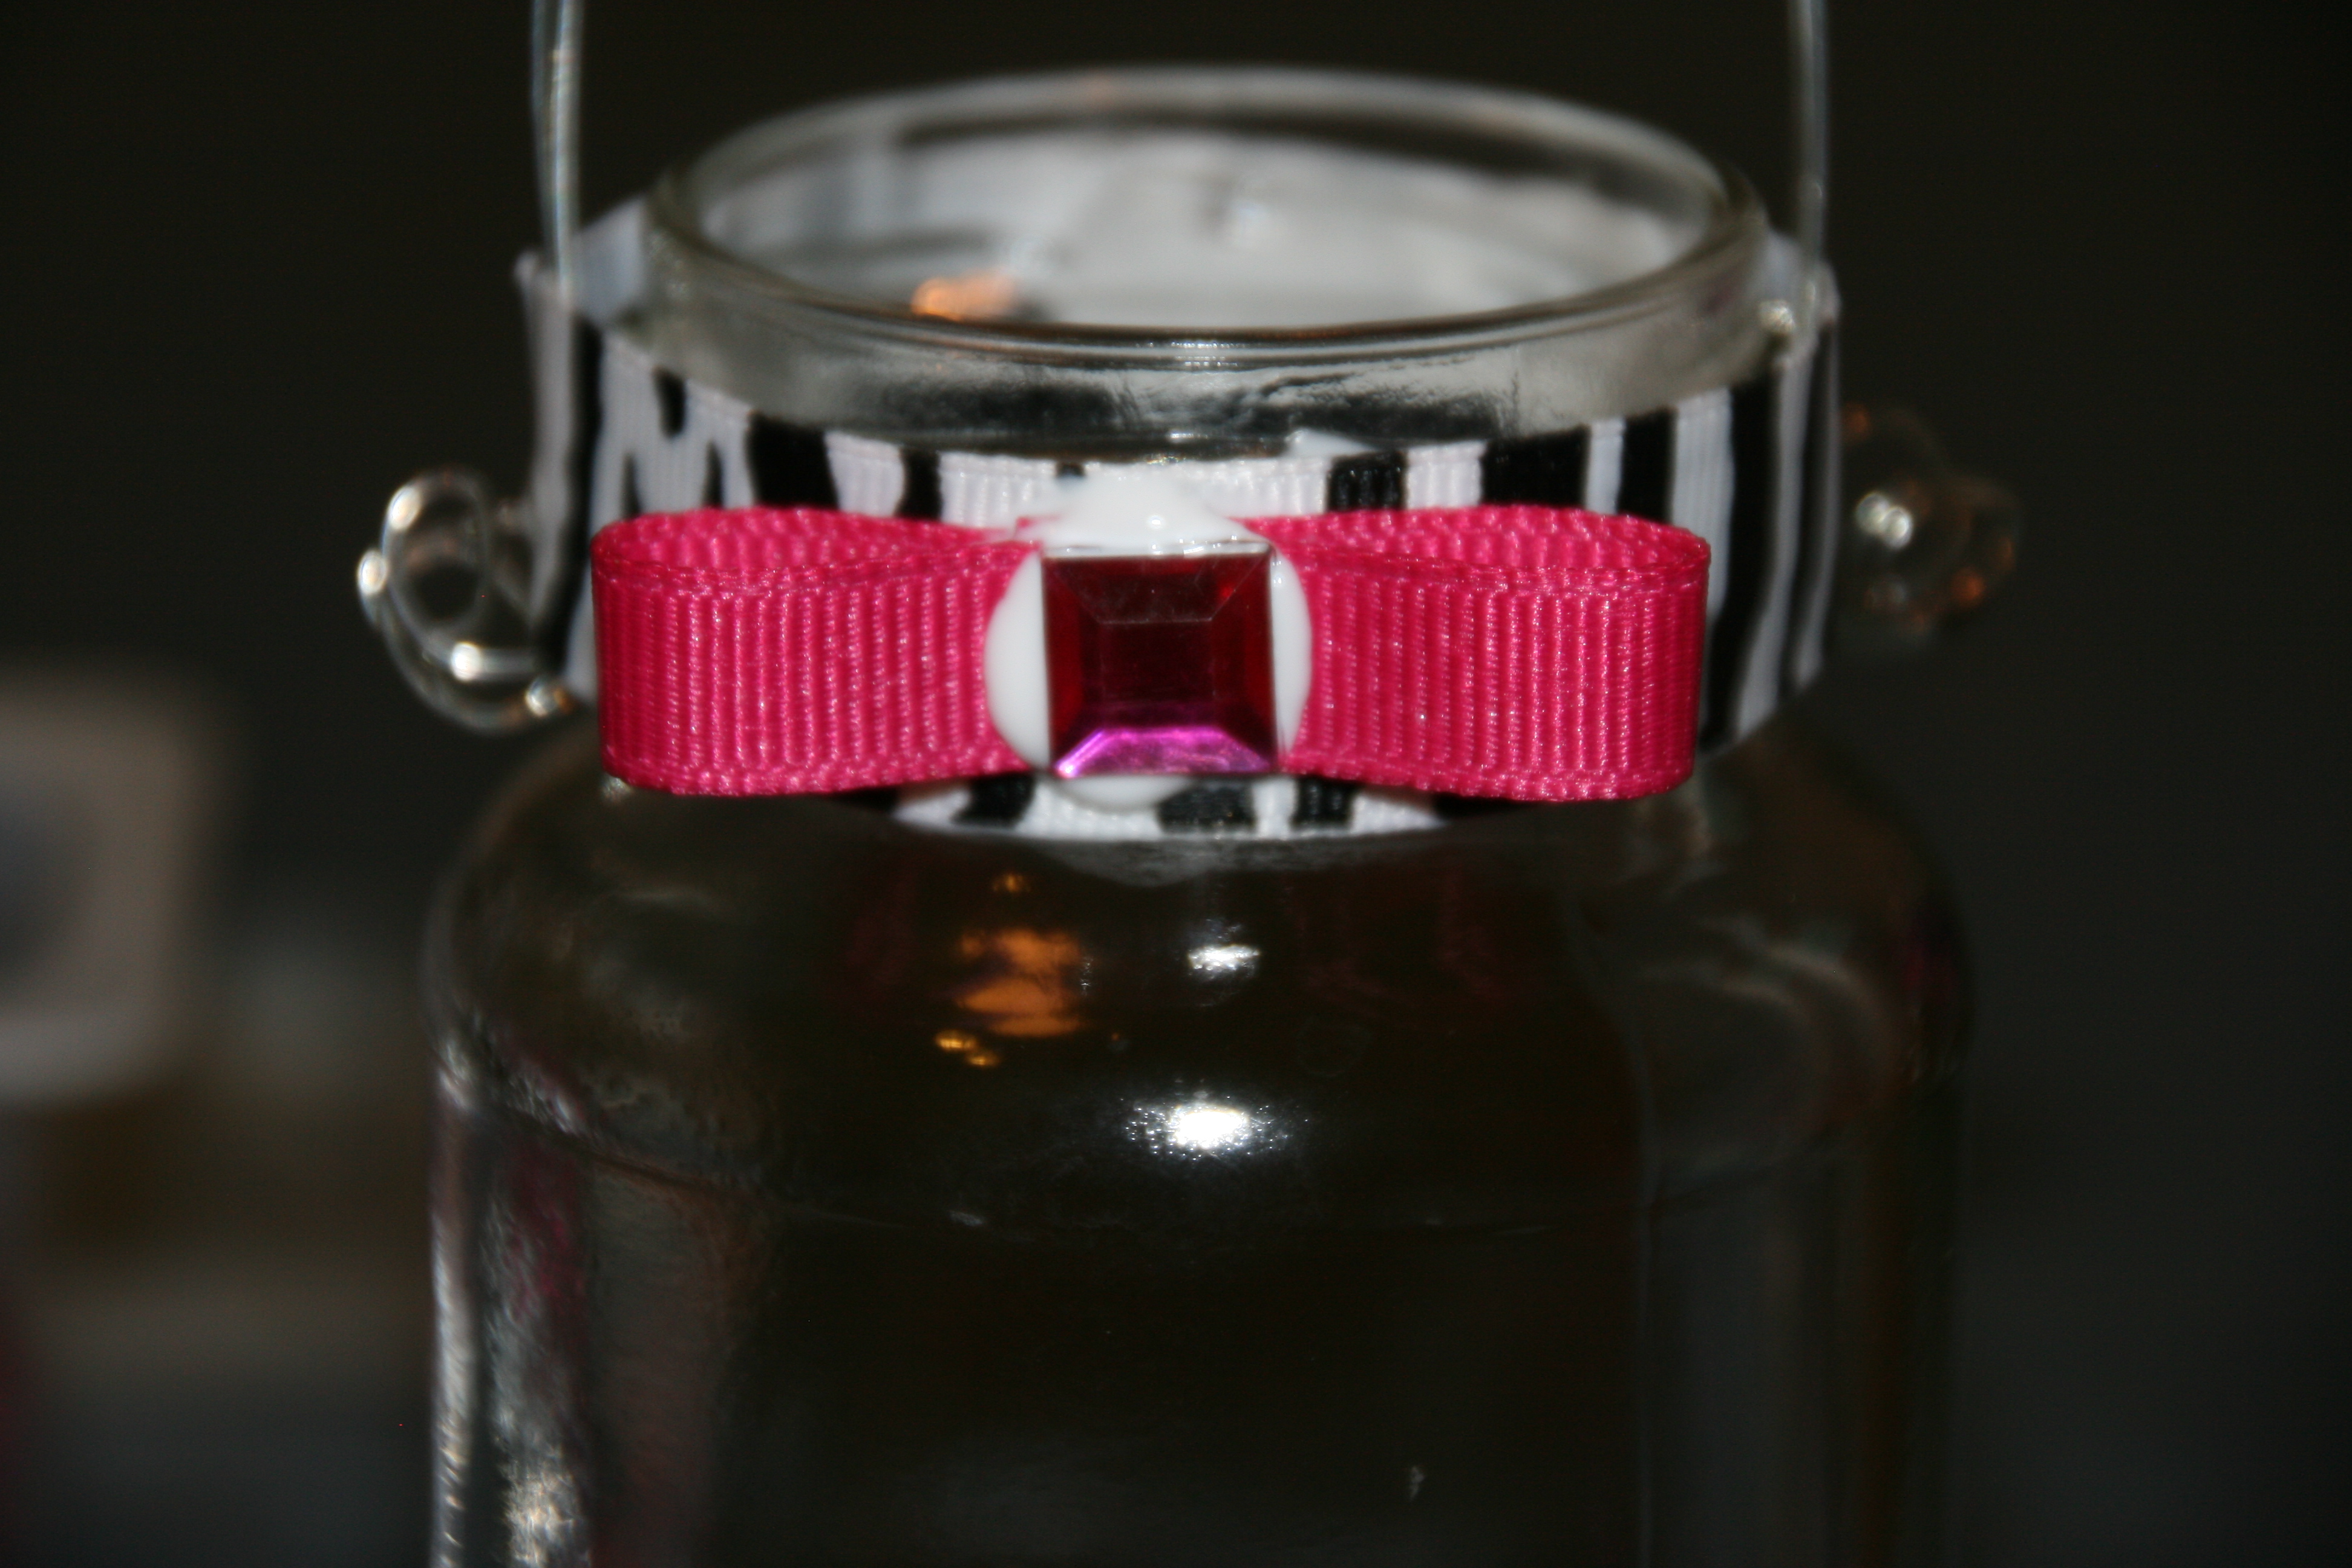
Add the tealight, and your lantern is ready to be hung, or given as a gift.

025

Happy jarring…

“Wonder what I will come up with next”…

Easy flower clips

How many of you have “Girlie Girls”?  Well, I certainly do!  They love bling and fun hair accessories.  Those hair accessories can cost a small fortune, so I took matters into my own hands, and made my own!  They are so easy and inexpensive to make!!!  Let me show you how.

012011

You will need fake flowers (I buy them at the Dollar Tree), ribbon, clips (I purchased these at Sally’s Beauty), hot glue gun, and rhinestones as embellishments.  I will also show you how to make these for infants.

001

Start by measuring ribbon so that it will cover the clip.  Start with the top of inside of the clip.  Wrap the ribbon over the entire top part of the clip, through the spring area, and only on the back where the clip is solid.  This is also the order you will glue the ribbon onto the clip.

003004

005

Next, disassemble the flower and lay out the pieces in the order they were together.

002

Now glue the flower onto the top of the clip covered in ribbon, one piece at a time.

006007

008

You are now done!  Unless, you want to glue a rhinestone onto the center of the flower.  This flower center is interesting, so I will leave it as it is.

If you want to use your flower clip for an infant, simply clip it onto a stretchy headband.

010009

Wasn’t that simple?!?!  AND…so MUCH cheaper than buying them at the store.

012

Happy flowering…

“Wonder what I will come up with next”…

fall table centerpiece

I am ready for cooler weather.  Bundling up in a cozy scarf and feeling the wind blow.  I created this fall table centerpiece using the log tealight candle holders that I posted earlier.

001 (5) 024 (5)

It is very festive and cost very little to create.  See my post on how to make the log tealight candle holders.  I purchased the center log candle holders at Joann’s.  I then purchased tealights and fall leaves & gourds at the Dollar Tree.  I scattered the leaves around the center candles.  It created quite a mood and much to be thankful for.

Happy fall…

“Wonder what I will come up with next”…

Cabin kitchen countertop

This is cabin decor post number 3!  If you viewed my post on our cabin dining room table and liked it, you will LOVE these countertops.  They were created the same way as the table.  Start with plain 12″ pieces of wood.  Glue them together using wood glue.  Cut the edges with curves to create a natural look.  Cut up the edges and stain them dark to look like bark.  Being that this is a kitchen countertop, it needs to be protected from water.  We coated it with “bar top” a 2 part epoxy.  It created a beautiful shiny finish that is water proof.  It is not heat resistant, though, so be sure to use thick trivets, or don’t place hot items directly on the counter.

094 095

The slate stones were purchased at Lowe’s and adhered to the wall with thinset.

AHHHH, the fresh mountain air.  It is so much more than fresh when you can relax at a beautiful “lodge”.

Happy designing…

“Wonder what I will come up with next”…

Cabin dining room table

My amazing husband made this table for our cabin in the mountains.  He started with plain 12″ wide boards.  He glued them together with wood glue.  He cut the edges with curves to create a natural look.  He then cut up the edges and stained them dark to look like bark.  AMAZING and GORGEOUS!

092 093

We love to dine at our beautiful table in our peaceful mountain retreat!

Happy designing…

“Wonder what I will come up with next”…

Cabin Bathroom Decor…

My husband and I purchased and remodeled a cabin in the mountains.  It has been SO MUCH FUN!!!  We wanted a “lodge” feel.  Here is our completed bathroom.

084085

We made a cabinet to hide the stacked washer & dryer.  It is made from old fence boards.  We also used fence boards on the walls and as trim around the window.  We paired the fence boards with “knotty hickory” cabinets purchase at Lowes.

091

089086

Fence board frame around the mirror and a box to hold toilet paper are nice coordinating touches.

090

The countertop was created using mexican rocks from Home Depot.  They were placed with gray thinset, then “bar top” 2 part epoxy poured in to create a “rocks in the river” look.

087088

The shower walls were created using the same rocks as the countertop.  They were placed with gray thinset, then gray grout piped in between each rock.  Cement sealer was brushed onto the rocks for a continuous wet look.

We love our little home in the mountains.  I hope you can have a retreat like ours someday.

Happy decorating…

“Wonder what I will come up with next”…

quilted fabric ball ornaments

041

My sister taught me how to make these AMAZING quilted fabric ball ornaments.  They are absolutely beautiful!!!  I can’t wait to show you how to make your own!  You can fill a Christmas tree with several, place them in a bowl on a table for a colorful centerpiece, or make them as gifts.

To start, you will need styrofoam balls (I am using 3″ balls in this example), straight pins (I recommend buying them in bulk because each ball takes 208 pins), fabric (3 different coordinating patterns, cut into 2.5″ x 2.5″ squares), crafting glue, colorful ball top straight pins, & ribbon.

153

Start by folding your first piece of fabric in half, then again in half the other way to create a cross in the center.  Place the piece of fabric on the ball and pin all 4 corners.

154155

Place a pin in the center of your next piece of fabric and pin it on a line @ the center of the cross on the already placed fabric.

156157

Fold the fabric in half, grab the right top corner and fold it down to the center.  Place a pin in the center to hold.  Then pin the outer corner of the fabric on the right.  Repeat the process for the left side of the fabric.  Repeat this process for 4 pieces of fabric, working your way around the initial piece.

158

Take the 1st piece of your 2nd fabric and place a pin through the center, with the head on the inside of the pattern.

159

Measure 1/2″ from the top center point of your first fabric, and place this pin there.

160161

Repeat the fold and pin process as described with the 1st fabric.  Place pieces across from one another. You will use 8 pieces to complete this step.

162163

165

Once you have placed all 8 pieces of fabric, move on to your 3rd fabric.  Measure another 1/2″ from the center points of the 2nd fabric and repeat the fold and pin process for 8 pieces of fabric.

166167

Your ball will look like this on the completed side.  Repeat the entire process on the opposite side of the ball.

168

To finish the edge, you can either use a strip of fabric, or ribbon.  Here I will use a strip of the 3rd fabric.

035037

Cut the width a little bit larger than you will need to cover all of the pins.  Measure the circumference of the ball and cut.  Iron down each side to make a straight edge.  Wrap the straight piece around the ball, gluing it along the way.  Fold the very end of the fabric and glue it down.

038039

Cut a piece of ribbon as your hanger and pin it to the spot where the fabric strip ended, using the colored ball top straight pins.  Add colored ball pins as embellishments around the entire strip and the center of the “star”.  Let the glue dry and you are ready to hang them, or gift them.

I hope you have as much fun making these as I have!  My finger does get a bit sore, so I use a thimble, on occasion, but I don’t stop even when my finger is red and sore!

041

Happy ball making!

“Wonder what I will come up with next”…