How to make Wooden “Wands”…

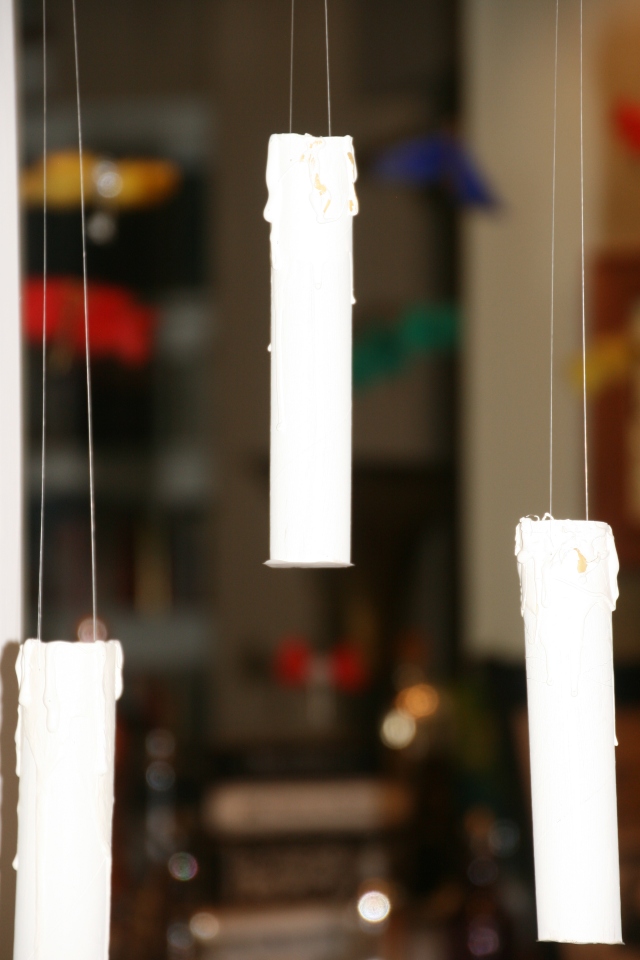
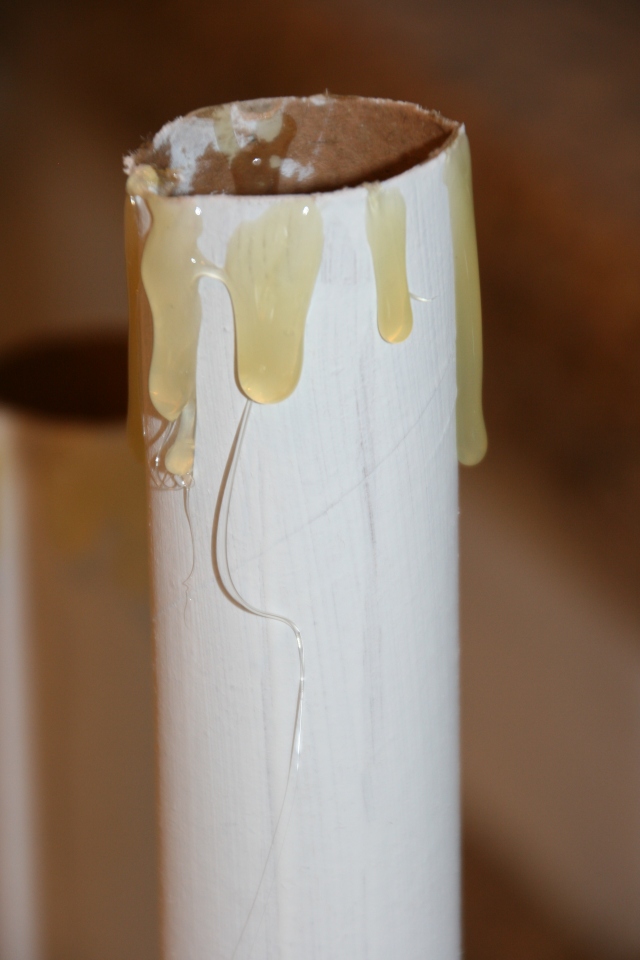
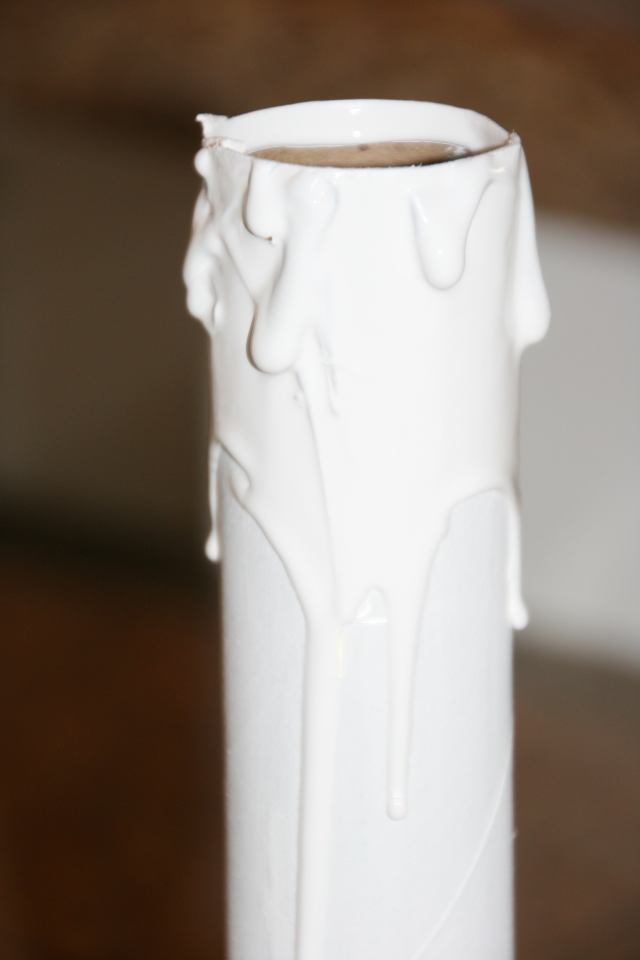
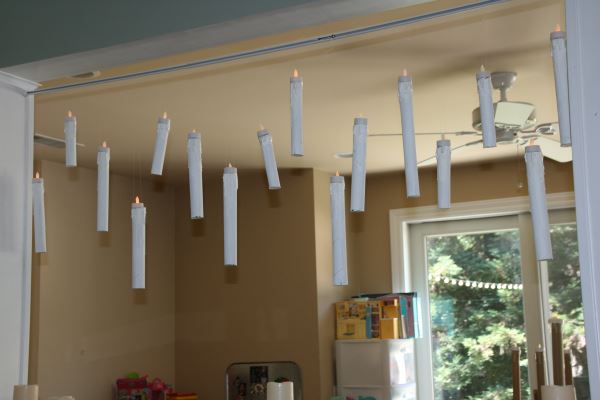
Now that you have learned how to make your own version of “floating candlesticks”, it’s time to learn how to make wooden “wands”.  After this, you will be ready to host your own Harry Potter party!  OR, prepare for Halloween in March!  OR make wands JUST FOR FUN!

imgsvr (22)

Supplies needed: wooden chop sticks, hot glue gun, 2-3 shades of brown paint, and gold paint.

IMG_9885

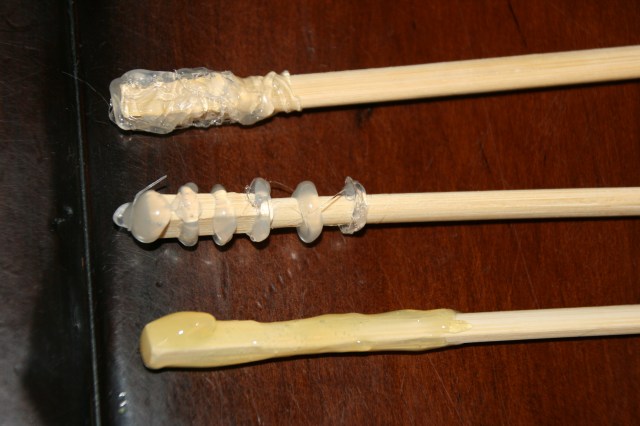
Step 1 is to create squiggles and lines with hot glue on the thick side of wooden chop sticks.  Be sure to make each one unique.  Let the glue cool.

Step 2 is to paint each “wand” brown.  I used 3 different shades of brown, so each wand was unique.  After the 1st coat of brown paint dries, create paint marks (using darker or lighter brown).

Step 3 add gold paint marks as highlights.  Each layer of markings makes the “wands” look like stained wood.

imgsvr (22)

SO SIMPLE!!

Happy painting!

“Wonder what I will come up with next”…

How to Make “Floating Candlesticks”

In my last post, I shared Harry Potter party decorations that I created for my daughter’s birthday party.  I mentioned that I  made the “floating candlesticks”, and would share how to make them.  Here you go.

IMG_9902

Supplies needed: wrapping paper/paper towel rolls, white paint, hot glue gun, needle and white or clear thread, batter operated tea lights, clear tape.

I started by gathering wrapping paper rolls and paper towel rolls, cutting them the sizes I wanted, and painting them white.  I stood them up on newspaper to dry.

Once the paint was dry, I created “drips” with a hot glue gun.

IMG_9886

After the glue cooled, I painted over the “drips” with more white paint.

IMG_9887

Notice how I used a lot of paint, and let the excess run down the roll, creating additional “drips”.

IMG_9902

Next, I threaded a needle with white thread, pierced each side of the roll and created large loops to hang the candlesticks with.

imgsvr (28)

Once the candlesticks were hanging from a rod, I taped battery operated tea lights to the top.  Be sure to turn them on prior to taping them.

That’s it!  VERY easy to make, but the impact was HUGE!  These would make a fun decoration for Halloween also!

Happy painting!

“Wonder what I will come up with next”…

Halloween Jar Lanterns…

I absolutely LOVE crafting with jars!  I save them all year long!  I wanted to make some unique Halloween lanterns for teacher gifts and found the perfect lace like ribbon at Hobby Lobby and transfer decals at The Dollar Tree.  I purchased the spiders at the 99cent store.

171176

To create these fun jars, start by applying the transfer decals.  They go on very easily!  Follow the directions on the package.  Be sure the transfer is completely adhered to the jar before pulling off the backing.

155

Next, glue on the lace like ribbon.  I used Tacky glue.  Lastly, glue on the spiders.  I started with Tacky glue, but found that E6000 glue worked better.  Finish with a knotted ribbon around the top of the jar.

172173174

The possibilities are endless!  I even created some without the lace ribbon, for a more masculine look.

170

Happy creating…

“Wonder what I will come up with next”…

Halloween Decor…

I created the most fun display of “Potion” bottles this year.  I wanted to share with all of you.  Now would be the best time to shop for these types of items as the stores clearance out their Halloween decorations!

035040

I found the spell & curses books at TJ MAX and I couldn’t help my self from there on out!  Home Goods had the most incredible supply of poison & potion bottles!

043

Here are the witches to create the “brew”.

045046

I found these darling witch hats at the 99cent store.  They make they perfect “topper” on any lamp!

044

Happy decorating…well…next year anyway!

“Wonder what I will come up with next”…

Halloween Treats…

I apologize that I am getting this to you after all of the Halloween celebrations have finished, but you can save the ideas for next year.

179180

Halloween “Grave Yard” cupcakes

I used Wilton “cookies and cream” sprinkles to create the “dirt”, gummy worms, and skull & bones candy I found at the 99cent store.

182184

Halloween “Bloody Eyeball” cupcakes

I used skull eyeball gumballs that I purchased at Walmart and red icing.  I heated up the icing so it would run as I dripped it onto the cupcakes.

187185

Halloween “Jack-O-Lantern” cookies

Once the cookies were baked and cooled, I used Wilton black gel to create the faces.

Happy baking…

“Wonder what I will come up with next”…

Witch hats attached to jars…

imgsvr

This is a fun gift to create for teacher gifts.  It is the same concept as the ghosts that I put on top of jars in a previous post.  I used foam & pipe cleaners to create the witch hats.  Then I glued them onto a spray painted black lid.  I filled the jar with tootsie rolls.

A very easy gift to create!

Happy Halloween…

“Wonder what I will come up with next”…

“Grave Yard” cupcakes…

035046

Who doesn’t LOVE a festive cupcake?!?!  I made these cupcakes for my kids classes.  They are sure to be a hit on Halloween!

032

Start by writing “RIP” on the smooth side of the orange slice candies with black decorating gel.  Let the gel dry over night.

031

Bake the cupcakes and frost them with chocolate frosting.  Place the orange slice candy on the cupcake and add the sprinkles so that it looks like dirt from a fresh grave.  Add bones & skull candies on top of the dirt sprinkles.

033

To make the “Grave Yard” cupcake platter, start with a large lid from a box.  Cover the lid with aluminum foil.  Make the back side of the foil taller.  This will keep the glitter, etc from the backdrop trees from dropping onto the cupcakes.

038043

I bought the tree branch picks at the 99cent store.  I taped them to the side & bottom of the lid.

041042

I added a strand of black mesh around the outside of the lid and tied it in a knot in front.

045

Add the cupcakes to the lid and you are ready to display your “Grave Yard”.

046

Happy Halloween…

“Wonder what I will come up with next”…

Paper bag luminaries…

002

My girls absolutely LOVE doing crafts.  These paper bag luminaries are to simple to create.

Start by cutting a circle or oval on both sides of the paper bag.  Tape a piece of orange tissue paper on the inside of the bag, covering the entire hole you cut.

003

Use black paper or cardstock and cut shapes for the eyes, nose, mouth, eyebrows, etc and glue or tape them onto the outside of the orange tissue paper.  Place a battery operated candle inside the bag and you have a festive, kid friendly luminary.

Happy Lighting…

“Wonder what I will come up with next”…

Halloween Ghost Treat Jars…

007

Remember my last post of easy 3 item ghosts?  Well these are the same ghosts, with googly eyes glued on and attached with glue to a jar filled with Tootsie Rolls.

You will need an empty glass jar & lid with the label removed.  I like to spray paint the lids white.  Be sure to find the bottom center of the ghost before gluing it onto the jar lid.  When you fill the jar with candy, be sure it looks nice from the outside, ie, have the large Tootsie Rolls standing tall around the outer edge of the jar.

A very easy and fun gift for teachers!

Happy Treating…

“Wonder what I will come up with next”…

Easy 3 item tulle ghosts for Halloween

009

I have seen several different styles of ghosts, but I made these using only 3 items…tulle, 2.5″ styrofoam balls, and white ribbon.

Start by cutting tulle squares 2’x2′.  You will want 2 layers of tulle per ghost.  Place the styrofoam ball in the middle of the square and wrap the tulle around the ball, bunching it at the bottom.  Use white ribbon to tie the tulle onto the ribbon, just where the tulle is bunched.  I used the same white ribbon and a straight pin stuck into the styrofoam ball to hang these in my kitchen.

Wasn’t that EASY!!!  Happy ghosting…

“Wonder what I will come up with next”…