Wood & burlap picture frames

While I was visiting my favorite “Southern Girls” in Dallas, I documented my friend making this incredibly darling picture frame and I wanted to share it with you!

028032

036

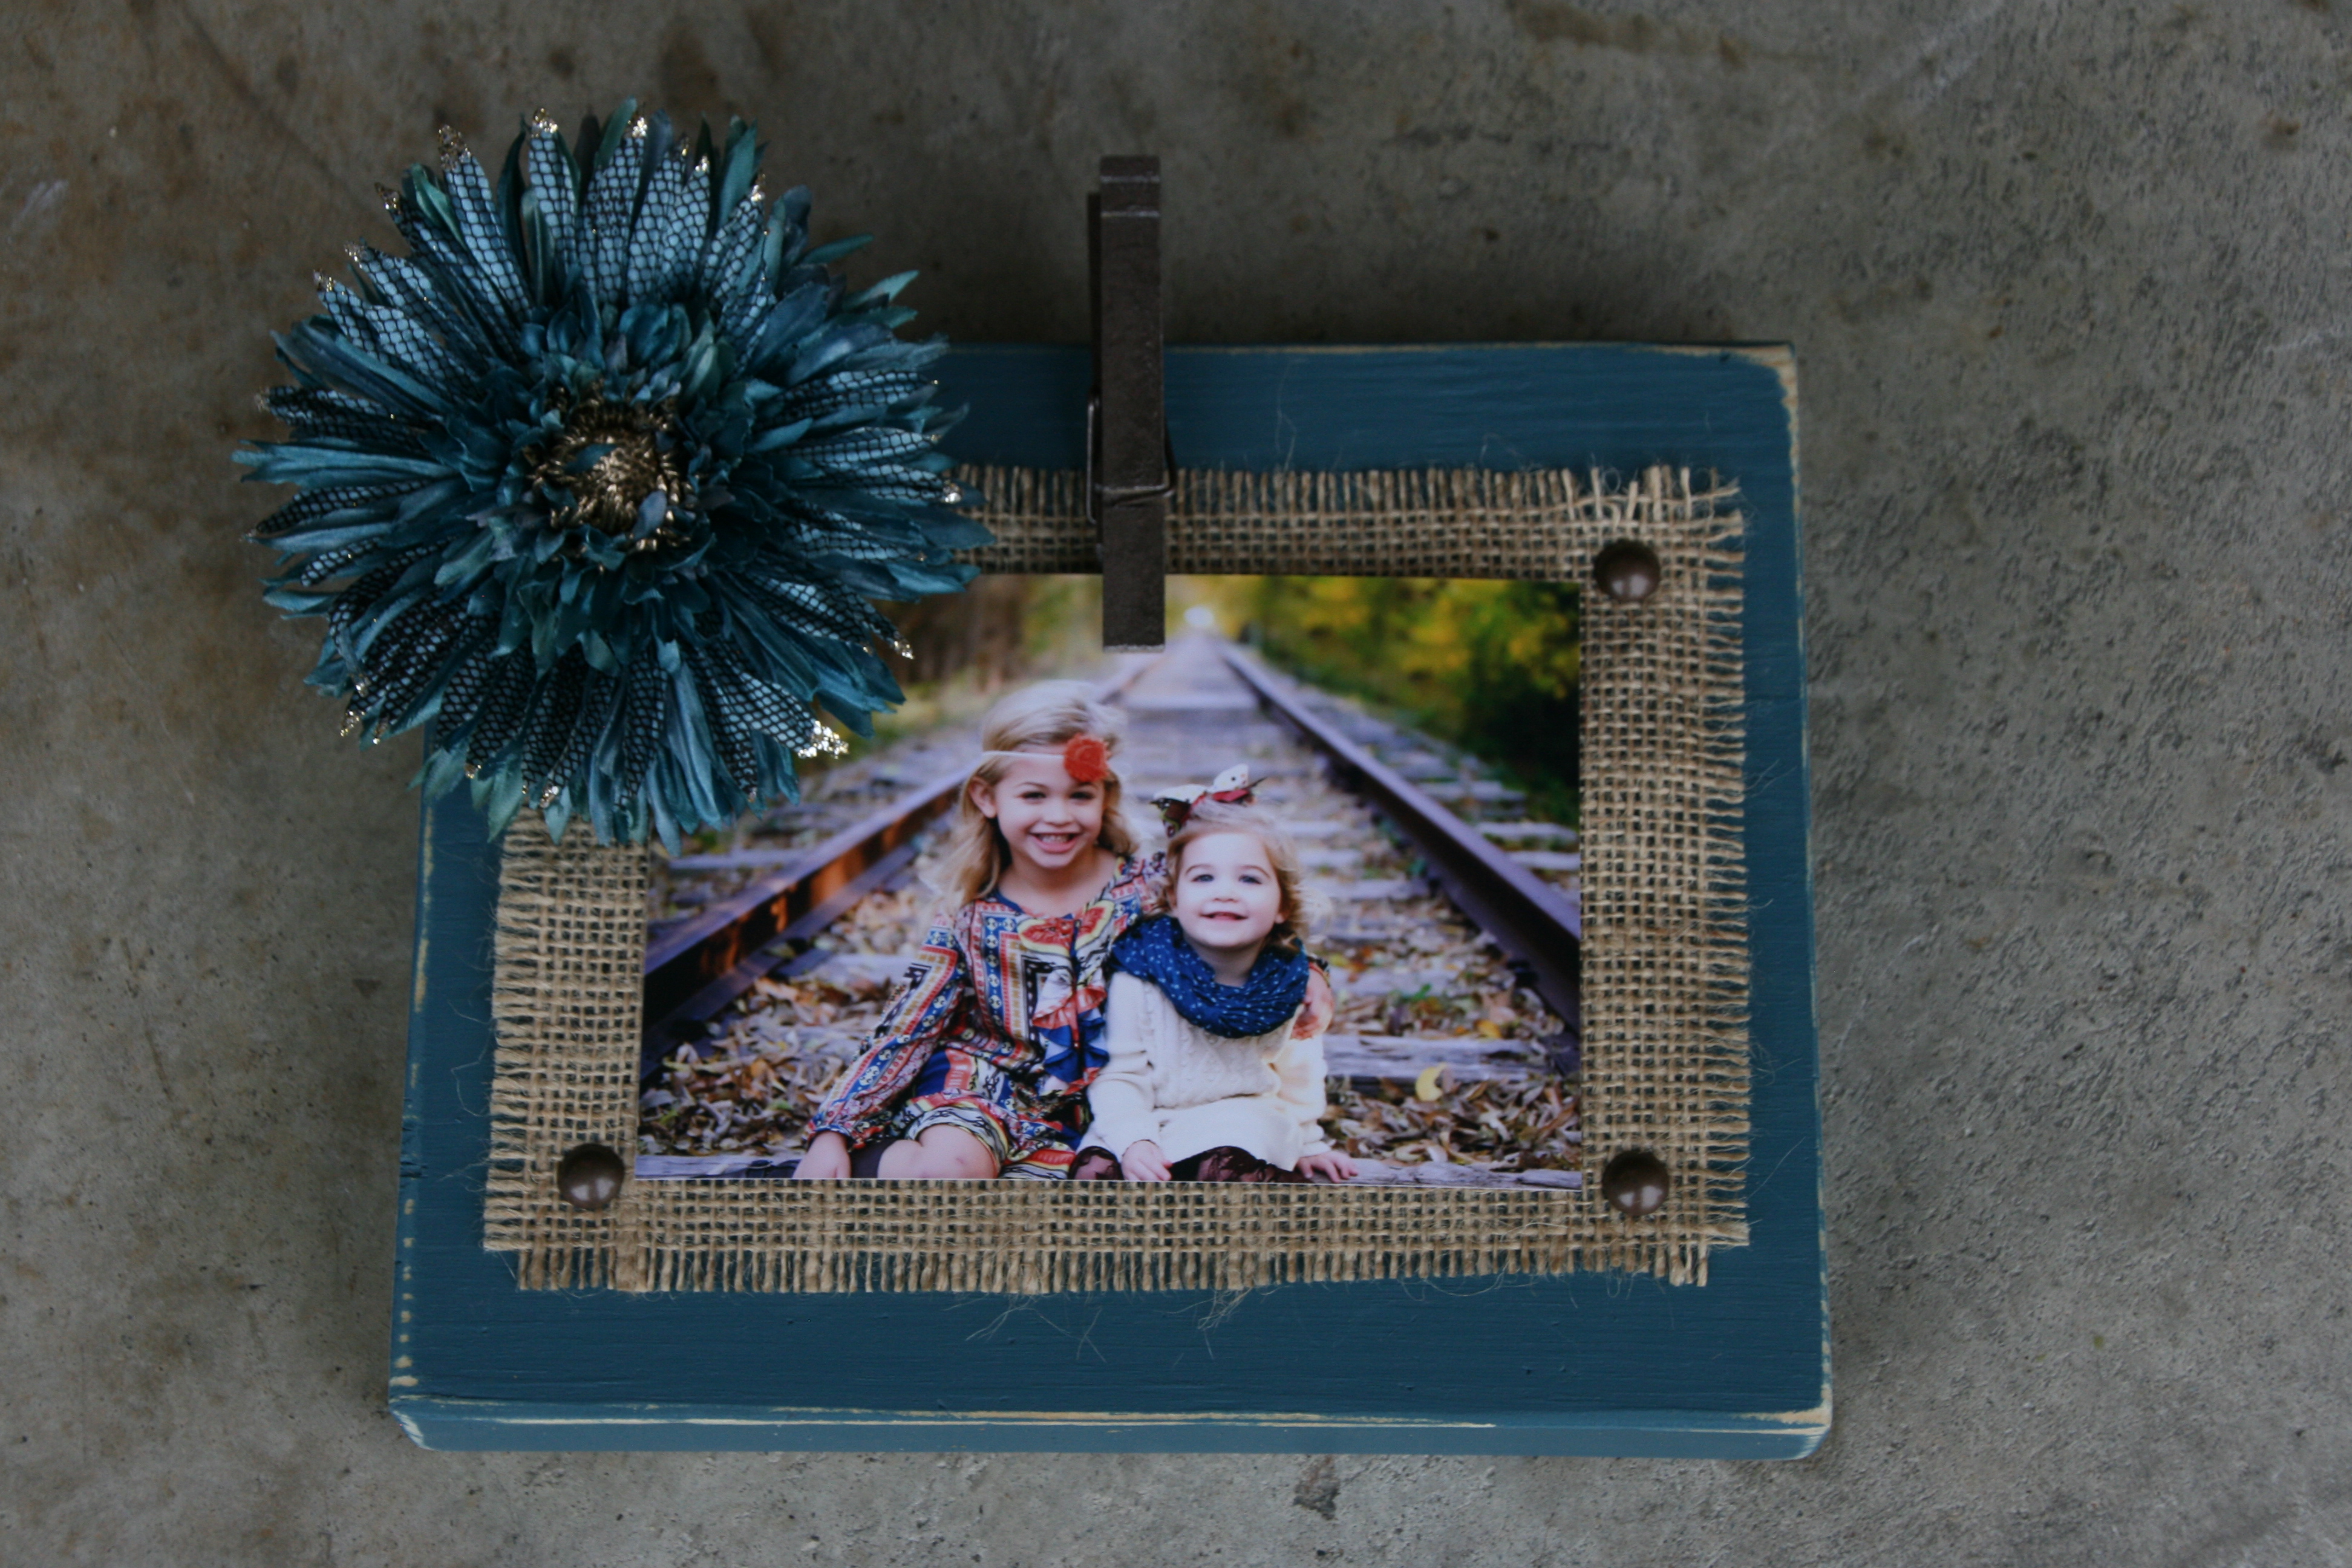
The supplies needed are: wood, paint, burlap, upholstery tacs, clothes pin, flower and glue.

018

Start by painting the wood and cutting the burlap the appropriate size.  I learned a valuable technique on how to easily cut burlap.  Measure the size, then grab the end of a string where you want the cut to go.  Do this on 2 sides.  It will leave a line gap in the burlap and you will know where to cut.  AMAZING and easy!

019020

Place the burlap on the wood and nail in the upholstery tacs.  You may want to cover the tacs as you hammer them.

021022

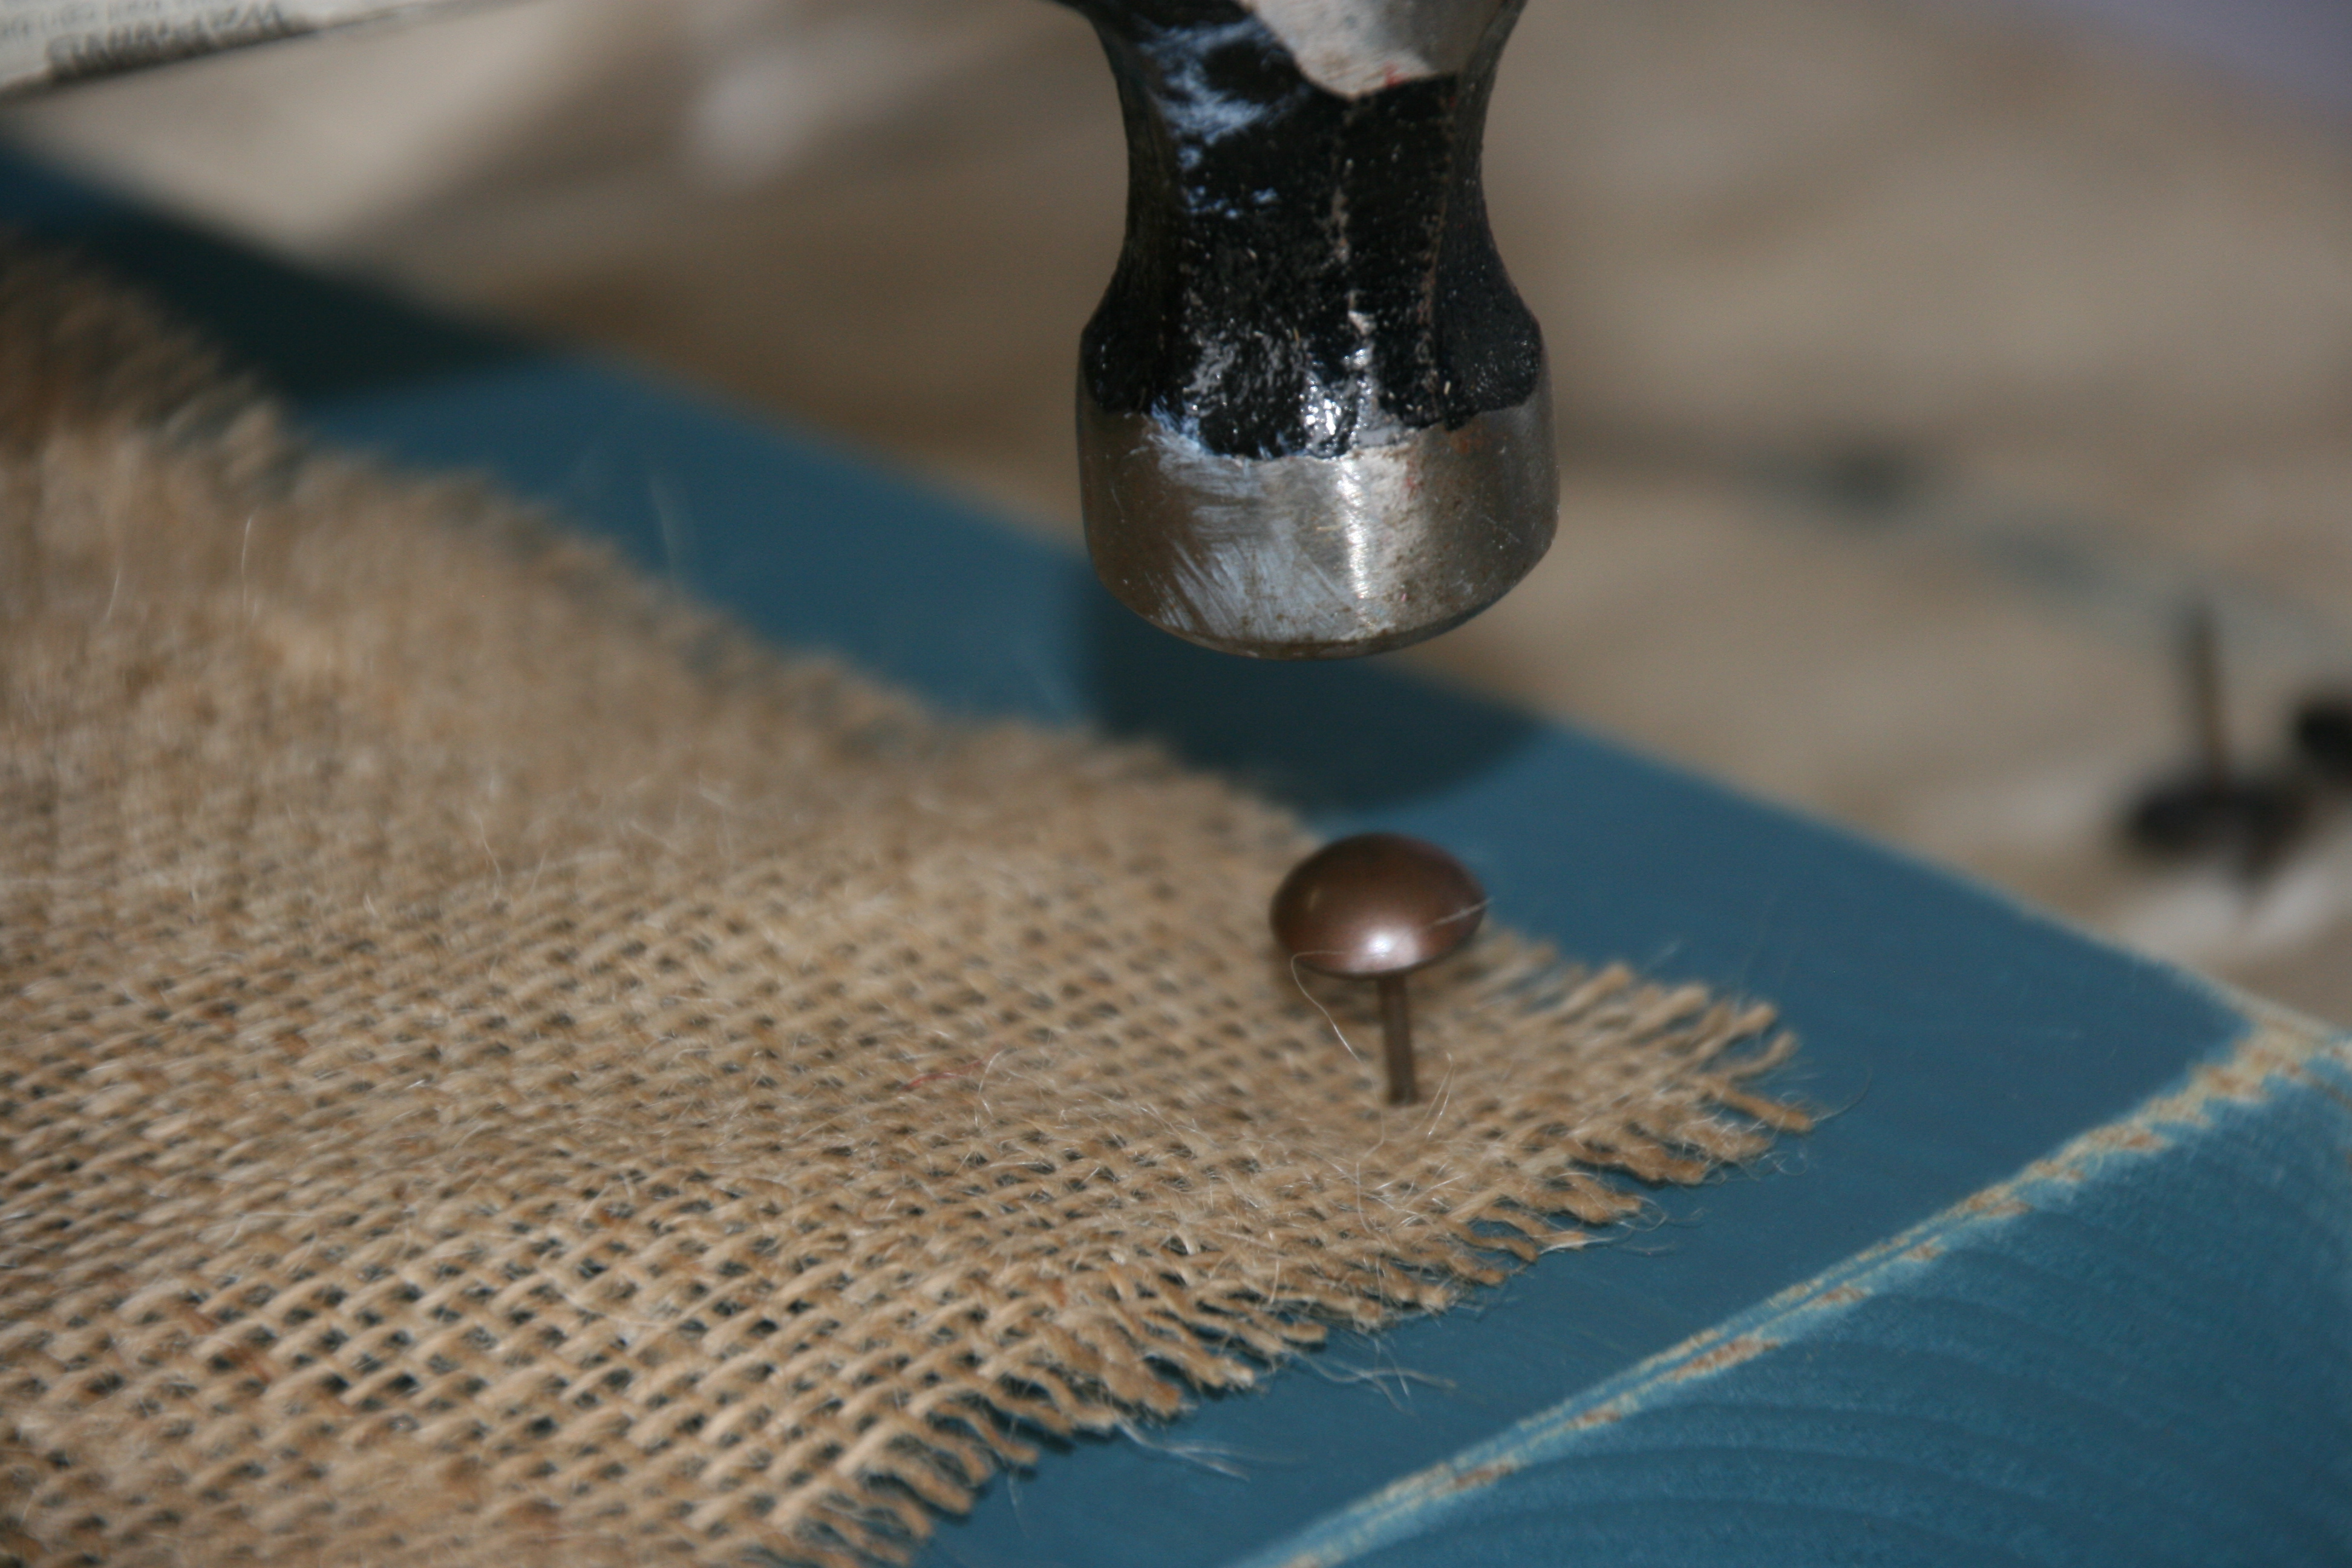
Nail all 4 corners.  Be sure to smooth out the burlap as you go so that it lays flat.

024025

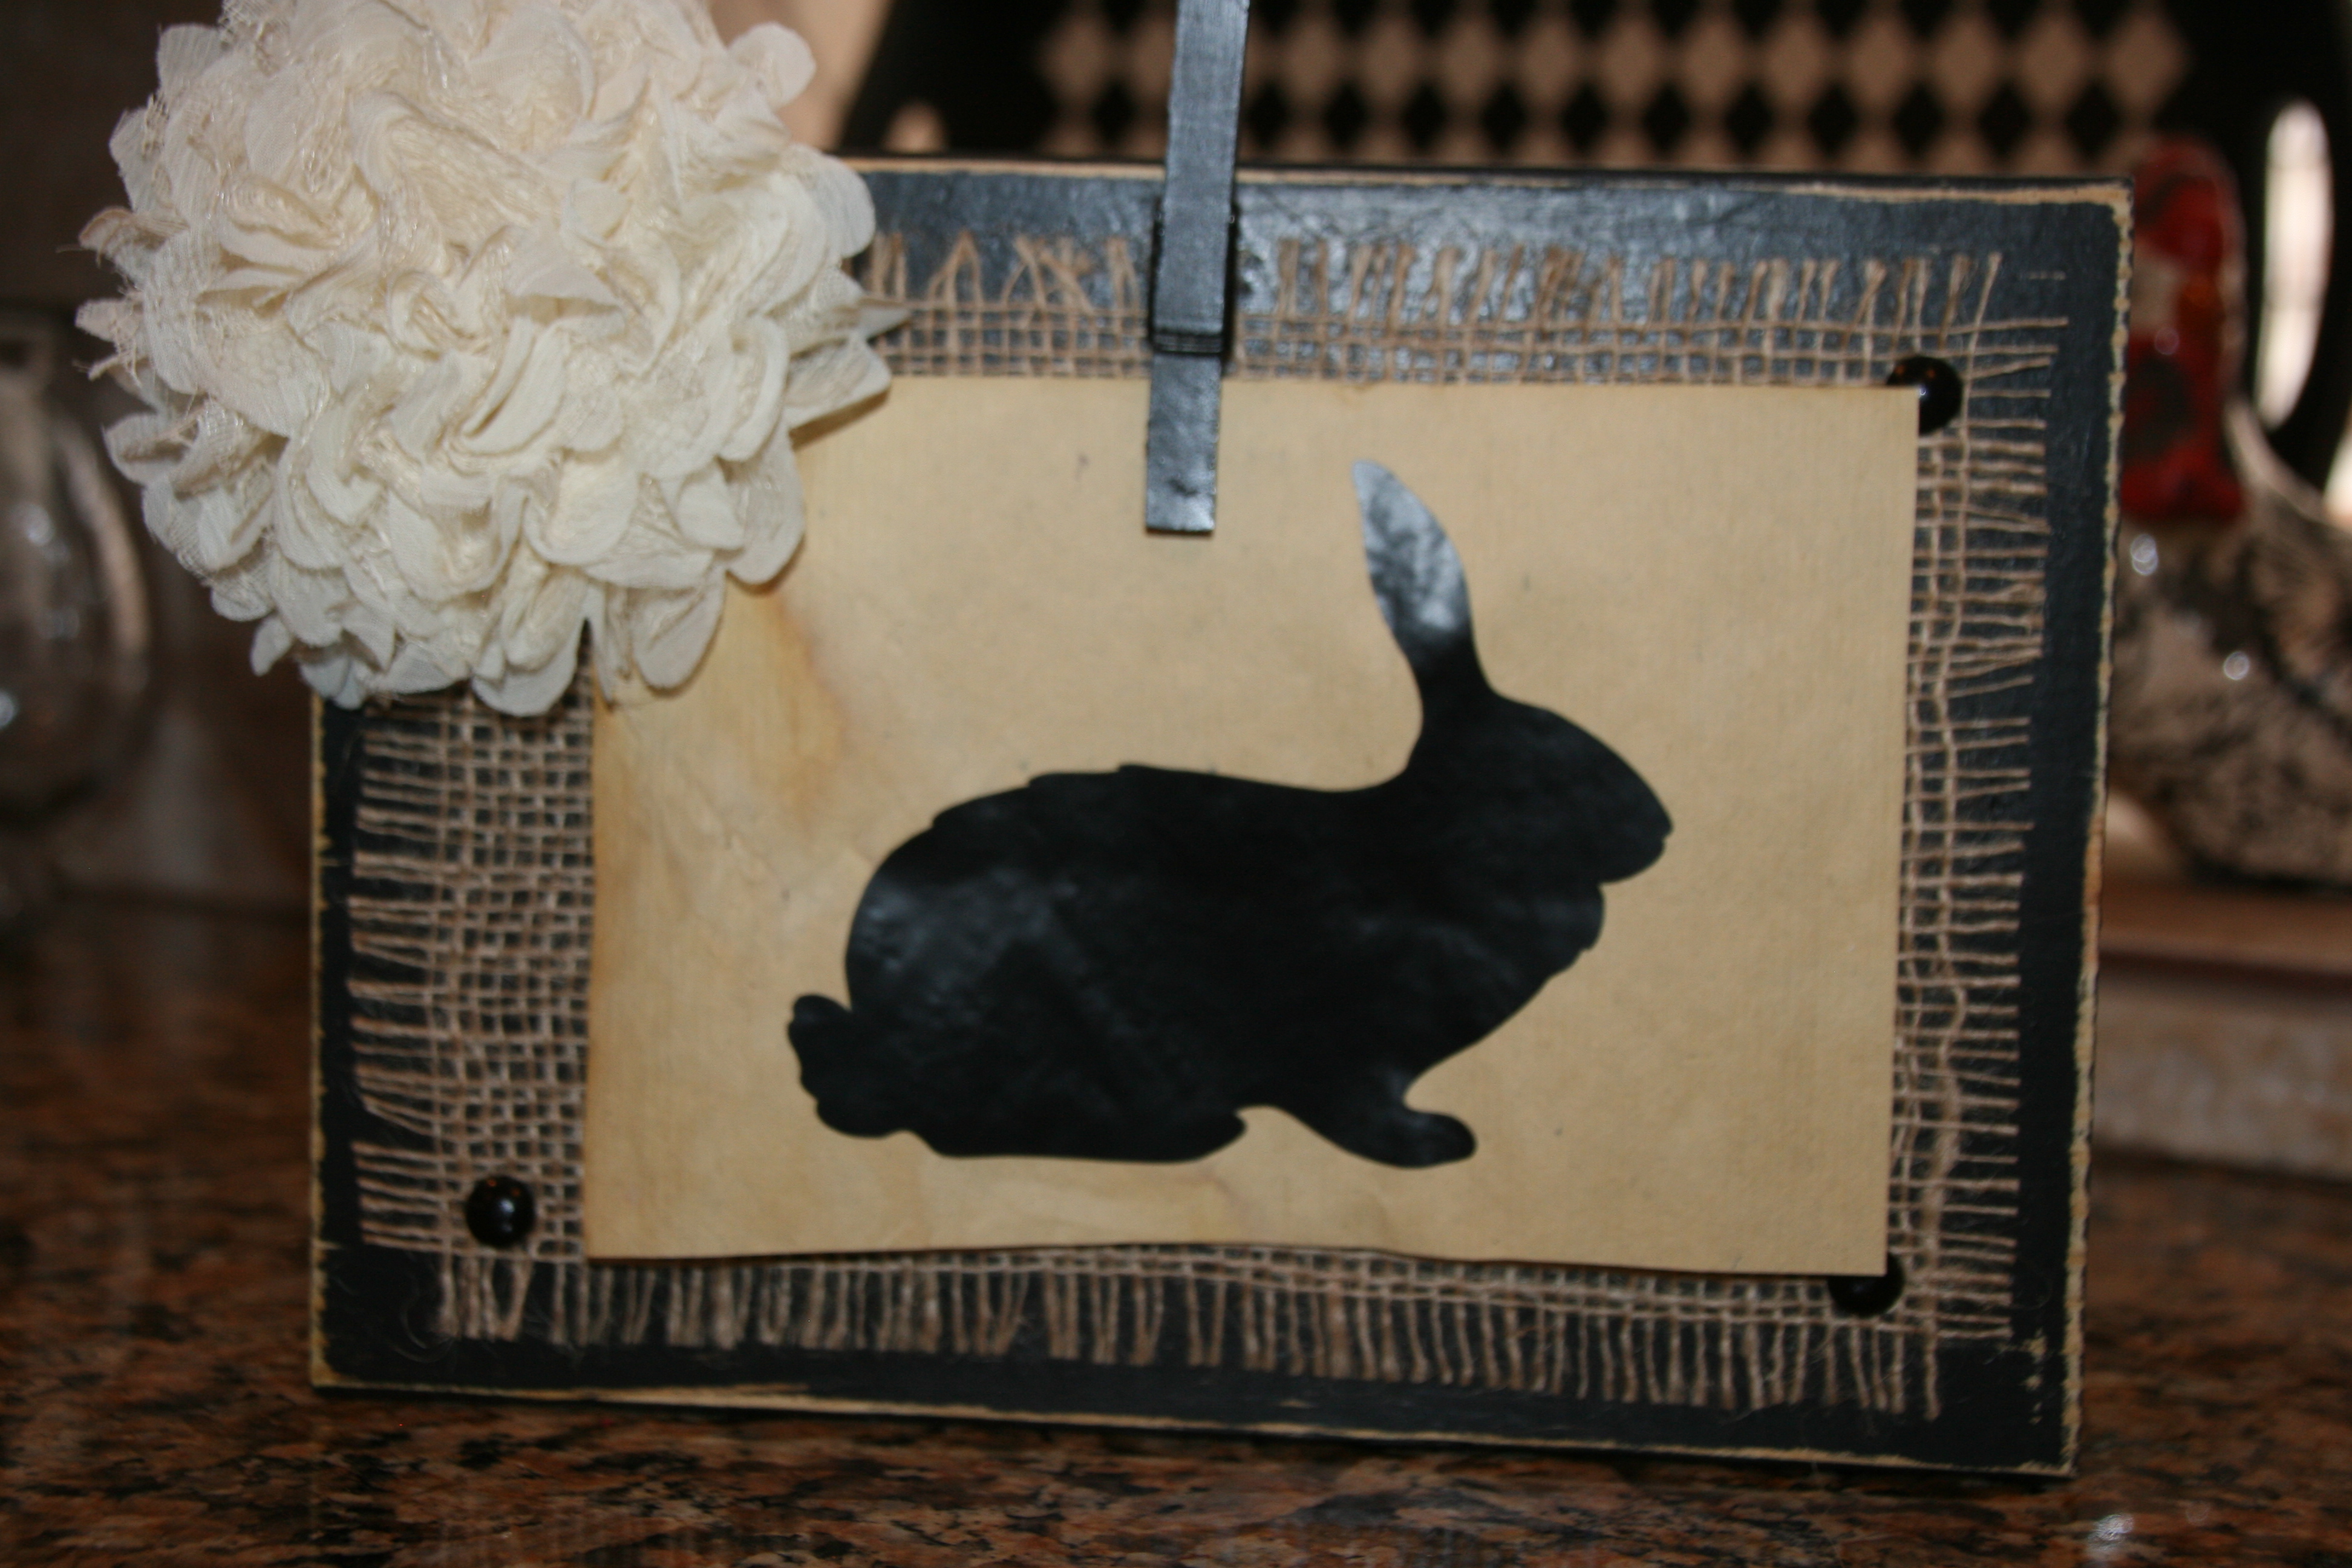
Spray paint the clothes pin and glue it to the wood.  Add a sweet picture and a flower, and your picture frame is complete!

027028

You can use different flowers to change the look.

032

This can also be used as a fun decoration piece…

035036

Happy creating…

“Wonder what I will come up with next”…

Decorative letters

I spent some time with a friend of mine this weekend and she made the cutest “Decorated Letter” for her daughters room.  It is so simple to replicate!

007 008

Start with a wood letter.  Paint the letter either with spray or regular paint.  Glue various flowers and embellishments to the letter and hang.  It doesn’t get much more simple than that!

Happy monogramming…

“Wonder what I will come up with next”…

Creating a tealight holder from a branch

 146

I made these tealight candle holders to decorate our cabin in the woods.  They were so easy to make and cost almost nothing!

149

Start by finding some branches that are thick enough to accomodate a tealight.  Use an electric drill with a 1 inch drill bit to create the holes.  Put the tealights in the holes are you are DONE!!!

145151

A rustic, fun way to decorate.

Happy candle lighting…

“Wonder what I will come up with next”…


Girls “Garden” bedroom…

I don’t know about you, but in my house we have to keep everything “fair” amongst the girls.  The “fair perception” from their young minds is so important, so that no one is feeling slighted.  In the spirit of “fairness”, I had to create not one, BUT TWO uniquely decorated and fun bedrooms.  For this daughter, I chose a “Garden” theme.  Very similar to my other daughters room, yet just enough different.

I created a tree using a tree branch that fell from a neighbors tree.  Believe me…when I told my husband what my plans were with the fallen branch, he thought I had “LOST MY MIND!!!”  I have a tendency to “rope” him into my crazy ideas!  I created the tree similarly to the other post I made about my other daughters “Garden” room.  Once the branch was securely bolted to the wall, my husband drilled holes and I wood glued in the smaller branches to create the tree shape.  I then hot glued on each leaf.  It was a tedious task, but worth the effort.  I even included a bird nest in the tree.

018

I mounted wisteria to a beam in the room that hangs lower than the ceiling.  It created a fun effect!

020  019022

I stapled white picket fence from Home Depot and fake flowers from The Dollar Tree and Walmart to the wall.  I used an air compressor & pneumatic nail gun for the stapling.  I added green ivy crawling up the trim and across the baseboard.

028

…and topped off the room with a personalization.

I painted wood letters from Michaels Crafts and nailed them to the wall.

Happy decorating…

“Wonder what I will come up with next”…

Girls “forest” bedroom…

When my daughters were toddlers, I wanted to create fun, unique rooms for them that they wouldn’t outgrow quickly.  I thought, if I am going to put all of this effort into a room décor, I don’t want to have to change it in 2-3 years.  I decided on a “Forest” & owl theme for one of my girls.

014013

I created a willow tree and a cherry blossom tree.  For the willow tree, I started with a branch from a live tree and bolted it to the wall.  I then drilled holes and inserted smaller branches to create the tree shape.  I used wood glue to keep the branches in place.  I then attached plastic willow pieces that I bought at Michaels crafts with wire to the ends of each branch.  For the cherry blossom tree, I started with a branch from a live tree.  I created the branches similarly to the willow tree.  I found cherry blossom picks at The Dollar Tree and hot glued the blossoms to the branches.

017

016 015

I stapled wood colored picket fence from Home Depot to the wall using an air compressor & pneumatic staple gun.  I stapled greenery I bought at Michaels crafts and numerous different fake flowers purchased at The Dollar Tree to the walls.

A forest was created.  I chose an owl theme quilt from Target that has trees to finish the room.

Happy Decorating…

“Wonder what I will come up with next”…

Under the ocean kids bathroom

If your kids are like mine, they associate with all of the kids movies and characters that are popular.  They want “character” theme bedrooms, parties, etc.  I accommodated my daughters love of mermaids and swimming with an “Under the Ocean” theme bathroom.

001009

I started with a reef wall decal that I found online.

008011010

I bought additional wall decals and paint that has sand in it to create the bottom of the ocean.

005012 007

I couldn’t find any mermaid wall decals, so I made my own.  I took a mermaid book and had color copies made at Office Max.  I then cut them out and used a spray adhesive to attach them to the walls.

002 003006

Of course the décor needed nets filled with starfish and shells, and glass bouys hanging from the ceiling.  I found the styrofoam chain during Halloween.  It was from a shackle and I bought it on clearance, then made an anchor to match.  I used a Styrofoam disc, drew & cut the anchor.  Bought 4 colors of paint that matched with the chain & sponge painted the colors onto the Styrofoam.  The anchor looks old & rusty.

004

I decided that the bathroom needed jelly fish hanging from the ceiling, so I bought plastic bowls & glued iridescent tissue & basket filler inside.  I hung them with clear thread & paper clips from the vent.  Too cute!

Happy decorating…

“Wonder what I will come up with next”…

Christmas ornaments as wall decor…

I have a craft room that is “MY SPACE” only!  I have all my supplies stored in there.  Well, most of them, but I have spilled over into other rooms in the house.  SHHHH…don’t tell anyone!  Anyway, my craft room is decorated in shoes & purses…fancy!  I was given some shoe & purse Christmas ornaments that were absolutely darling, and I wanted to be able to display them year round.  They were flat painted wood.  I decided to frame them and hang them on the wall.

Happy hanging…
“Wonder what I will come up with next”…