
My husband made these awesome boxes from old fence boards.
All I can say is…I WANT MORE!!!!
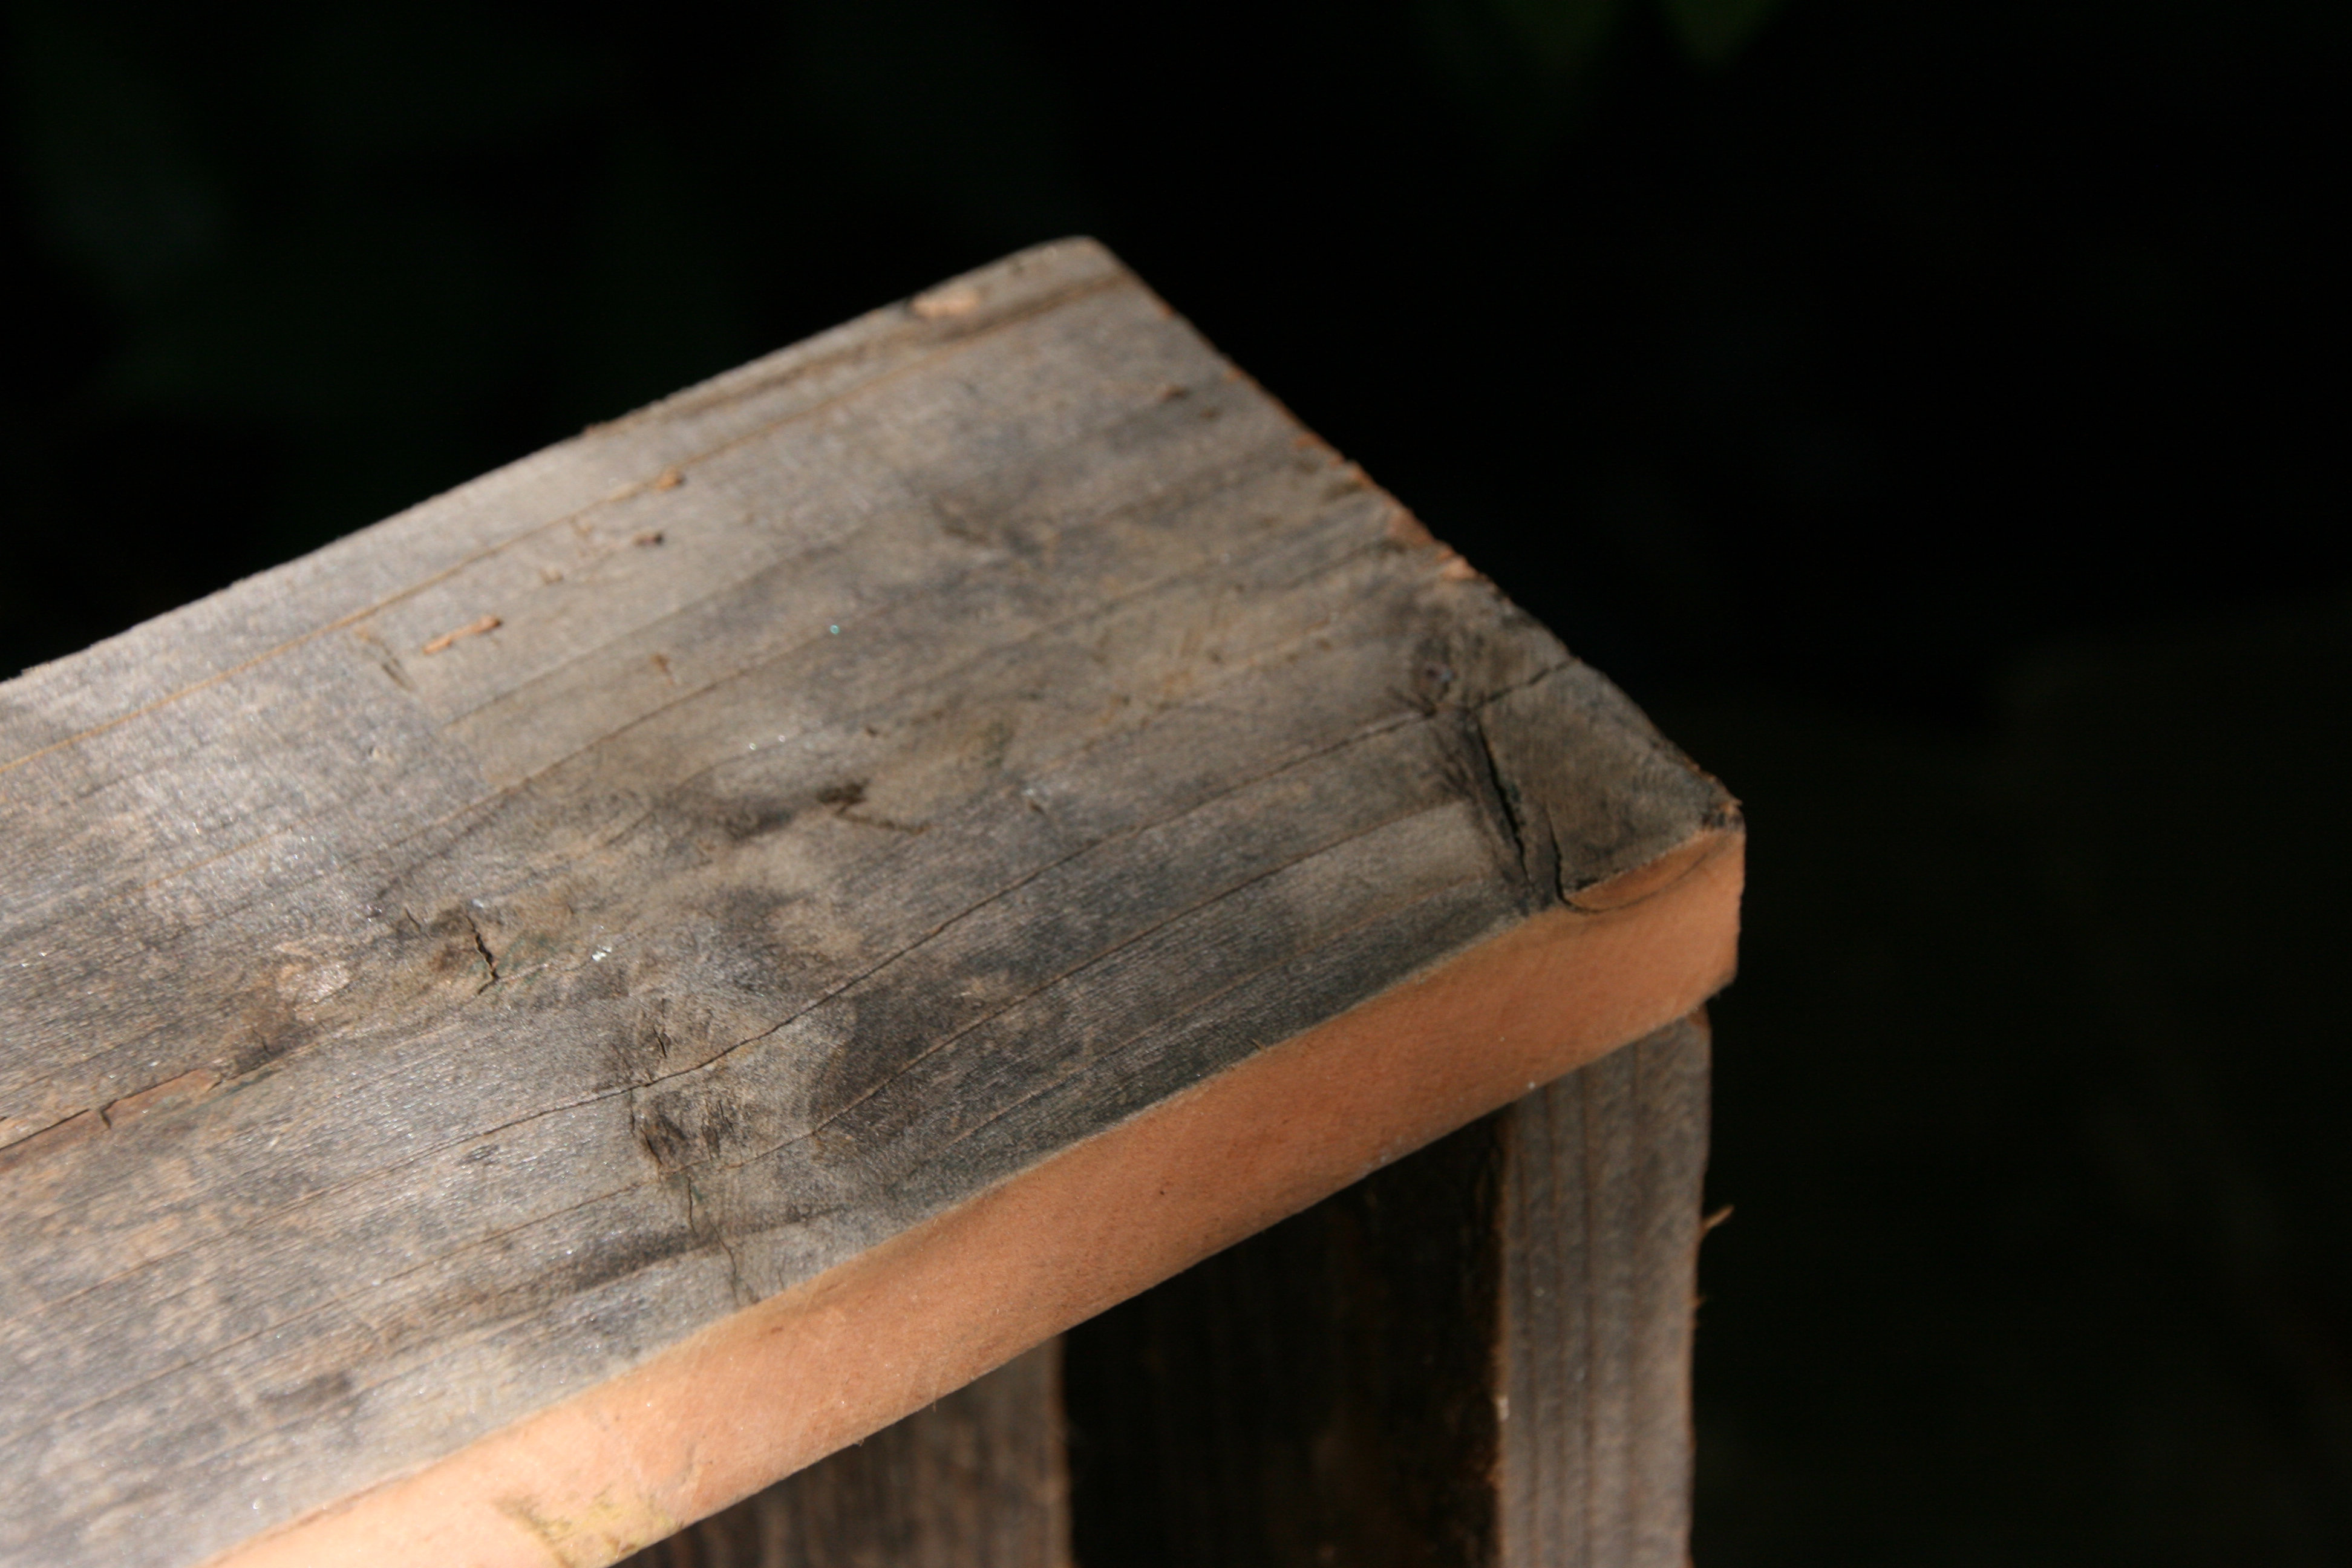

I will find so many uses for these! AND…they look amazing!
Happy creating…
“Wonder what I will come up with next”…
My husband made these awesome boxes from old fence boards.
All I can say is…I WANT MORE!!!!
I will find so many uses for these! AND…they look amazing!
Happy creating…
“Wonder what I will come up with next”…

My daughter wanted a “FROZEN” themed birthday party. I had a BLAST coming up with fun creative decorations!


I bought glass beads at Dollar Tree and put them in square vases, topped with silver & blue beaded balls & picks that looked like ice from Hobby Lobby. I placed the vases on top of glass blocks, which acted as risers.
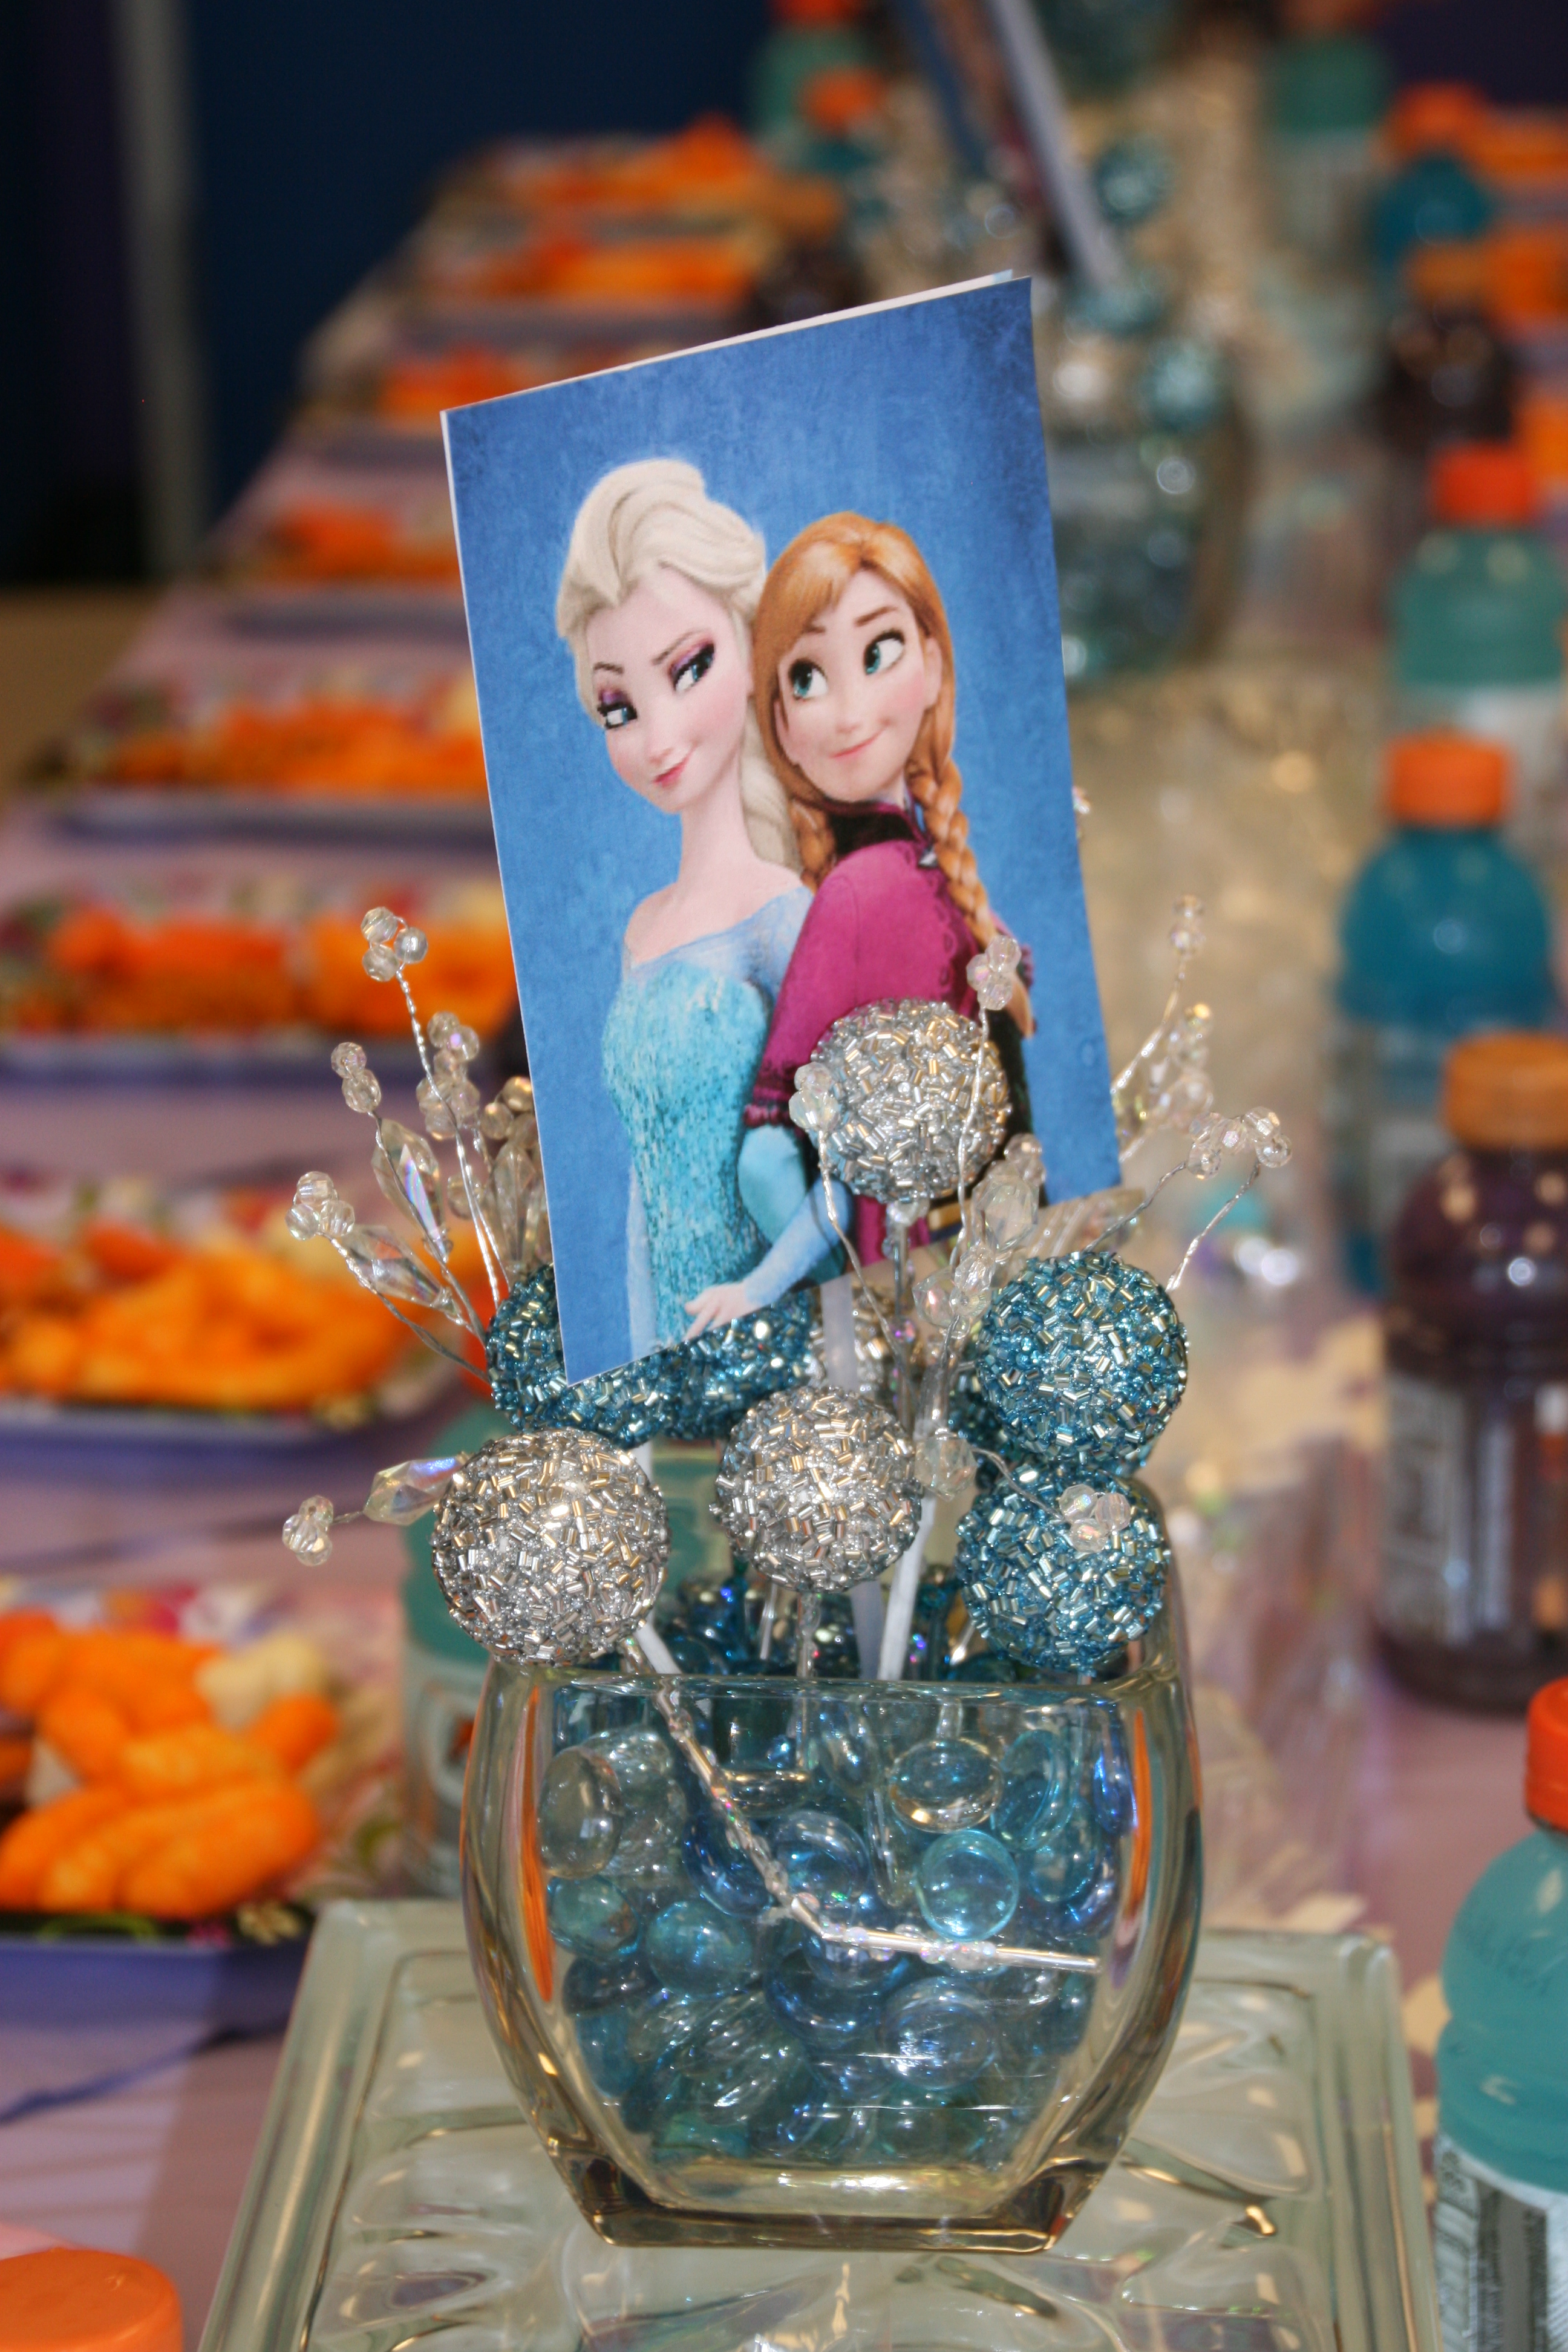
I printed on white cardstock pictures of Elsa & Anna from the internet & glued them back to back with a glow stick in between.
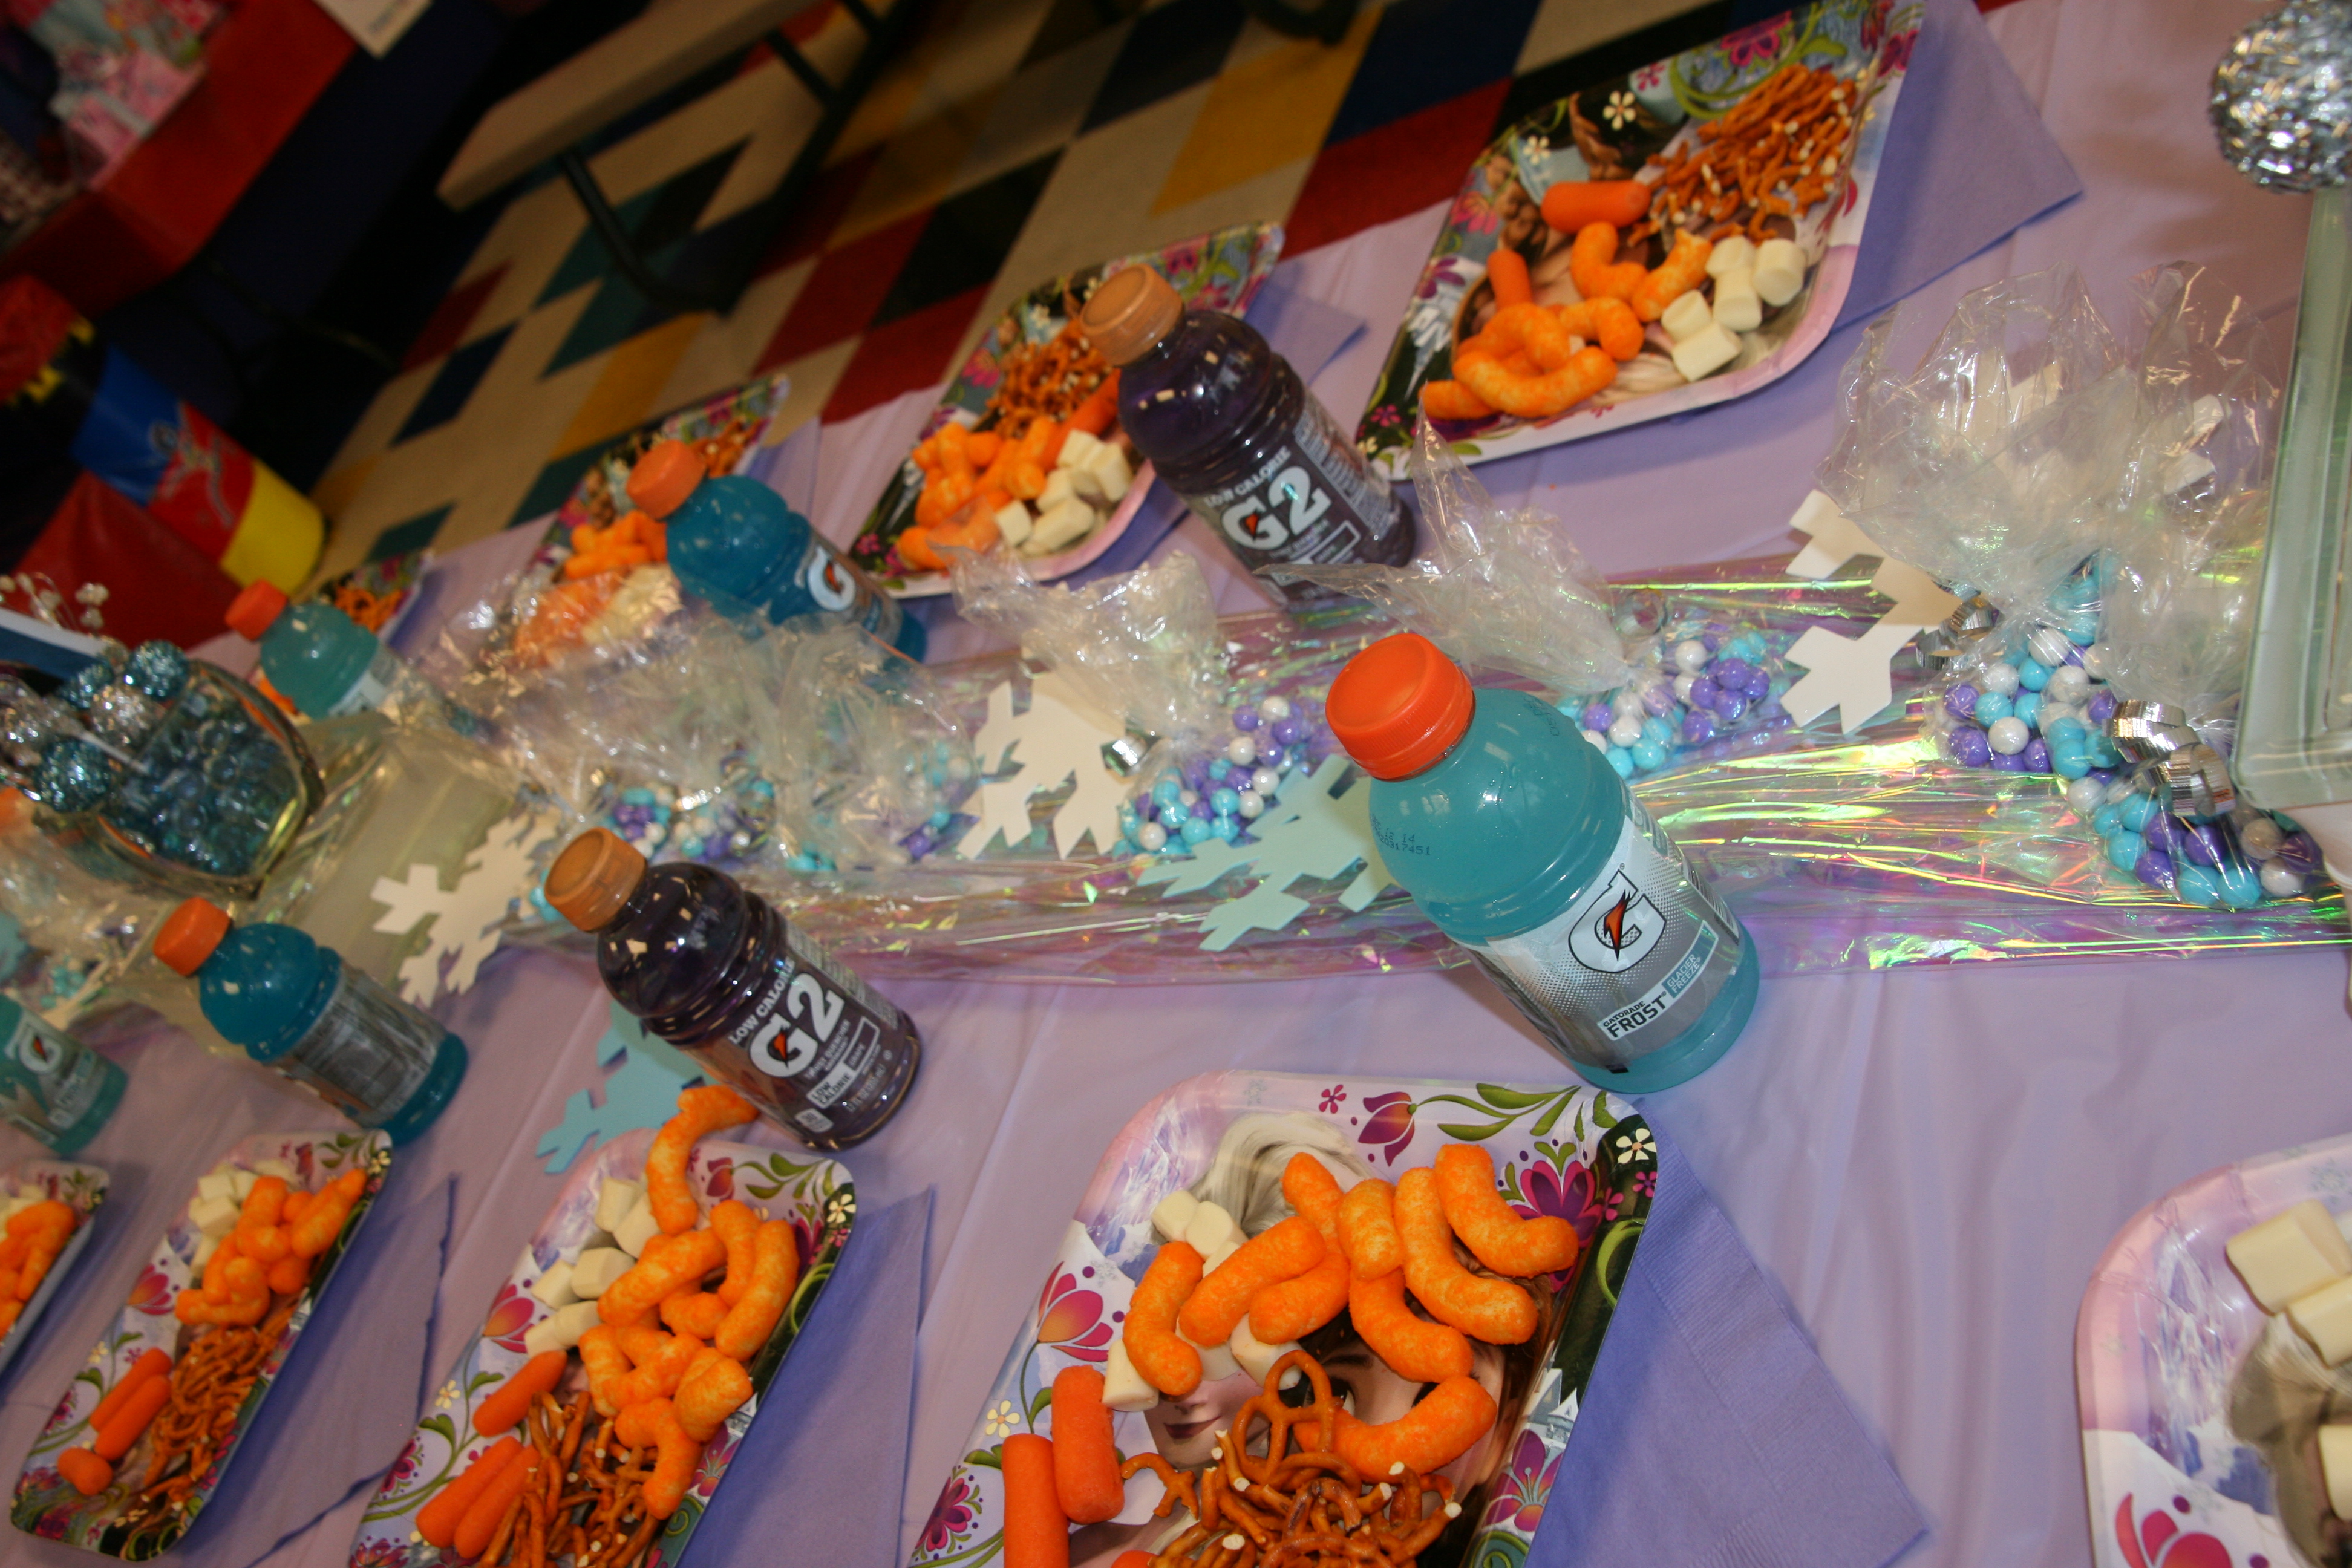

I ran iridescent cellophane down the center of the table, with purple & blue glow sticks underneath. Different shades of blue & white foam snowflakes were placed on top of the cellophane. I combined blue, purple, and white Sixlets candy balls in clear sandwich baggies, tied with silver curling ribbon, and scattered them with the snowflakes.

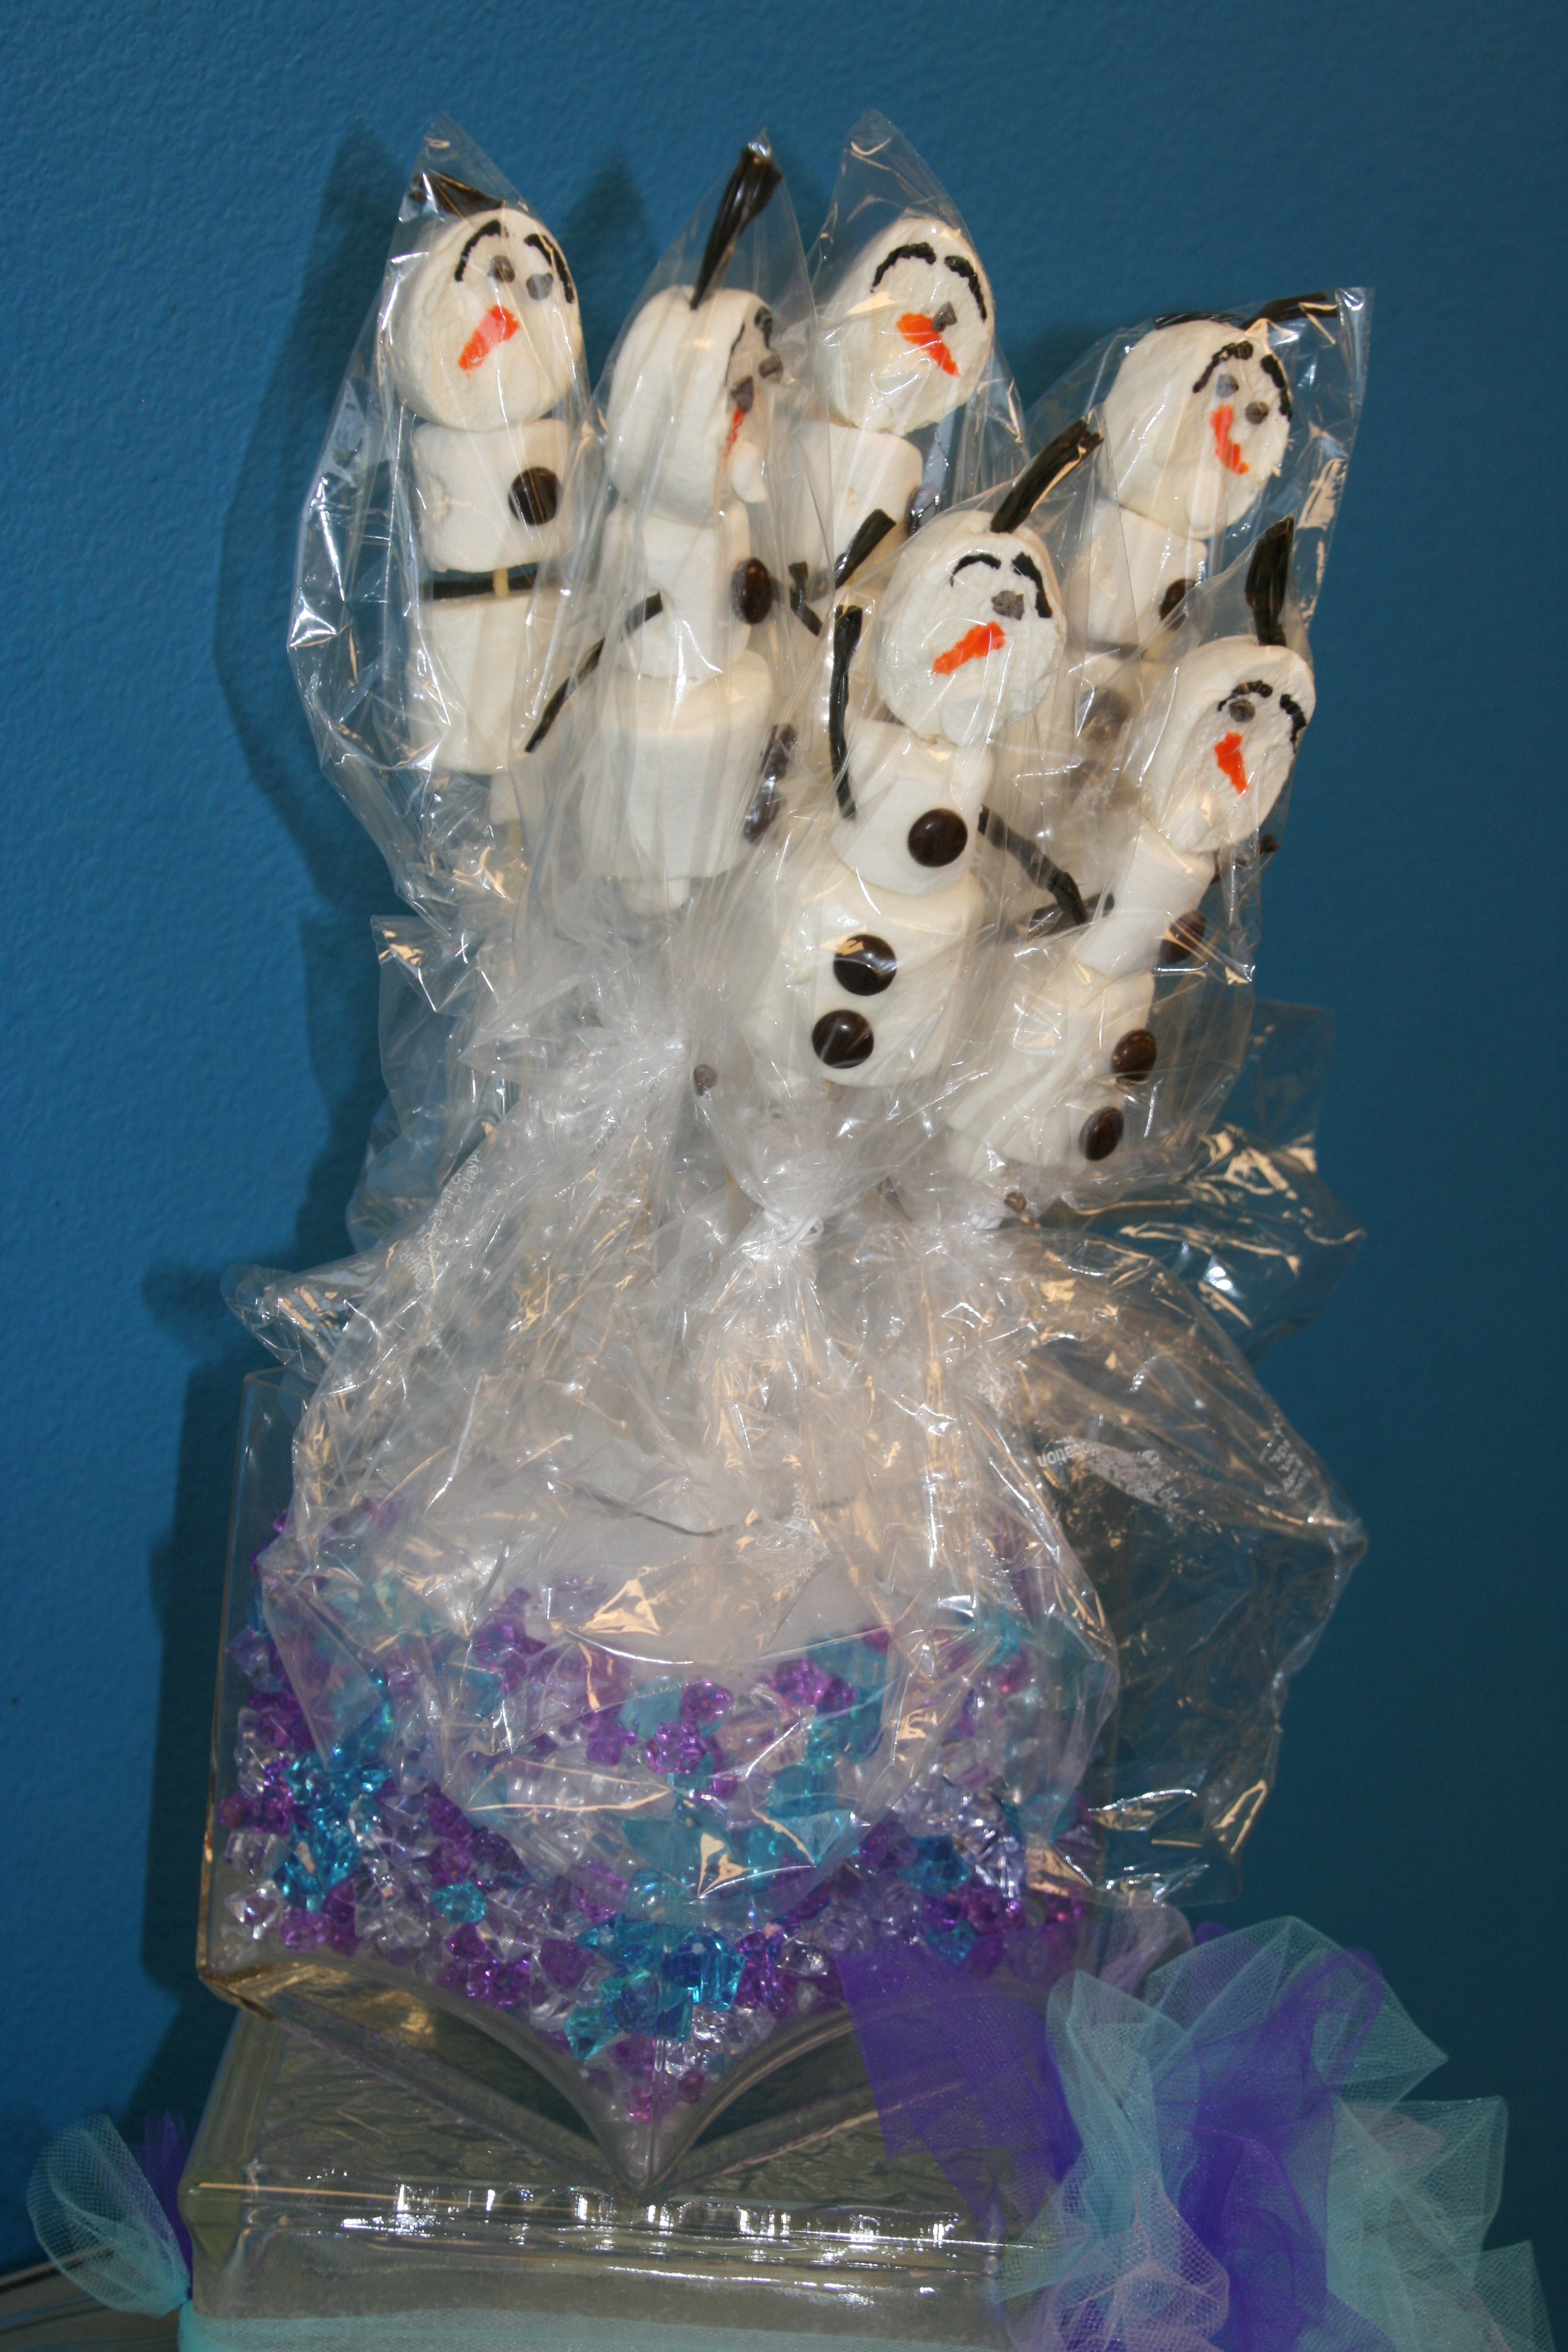
I made “Olaf” snowmen sticks, which I featured in a previous post on this blog. I covered each stick with a clear plastic bag and stuck them in styrofoam cubes & flat pieces for decor. These also were used as part of the party favors.

Party favor bags in varying shades of blue & white with “FROZEN” stickers, and snowflake name tags.

The snacks were carrots, Cheetos, cheese puffs, pretzels, and string cheese cut into cubes. These were indicative of Olaf’s noses, ice blocks, and Sphen”s antlers. The kids drank blue & purple Gatorade.
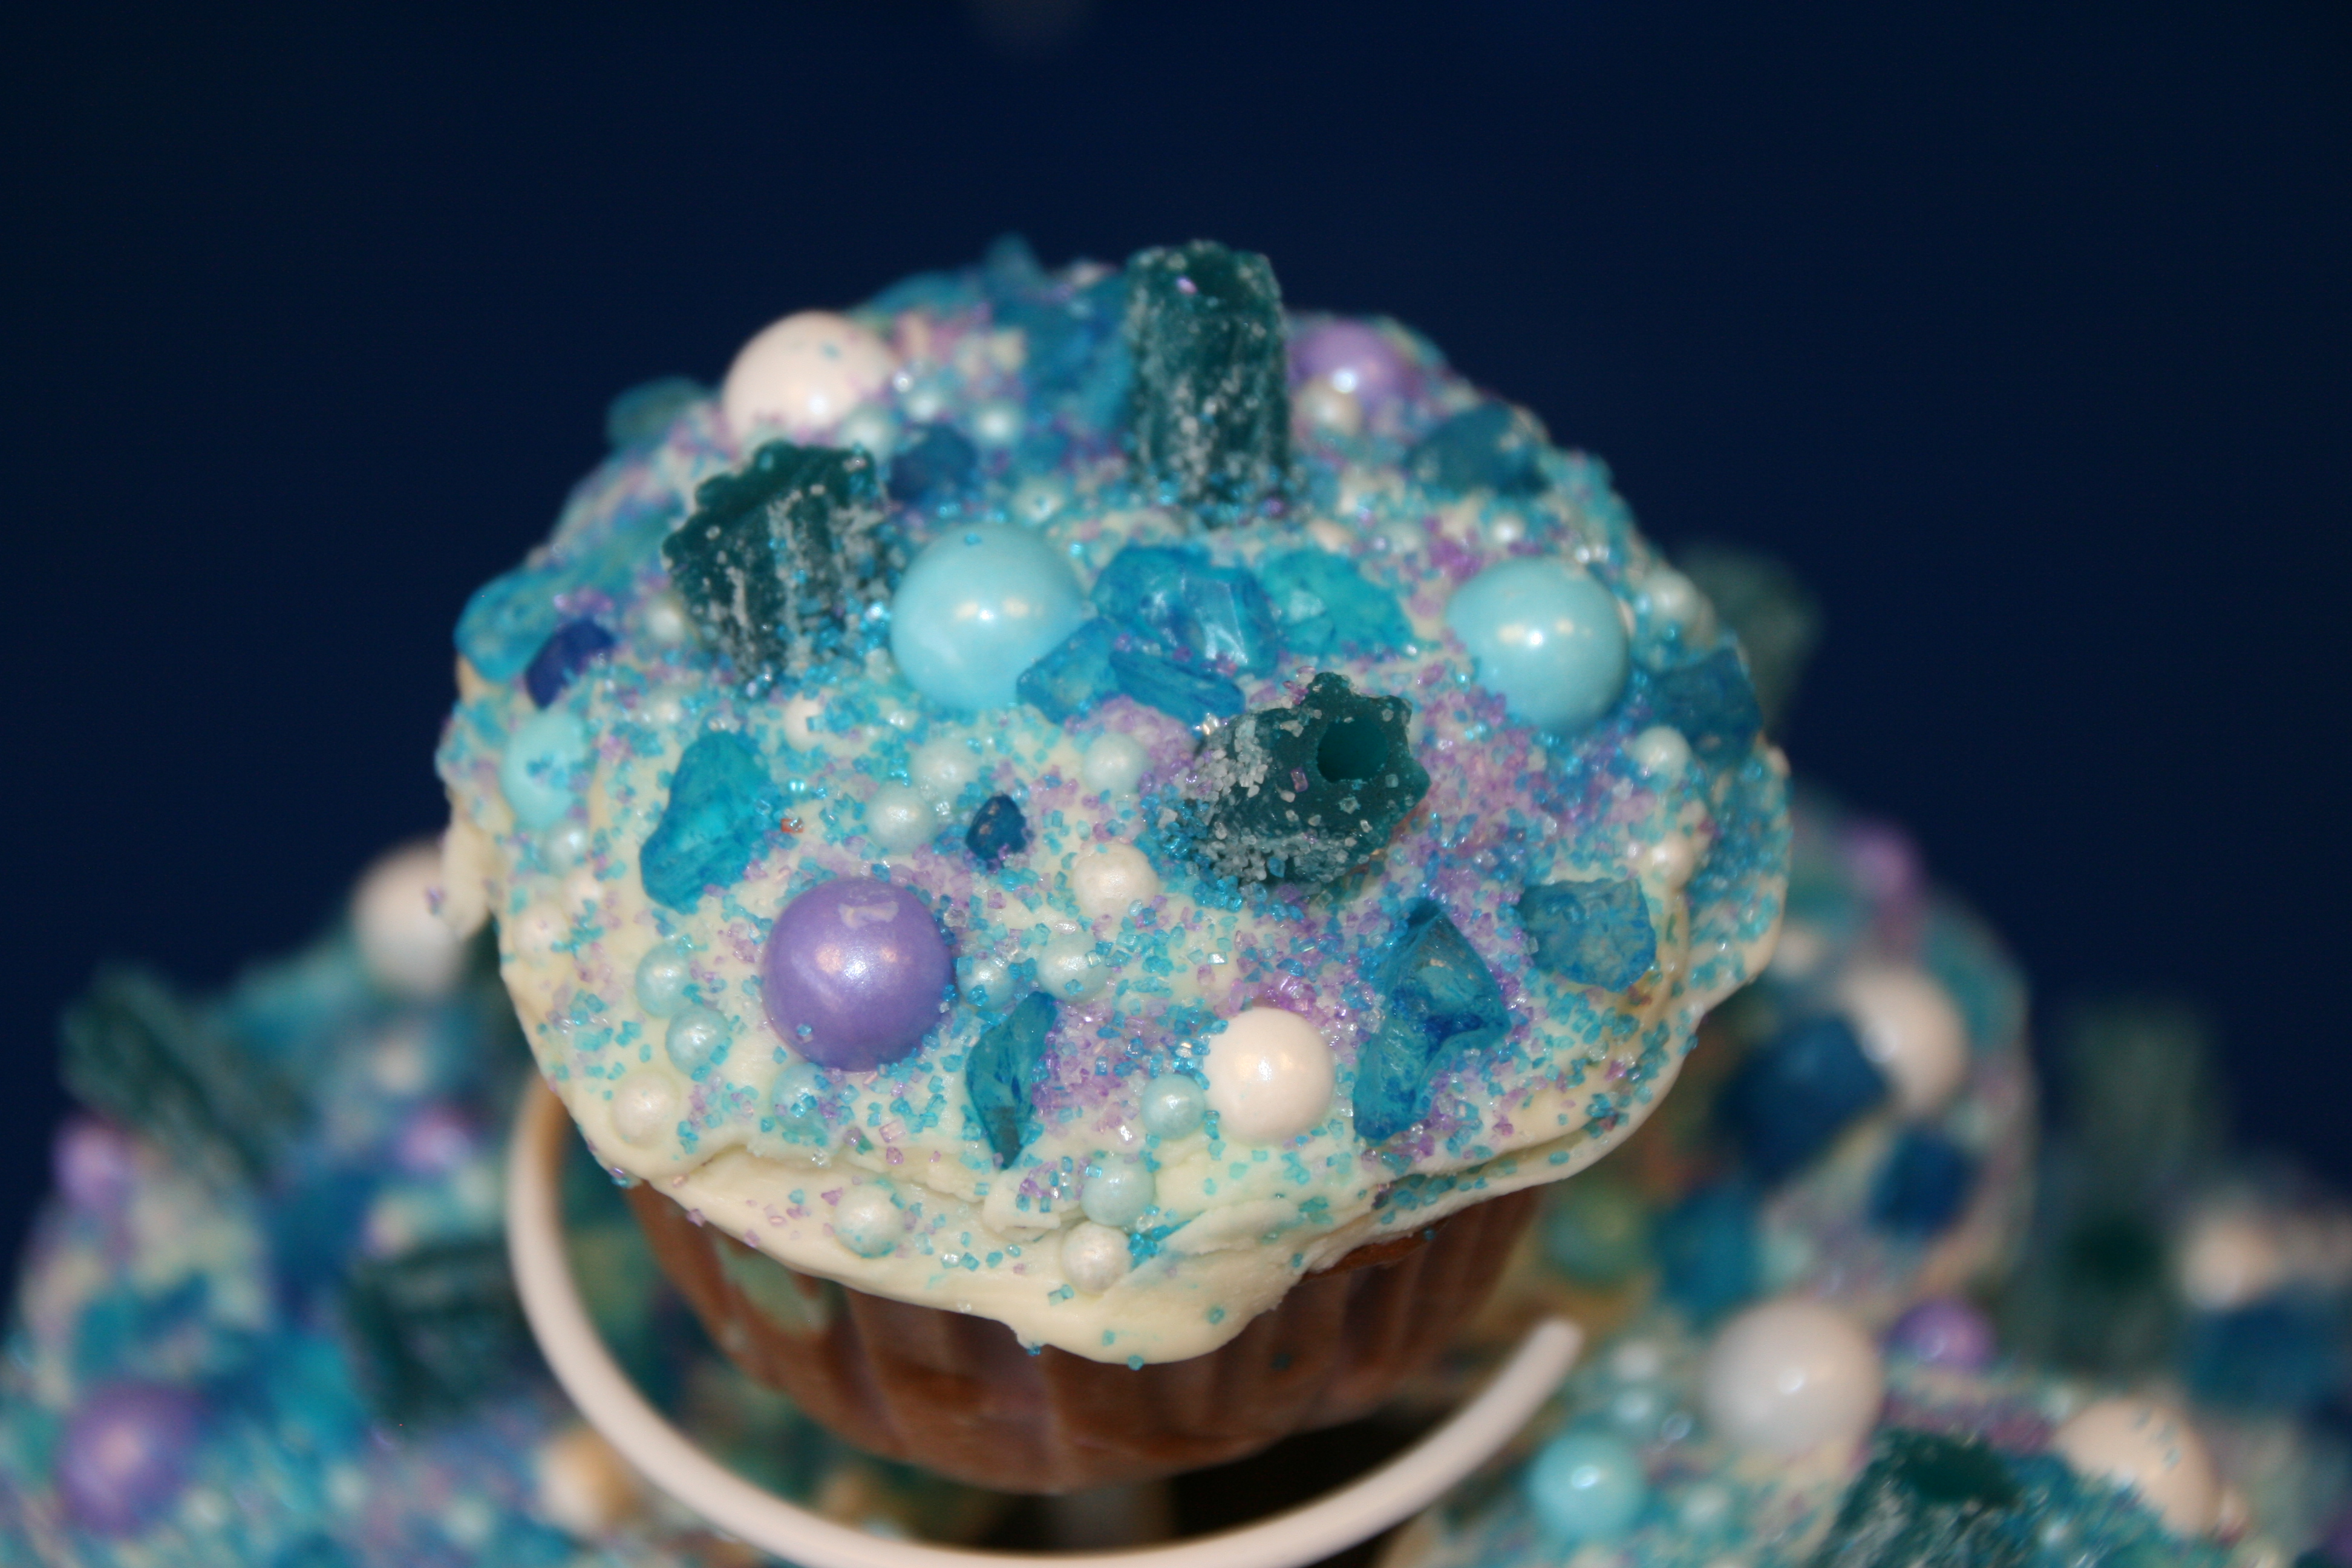
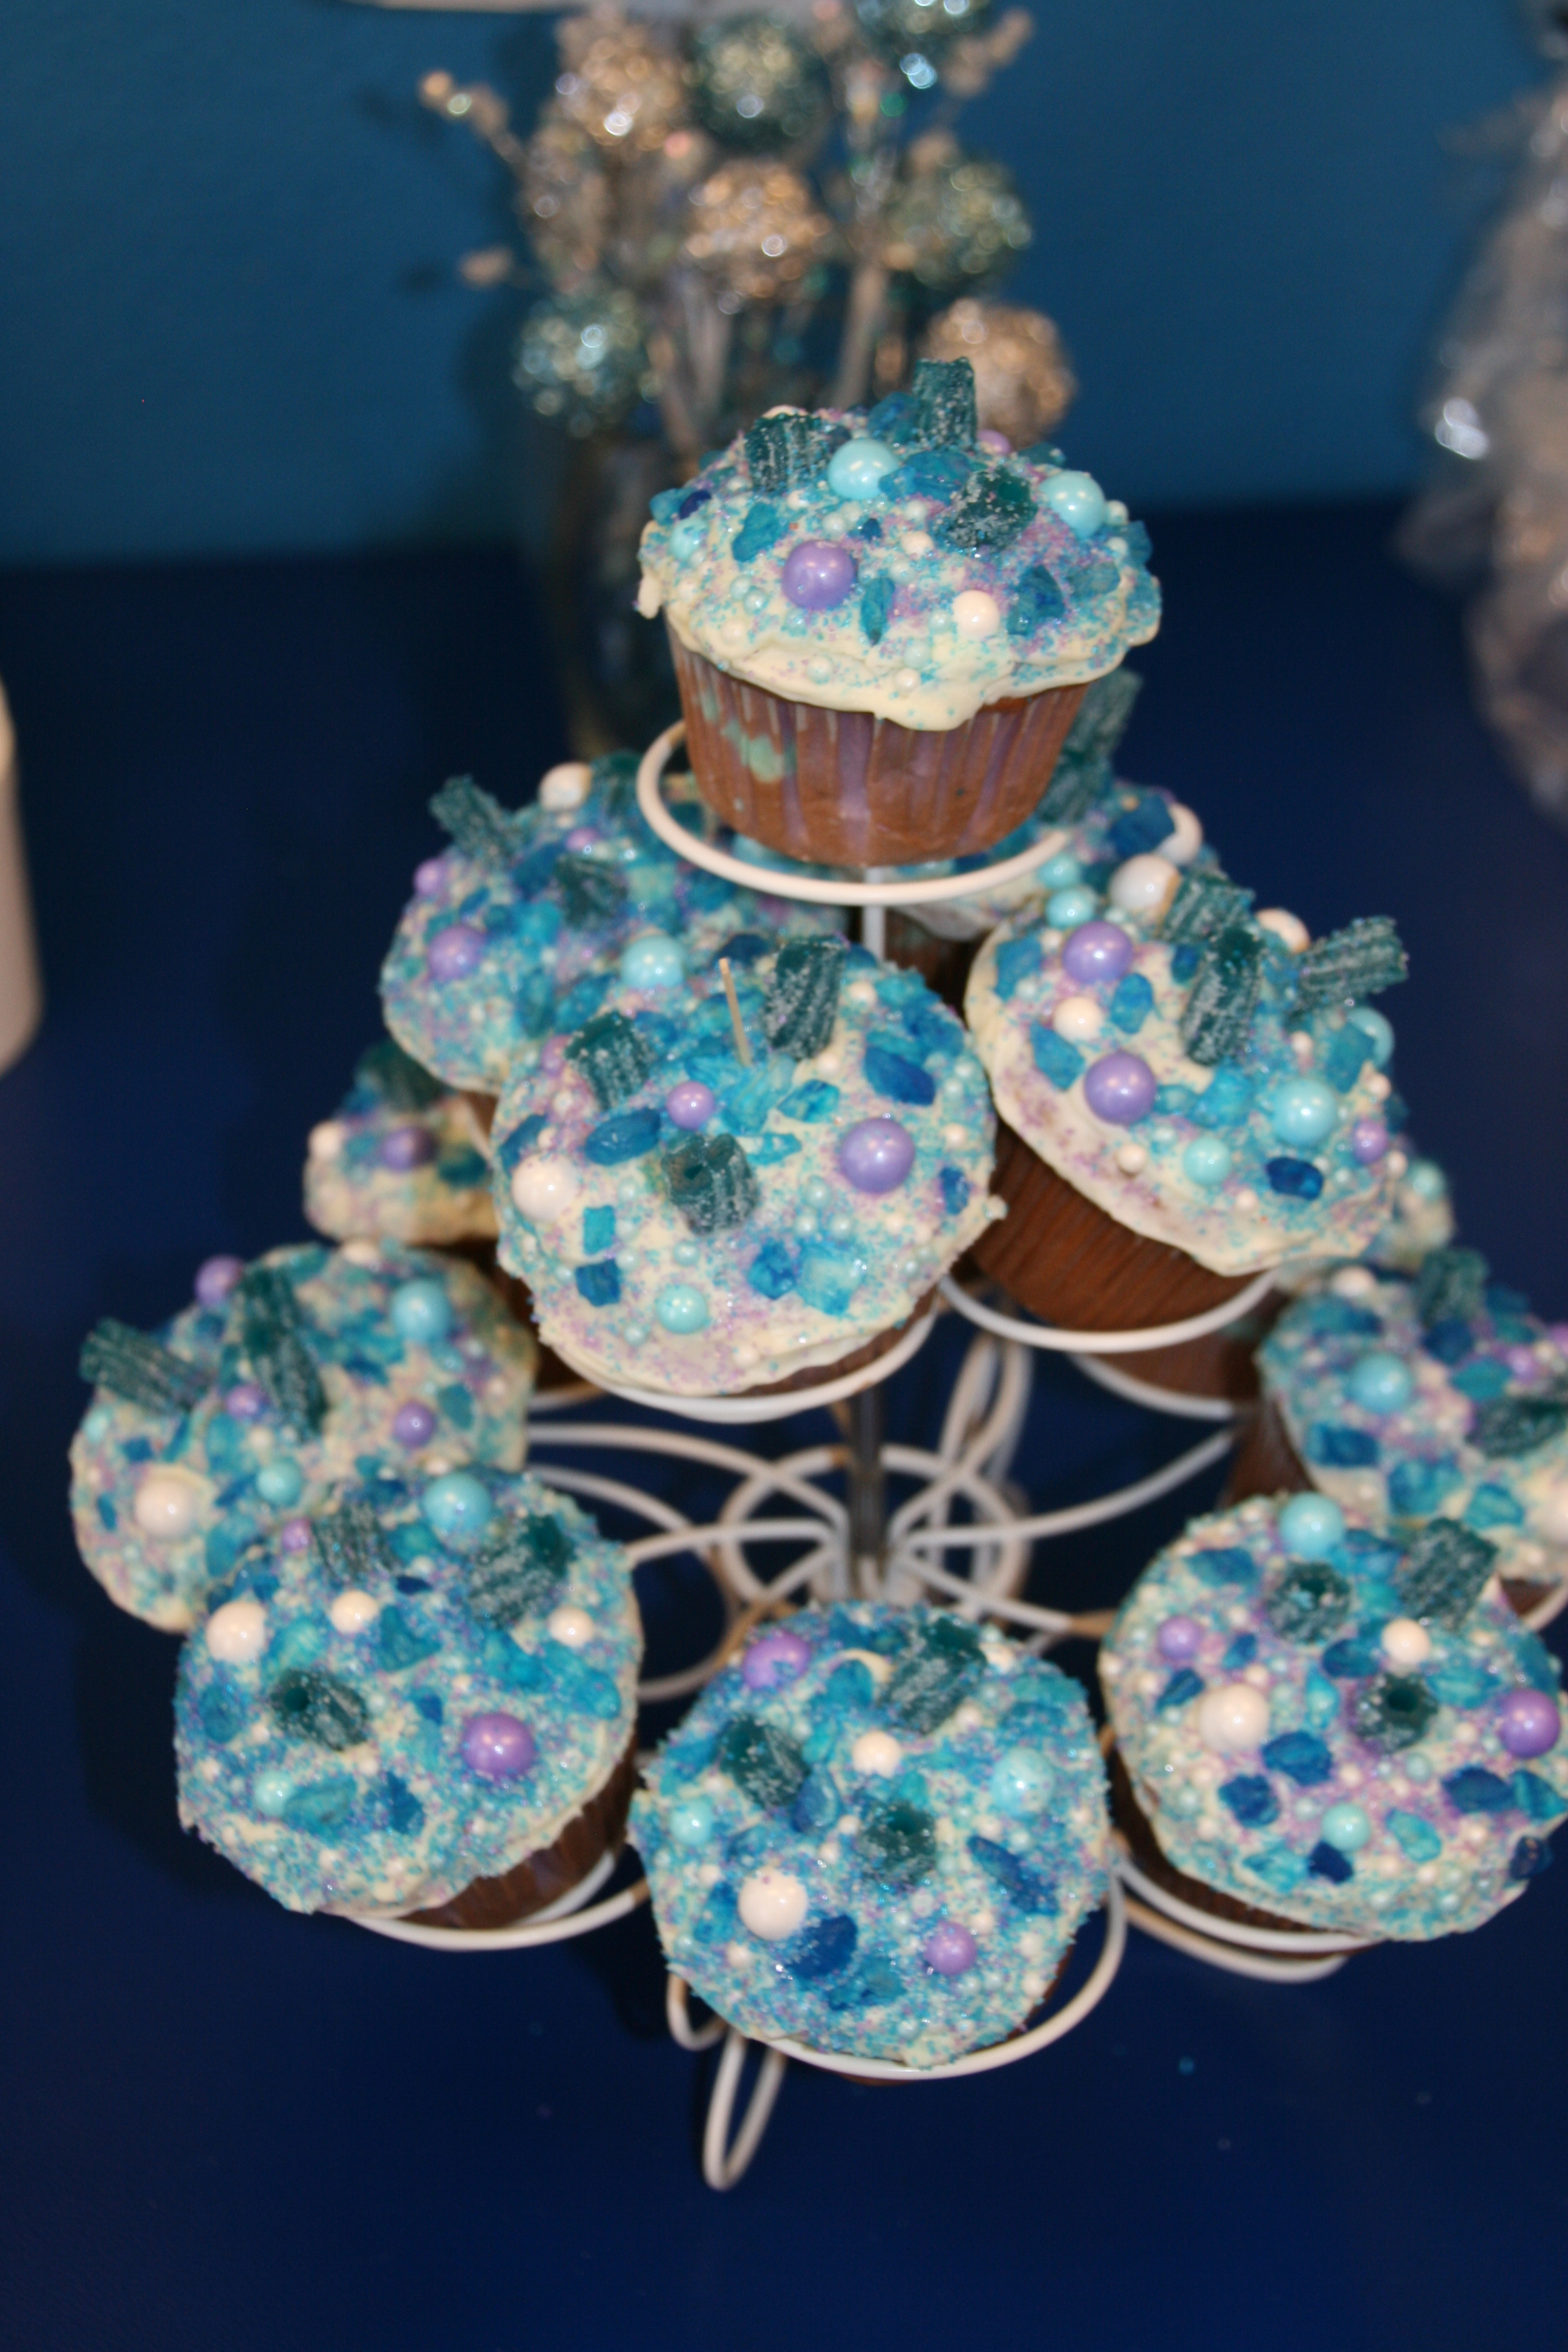
The cupcakes were blue & purple swirl. I mixed food coloring into the cake batter. I topped the cupcakes with vanilla frosting and a variety of candies to make them look like ice. Candies included cut sour blue licorice, Sixlets, small blue & white pearls, rock candy topping, and blue & purple sprinkles.
It was a “FROZEN” fantastic time!
Happy birthday party planning…
“Wonder what I will come up with next”…
Have you ever wanted to have a pillow in a certain fabric, but couldn’t find exactly what you were wanting? This happens to me ALL the time! I then solve the problem by making my own pillow, bed skirt, etc. Here, I used fun zebra print curtains to make pillows for my craft room.

I started with pillow forms, curtains, ribbon & a bead strip.


I took the plastic embellishments that look like “teeth” off of the curtains to use on a pillow.

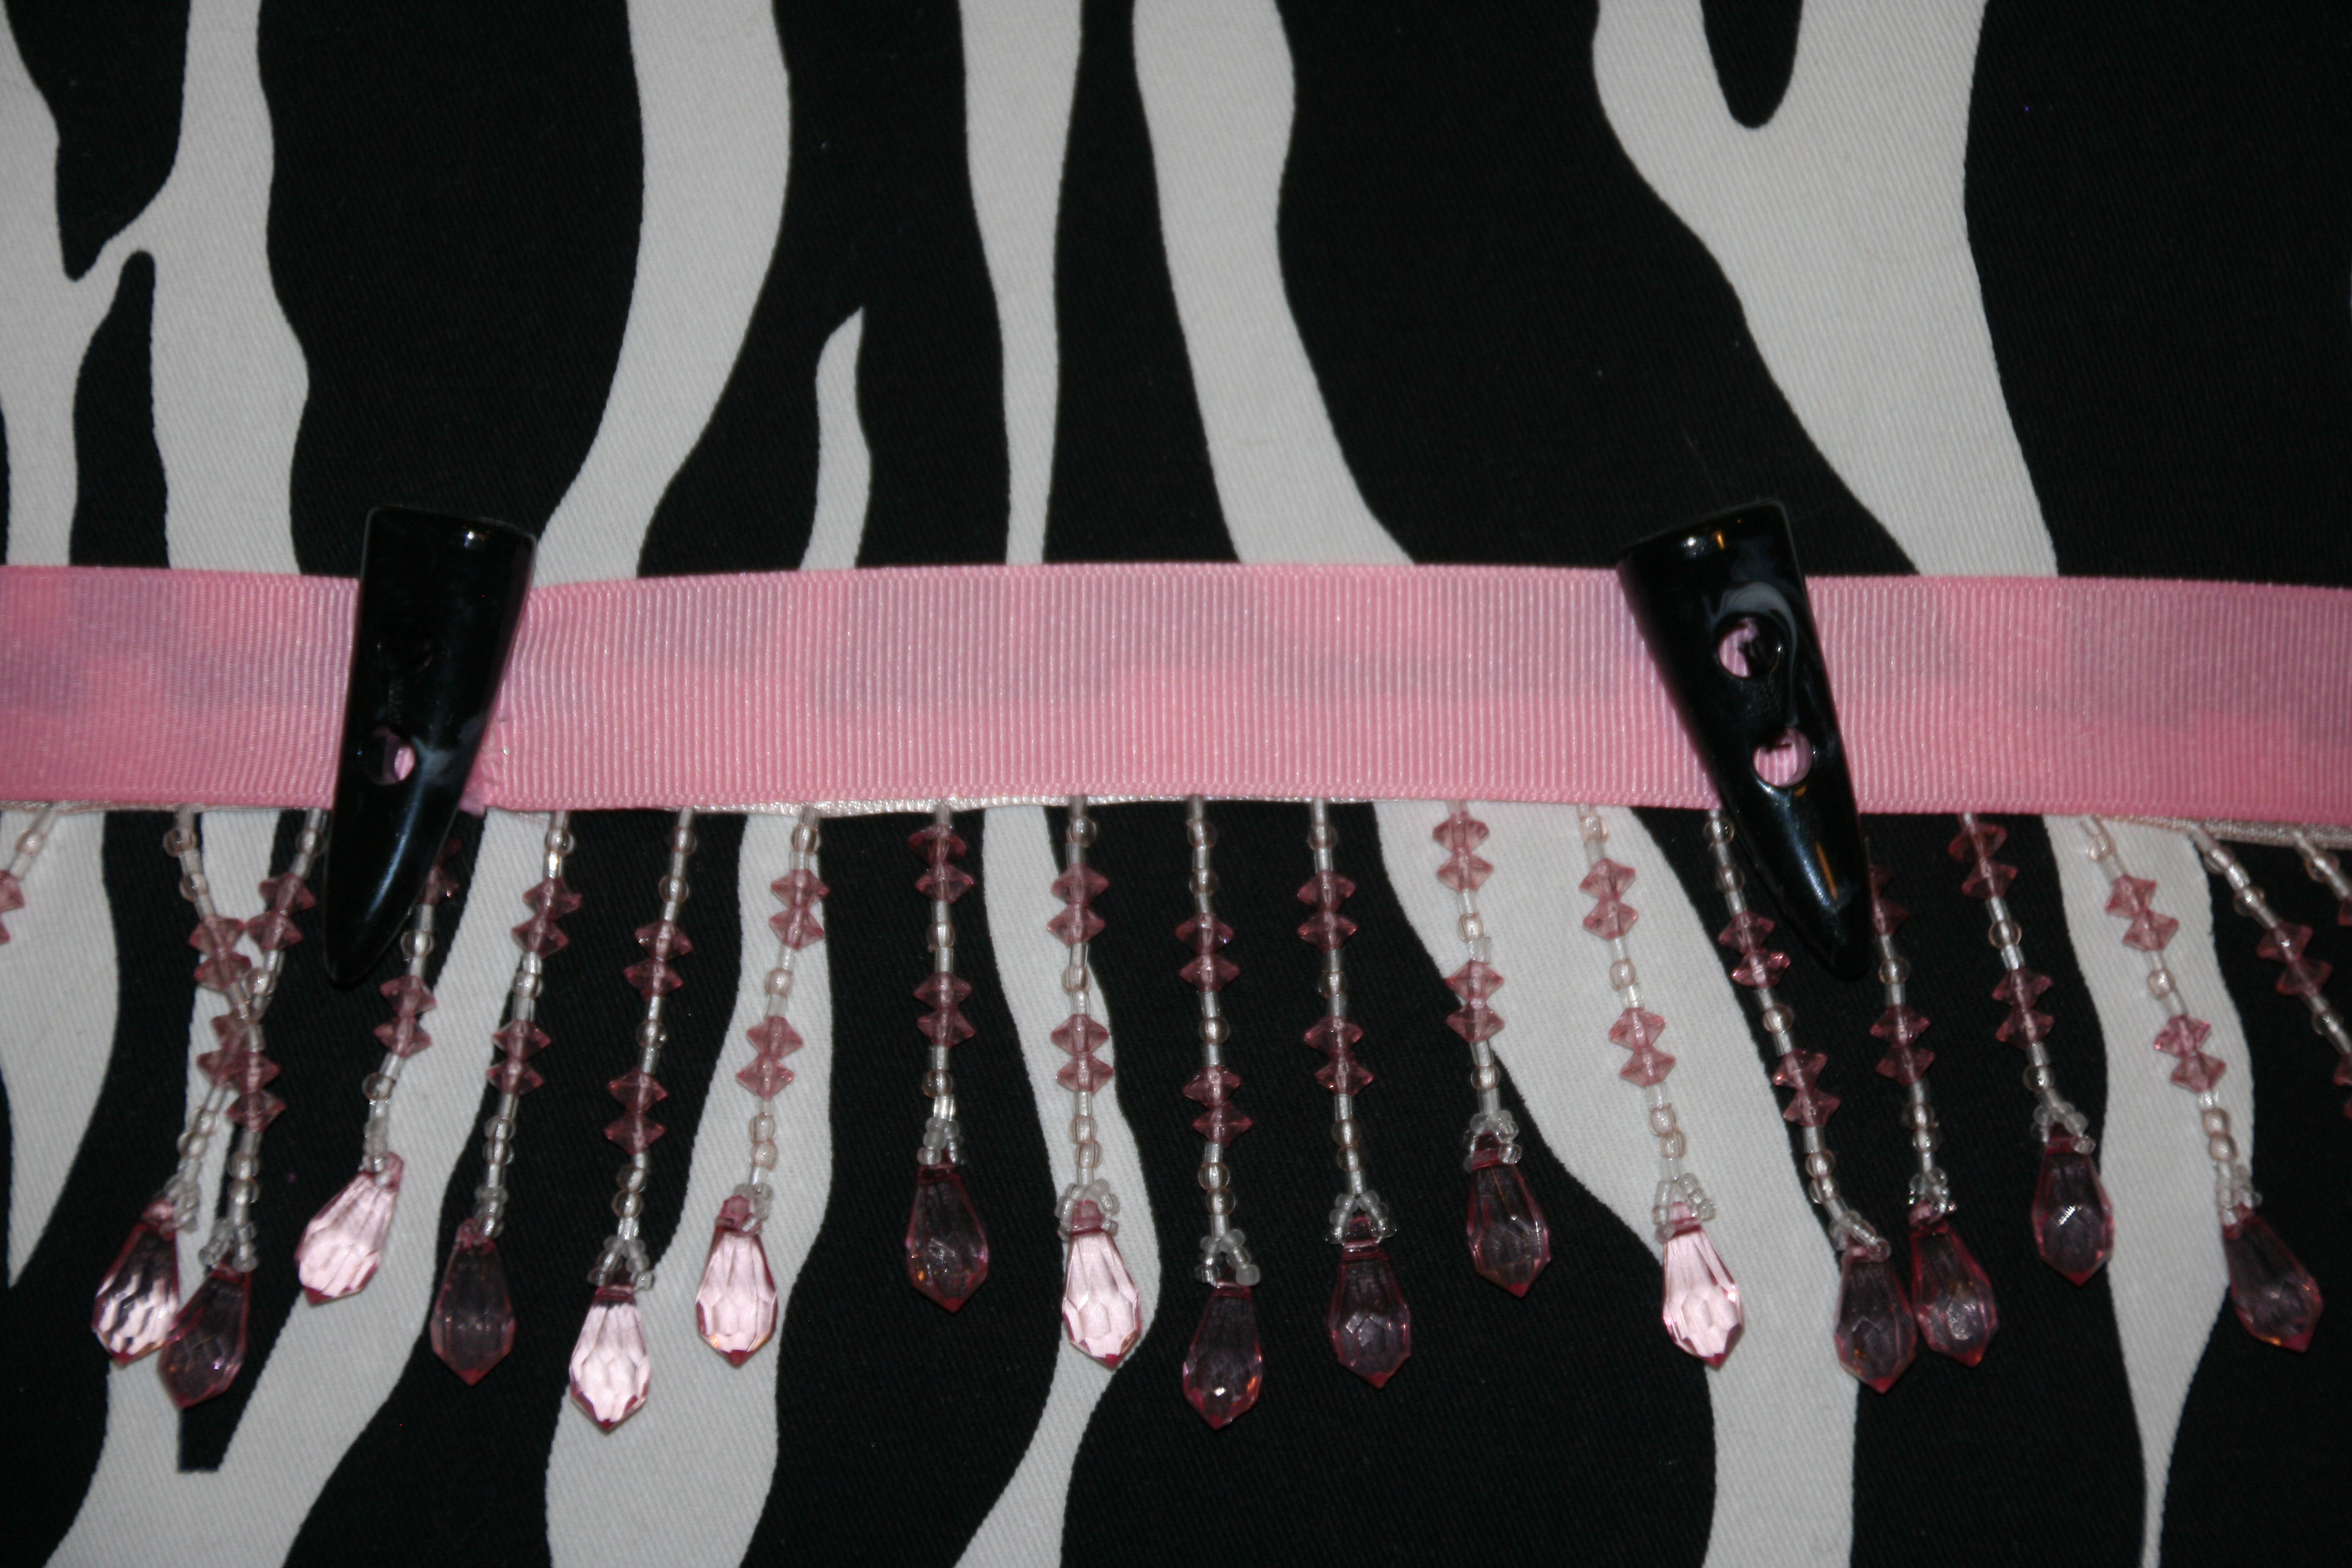
I sewed the square & stuffed it with the form. I then added a row of strung beads, covered it with pink grogain ribbon (the same ribbon that is used as the curtain tie backs) and hand sewed on the “teeth”.


On this pillow I created a non traditional bow with the same pink ribbon and added a buckle with bling.


This tube pillow was so simple to create! Once the fabric form was sewed, I inserted the form and closed the ends with a pink ribbon bow.
I got exactly what I wanted AND they were so fun to make!
Happy sewing…
“Wonder what I will come up with next”…
I am in the process of planning a birthday party for my daughter. OF COURSE, she wants a FROZEN birthday party! I have been having a BLAST thinking of all the creative decorating I can do for the party. I made these “Olaf” marshmellow snowmen to use as decor AND as a treat for the kids.
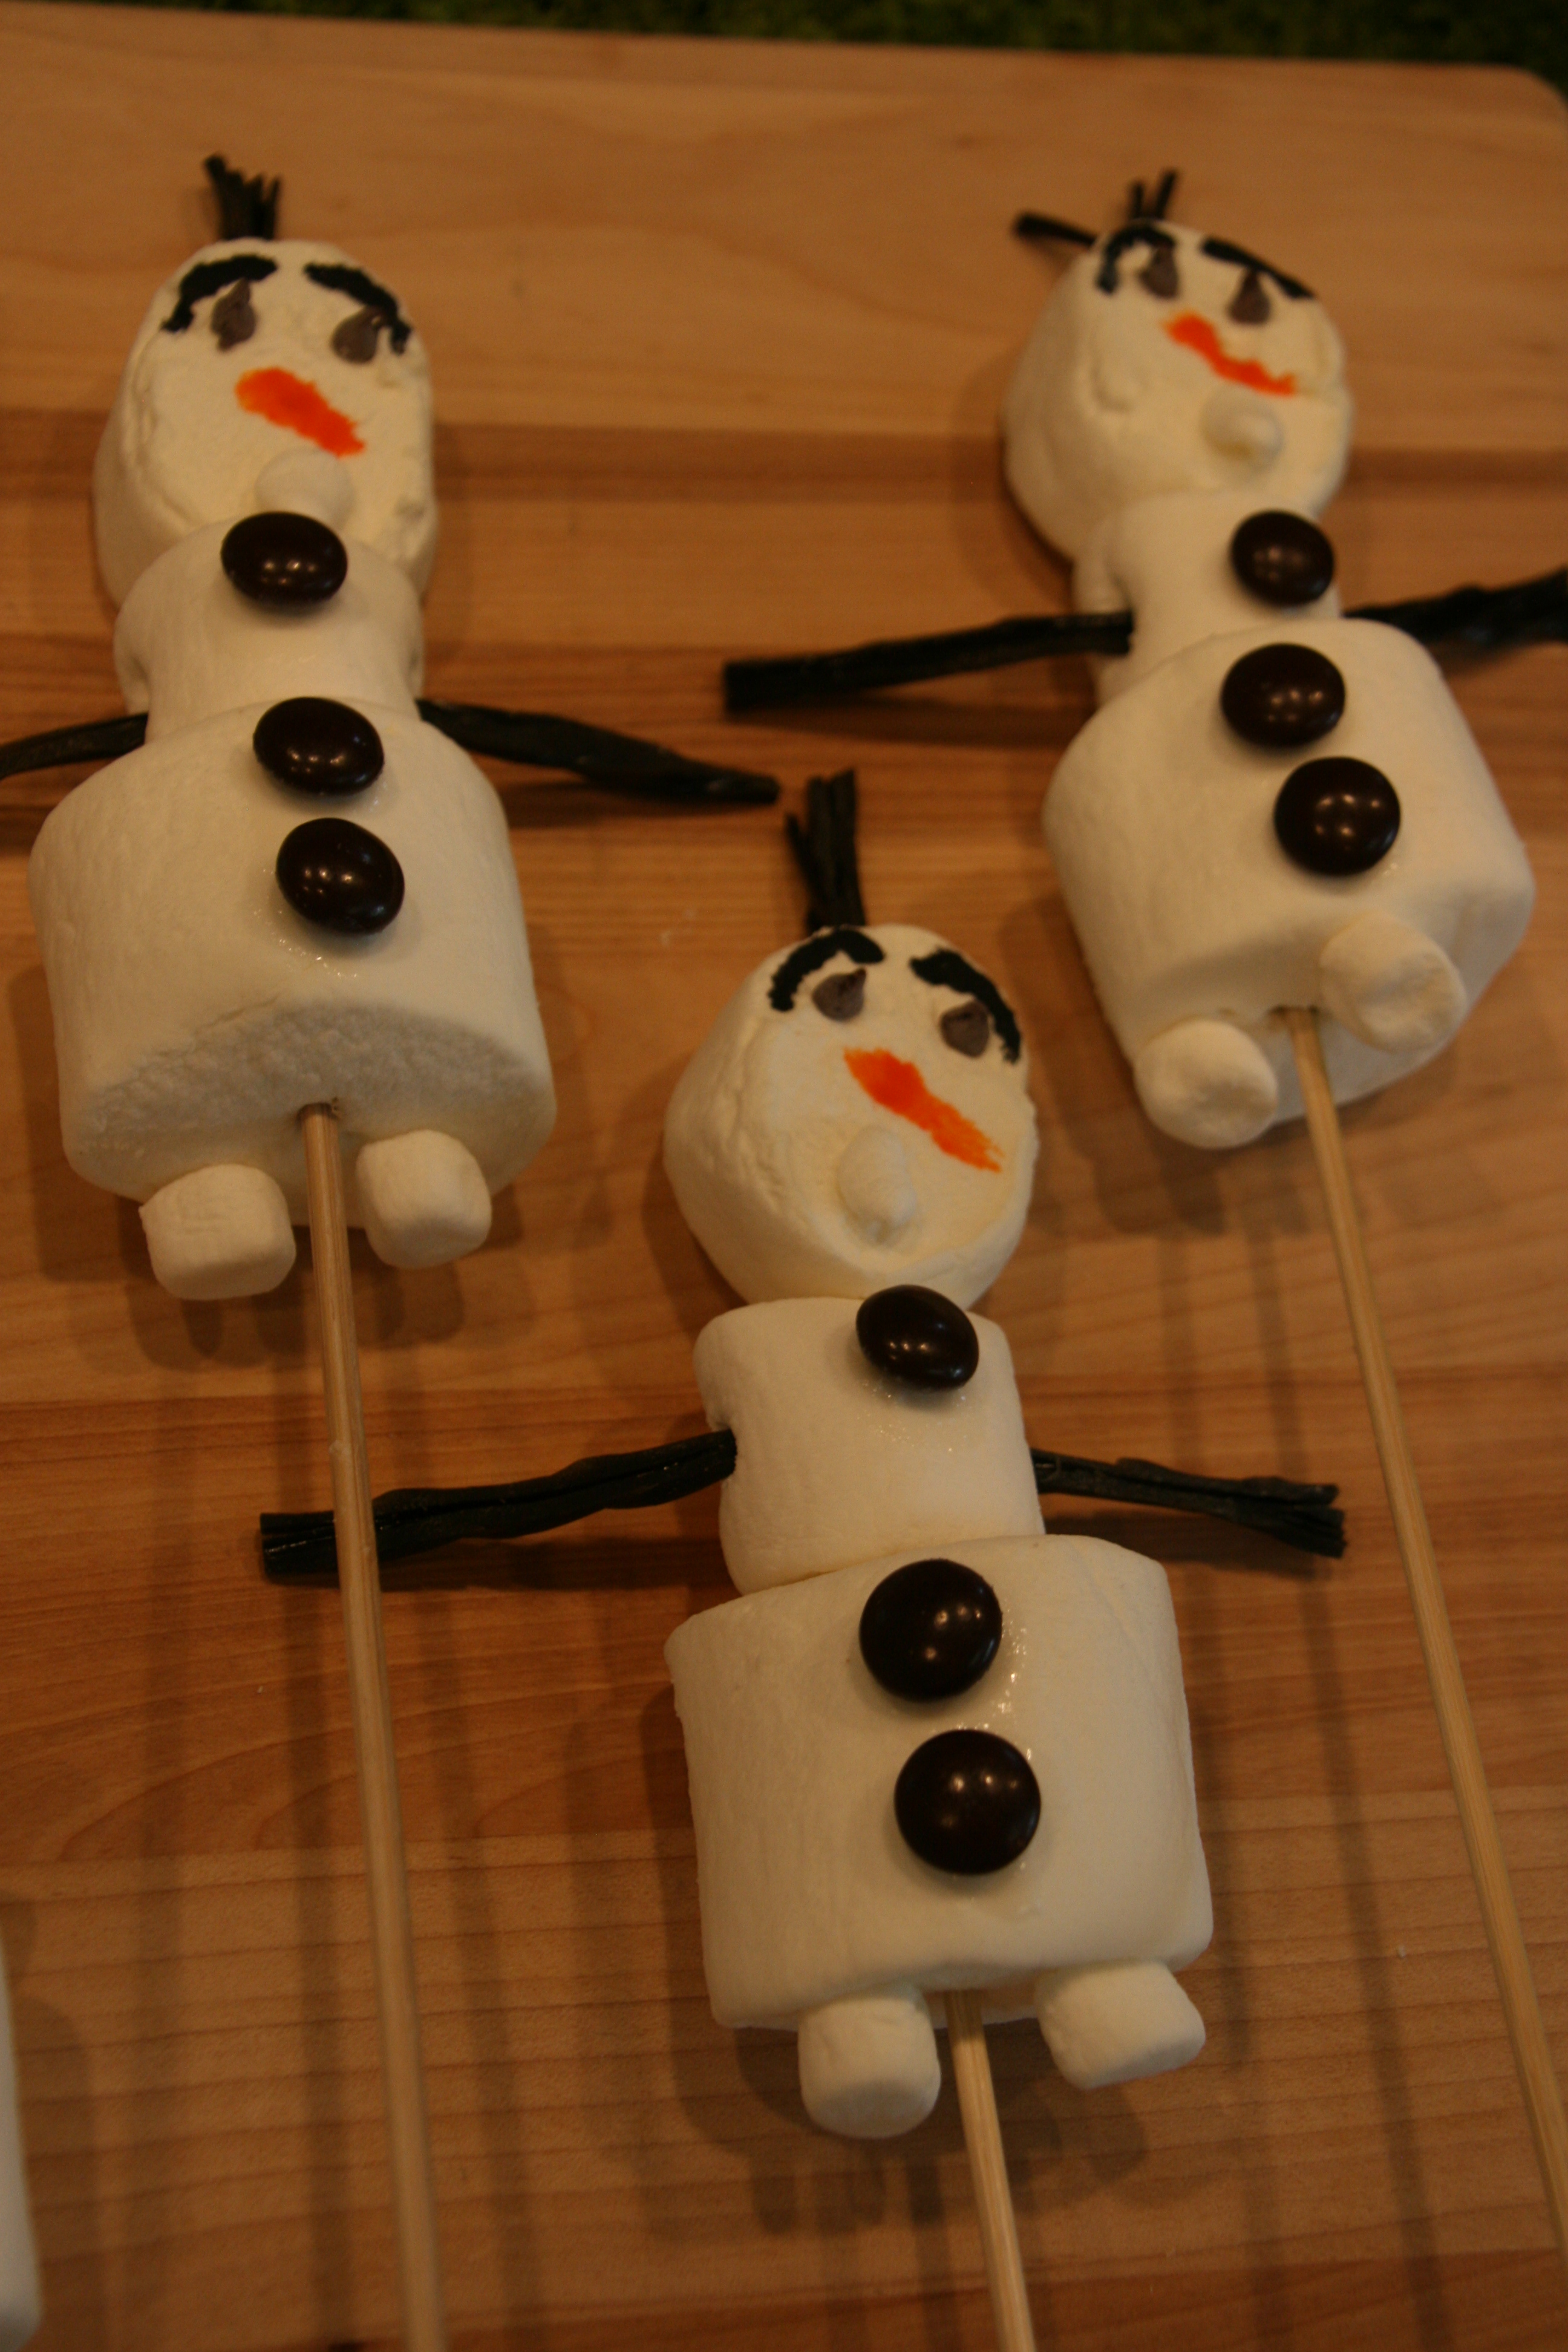
I used wood skewers, and 3 sizes of marshmellows – jumbo, large, and mini. I cut the jumbo marshmellows in half for the head. I attached brown MnM’s, mini chocolate chips, and the marshmellow feet & tooth using cookie icing. I also used orange & black cookie icing for the nose & eye brows.

I made holes in the head and body to attach black licorice hair & arms. I will wrap them individually in clear plastic and stand them in styrofoam at the party…pictures to follow from the actual party.
Too cute!
Happy creating…
“Wonder what I will come up with next”…
My Mom makes the most AMAZING banana bread! I have learned how to make it and thought you might like to try it too. The key to tasty banana bread is to use the most ripe bananas you can get. If they are mushy and almost molding on the skin, these are PERFECTLY SWEET. AND…the very first step when making this scrumptious treat is to mash the bananas before doing anything else in the baking process. Mash 3-4 bananas to smitherines and let them sit on a plate while you complete everything else in the process. The sweet sugars will release in the pile of mash!

Preheat the oven to 350 degrees
Combine the following ingredients: 2 1/2 C flour, 1 C sugar, 3 1/2 tsp baking powder, 3 TBS oil, 3/4 C milk, 1 egg. Mix these ingredients thoroughly. Now add the banana mash and mix again thoroughly. Pour into bread pan and bake for approximately 1 hour. DO NOT OVERBAKE. Keep testing with a toothpick and as soon as the toothpick is clean, pull the bread out of the oven. Place it on a rack away from the oven so it can cool quickly.
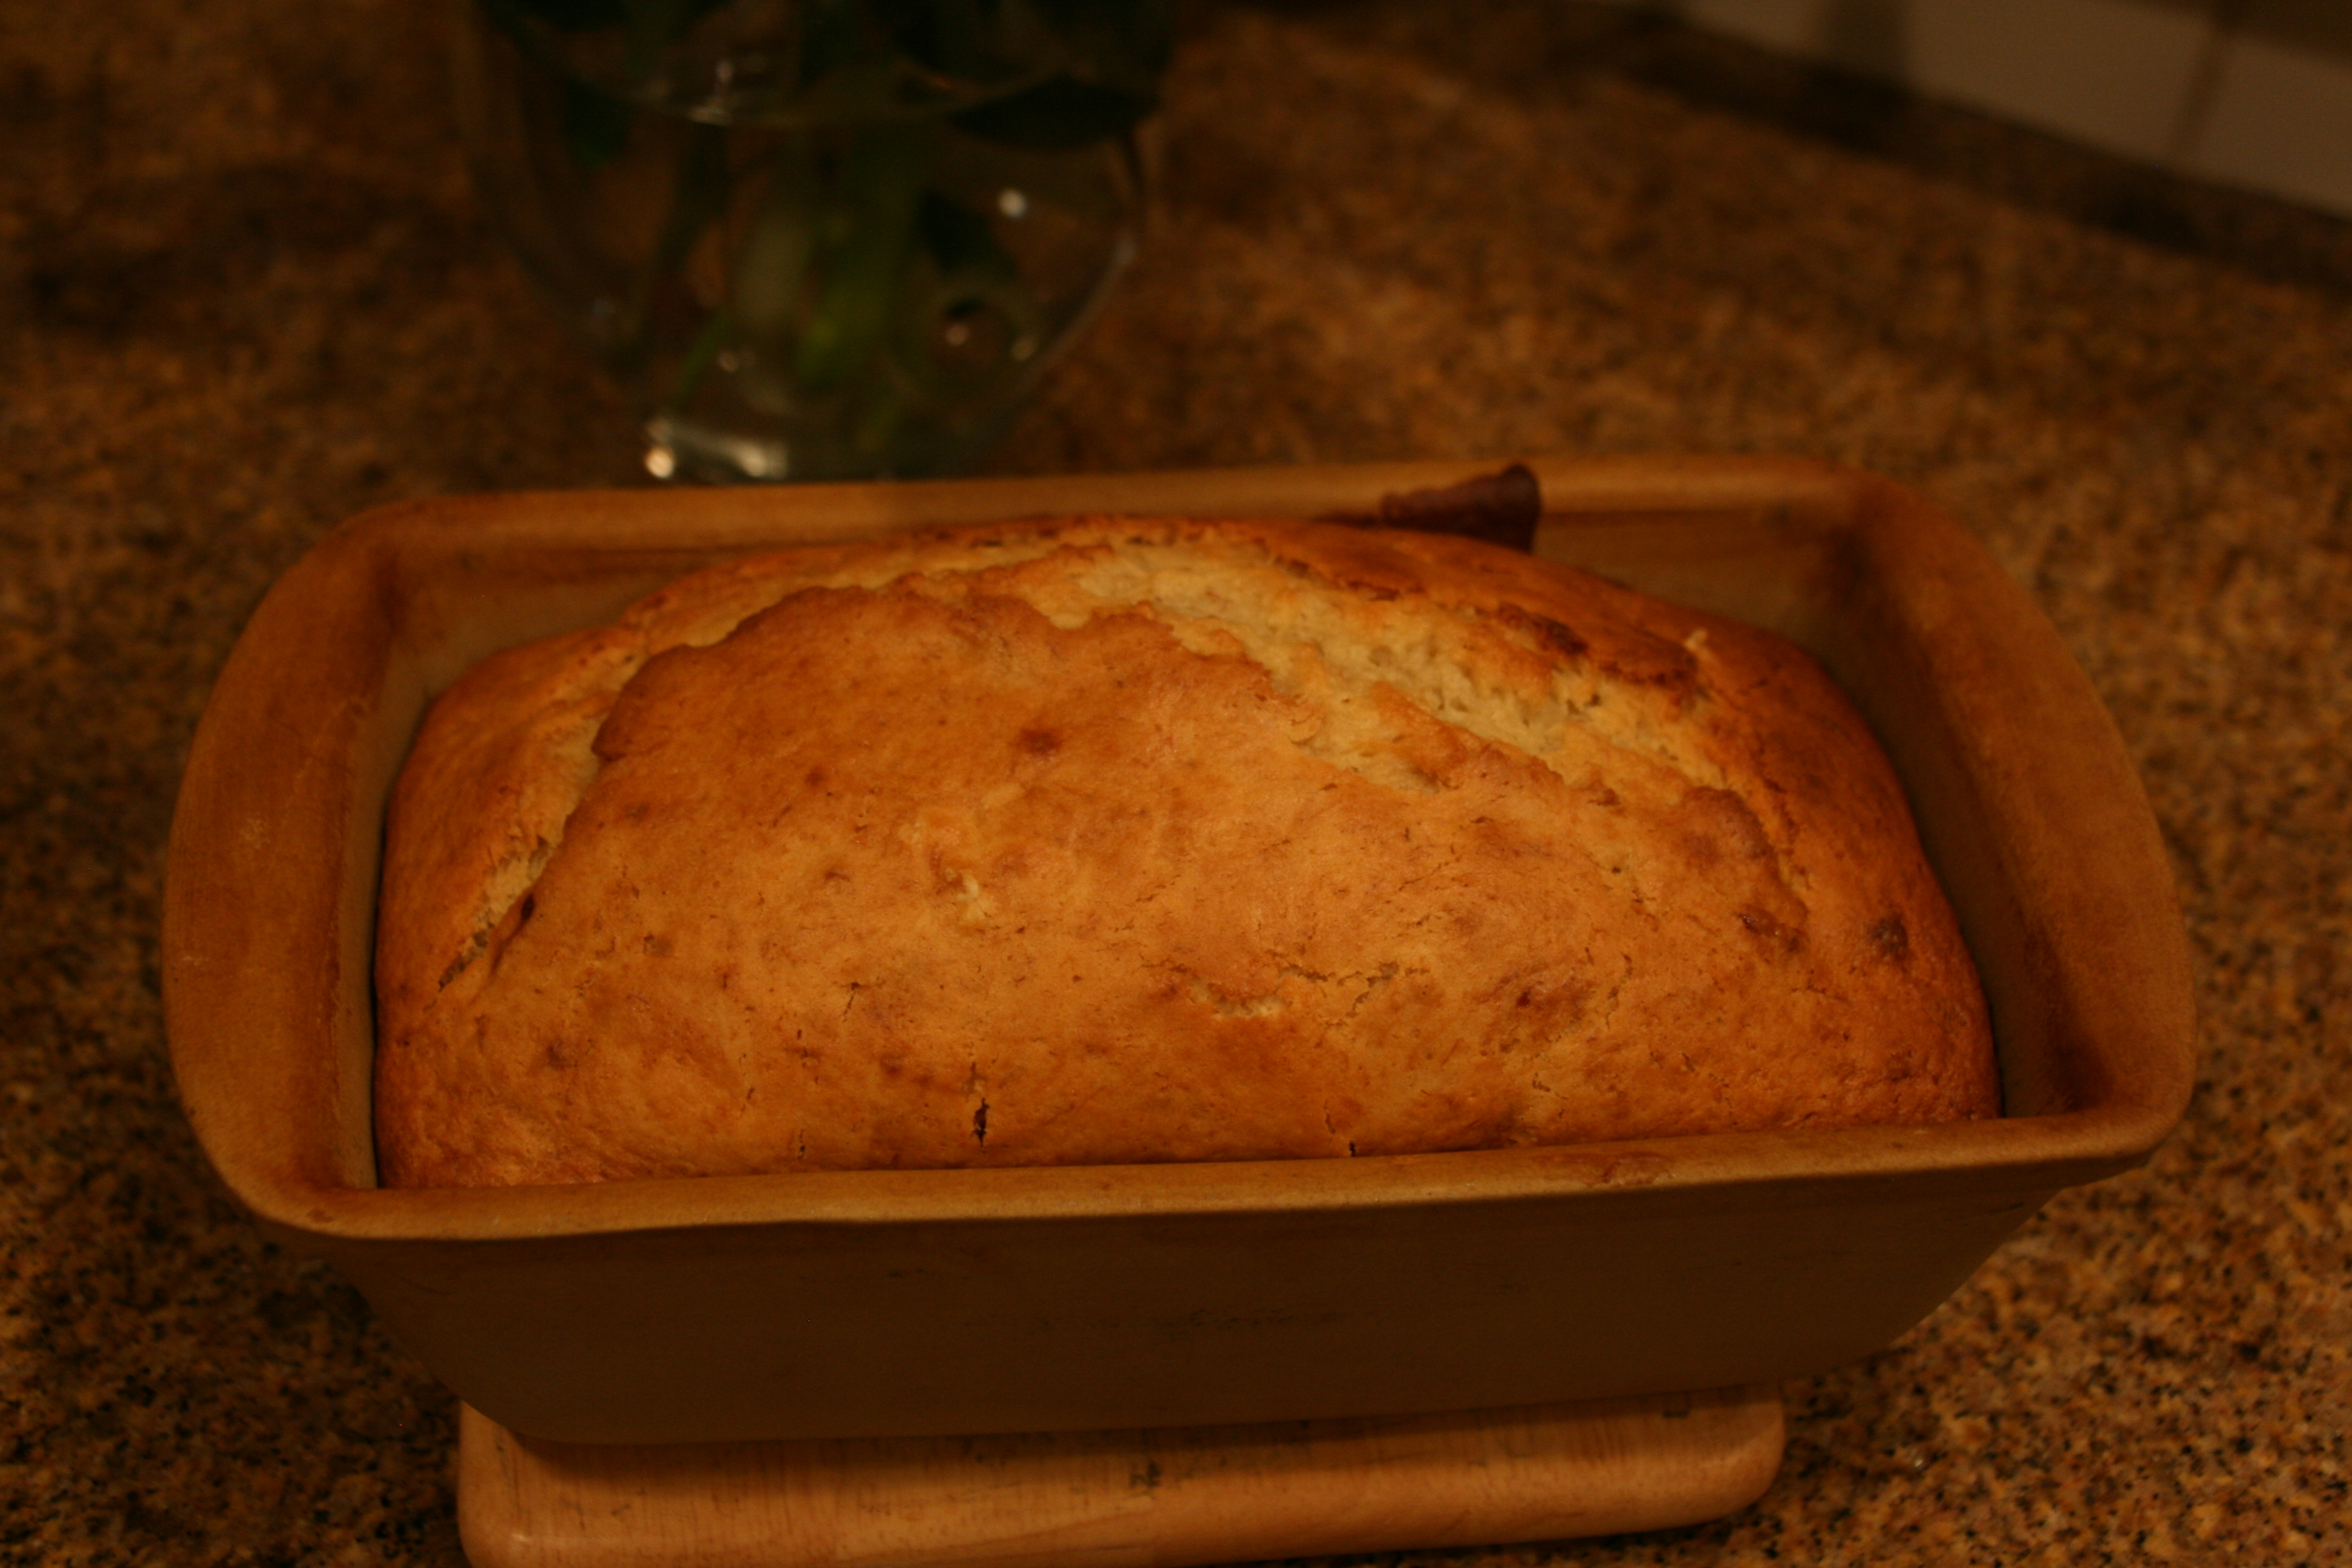
YUMMY!!! Enjoy!
Happy baking…
“Wonder what I will come up with next”…
I have to be honest…I never even knew water color pencils existed, until about 3 months ago! I heard about them and HAD to go buy some.

They draw just like a colored pencil, but smear like a water color when you add water with a paint brush. SO COOL!!!

Easy for kids to use…
Happy painting…
“Wonder what I will come up with next”…

Once I tied the ribbon onto the package, I tied a normal bow, then tied another. EASY and simple, yet it looks fancy!
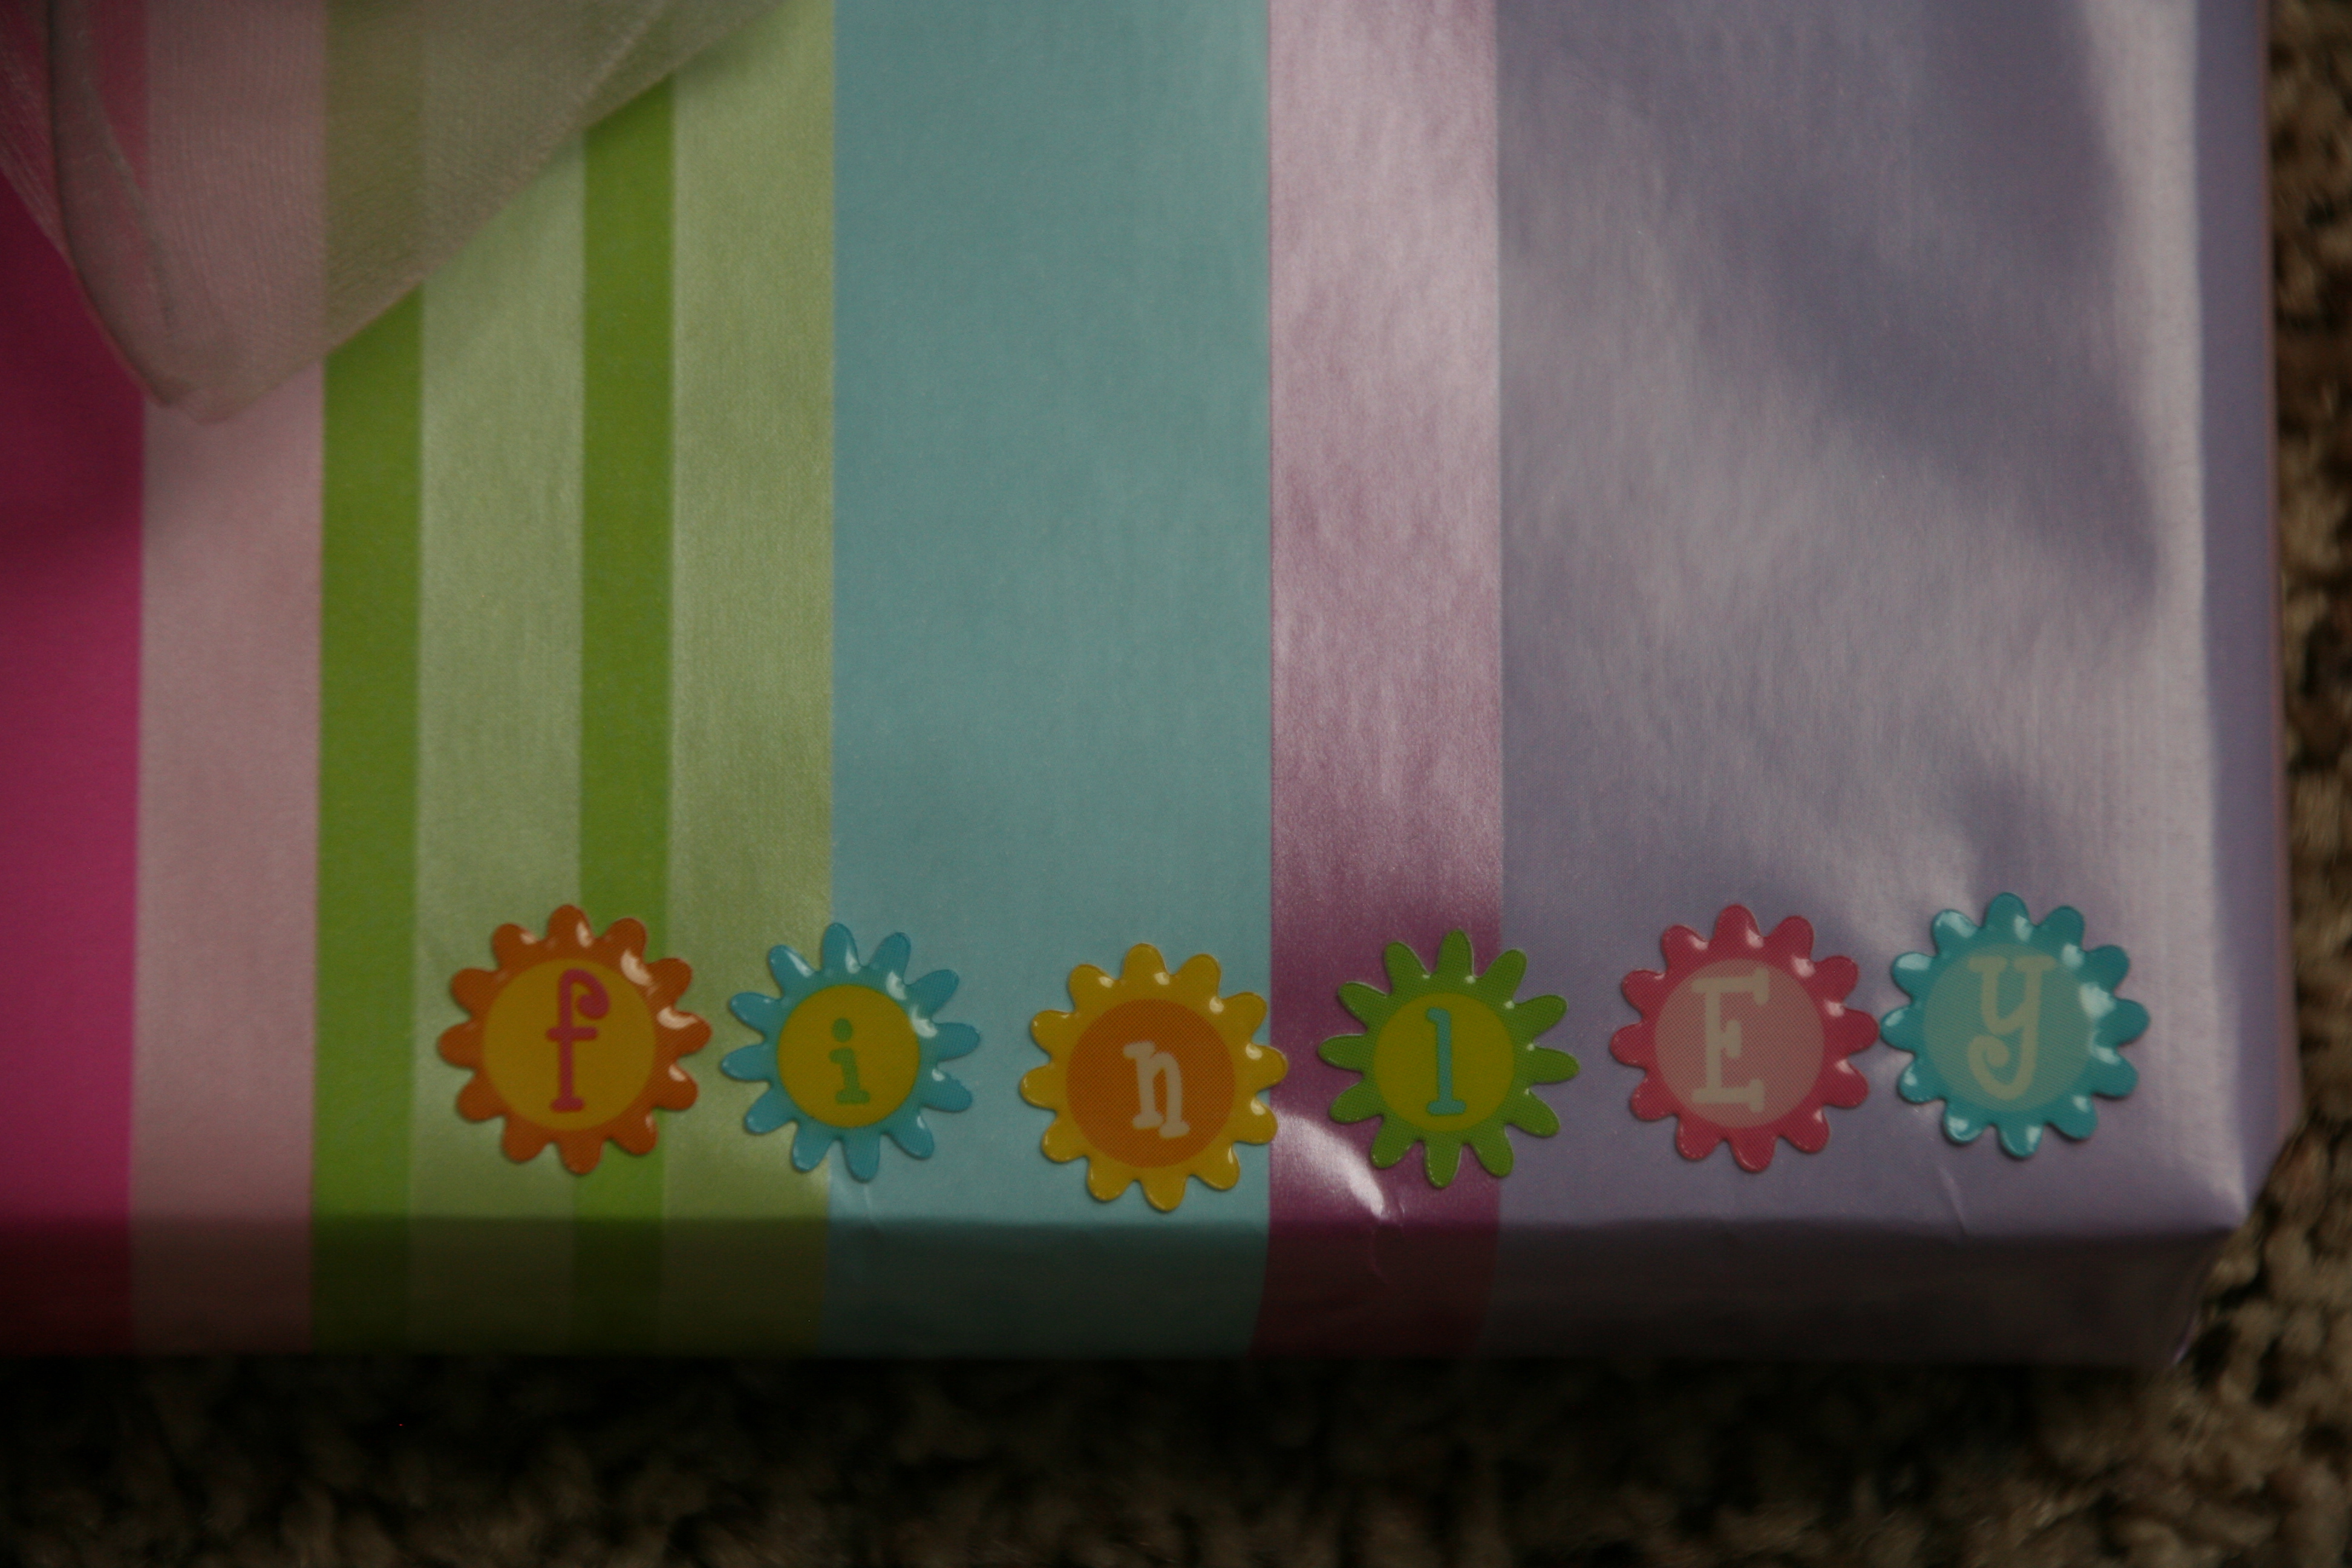
Then I put stickers in the corner, spelling the recipients name. TOO cute!
Happy wrapping…
“Wonder what I will come up with next”…
I absolutely went crazy when I saw these carrots at the store!!! Sorry…I bought them several years ago, but still LOVE them!
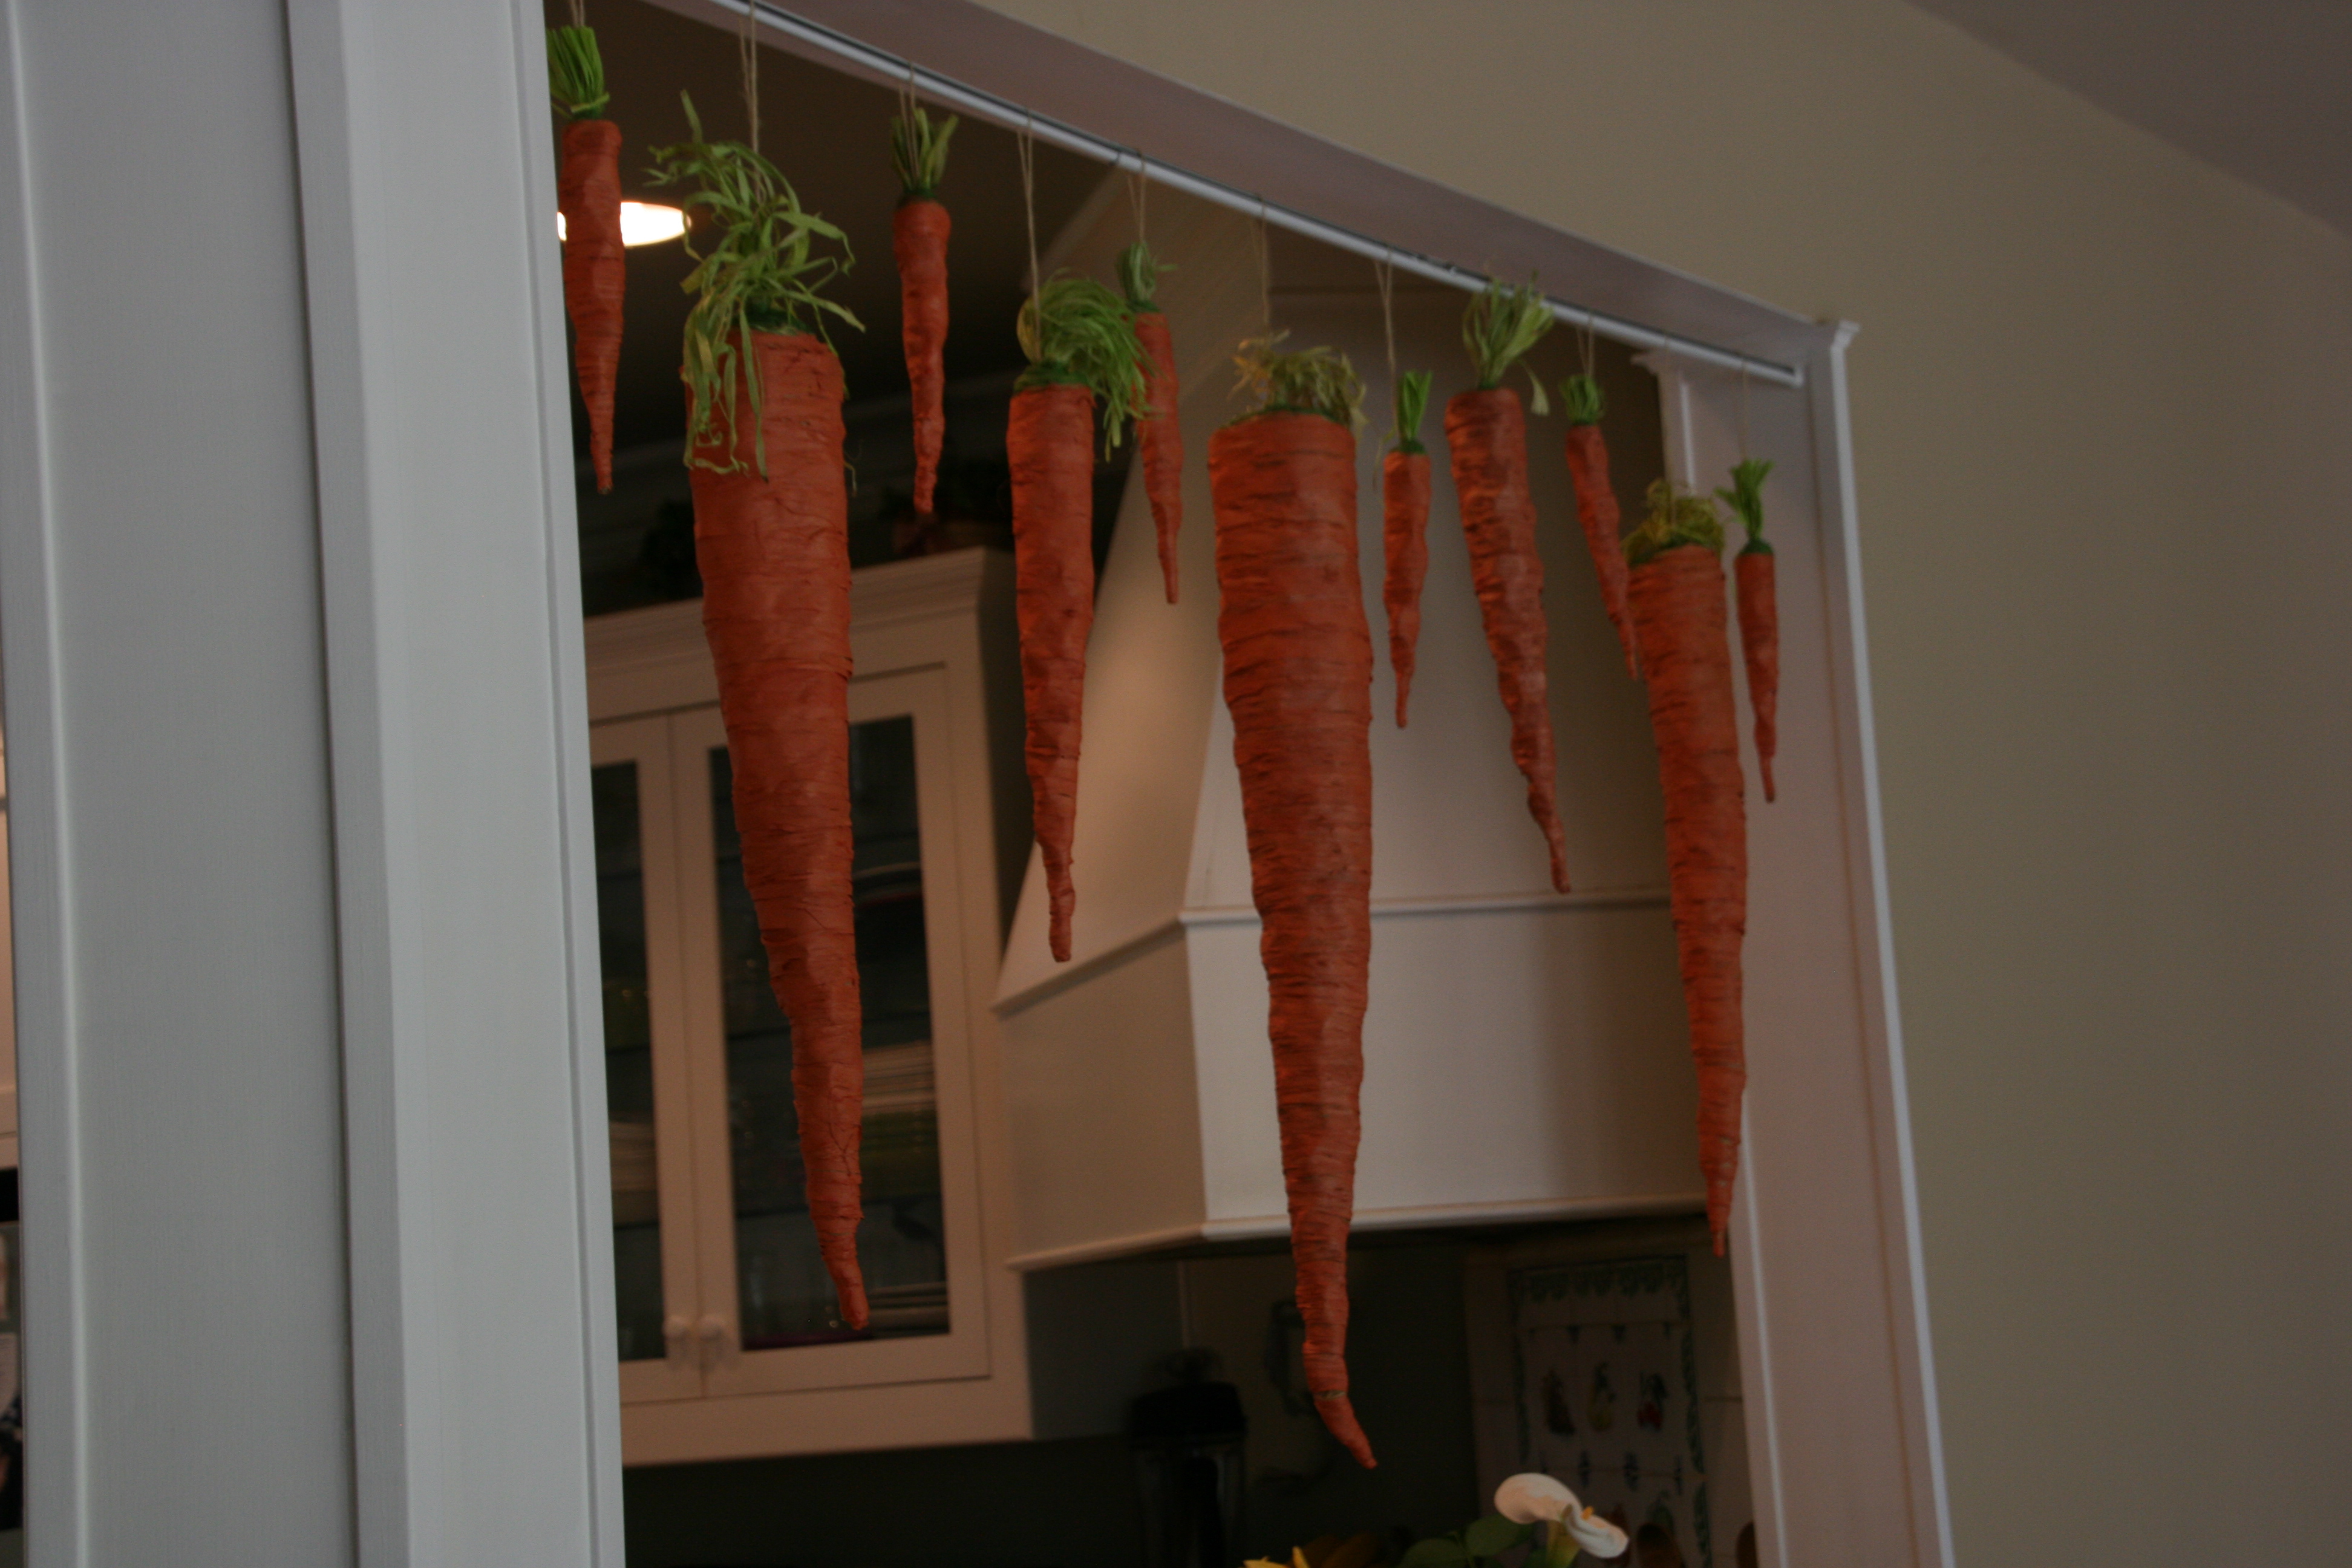
They look amazing hanging on a stretcher rod in the open space between my kitchen & family room!
Happy decorating…
“Wonder what I will come up with next”…
This is a fun craft that I saw on Pinterest last year. We made several of these with our Girl Scout troop. A cute and easy craft for kids!

“Hoppy” Easter…
“Wonder what I will come up with next”…
A VERY simple, yet cute candle decoration for Easter…
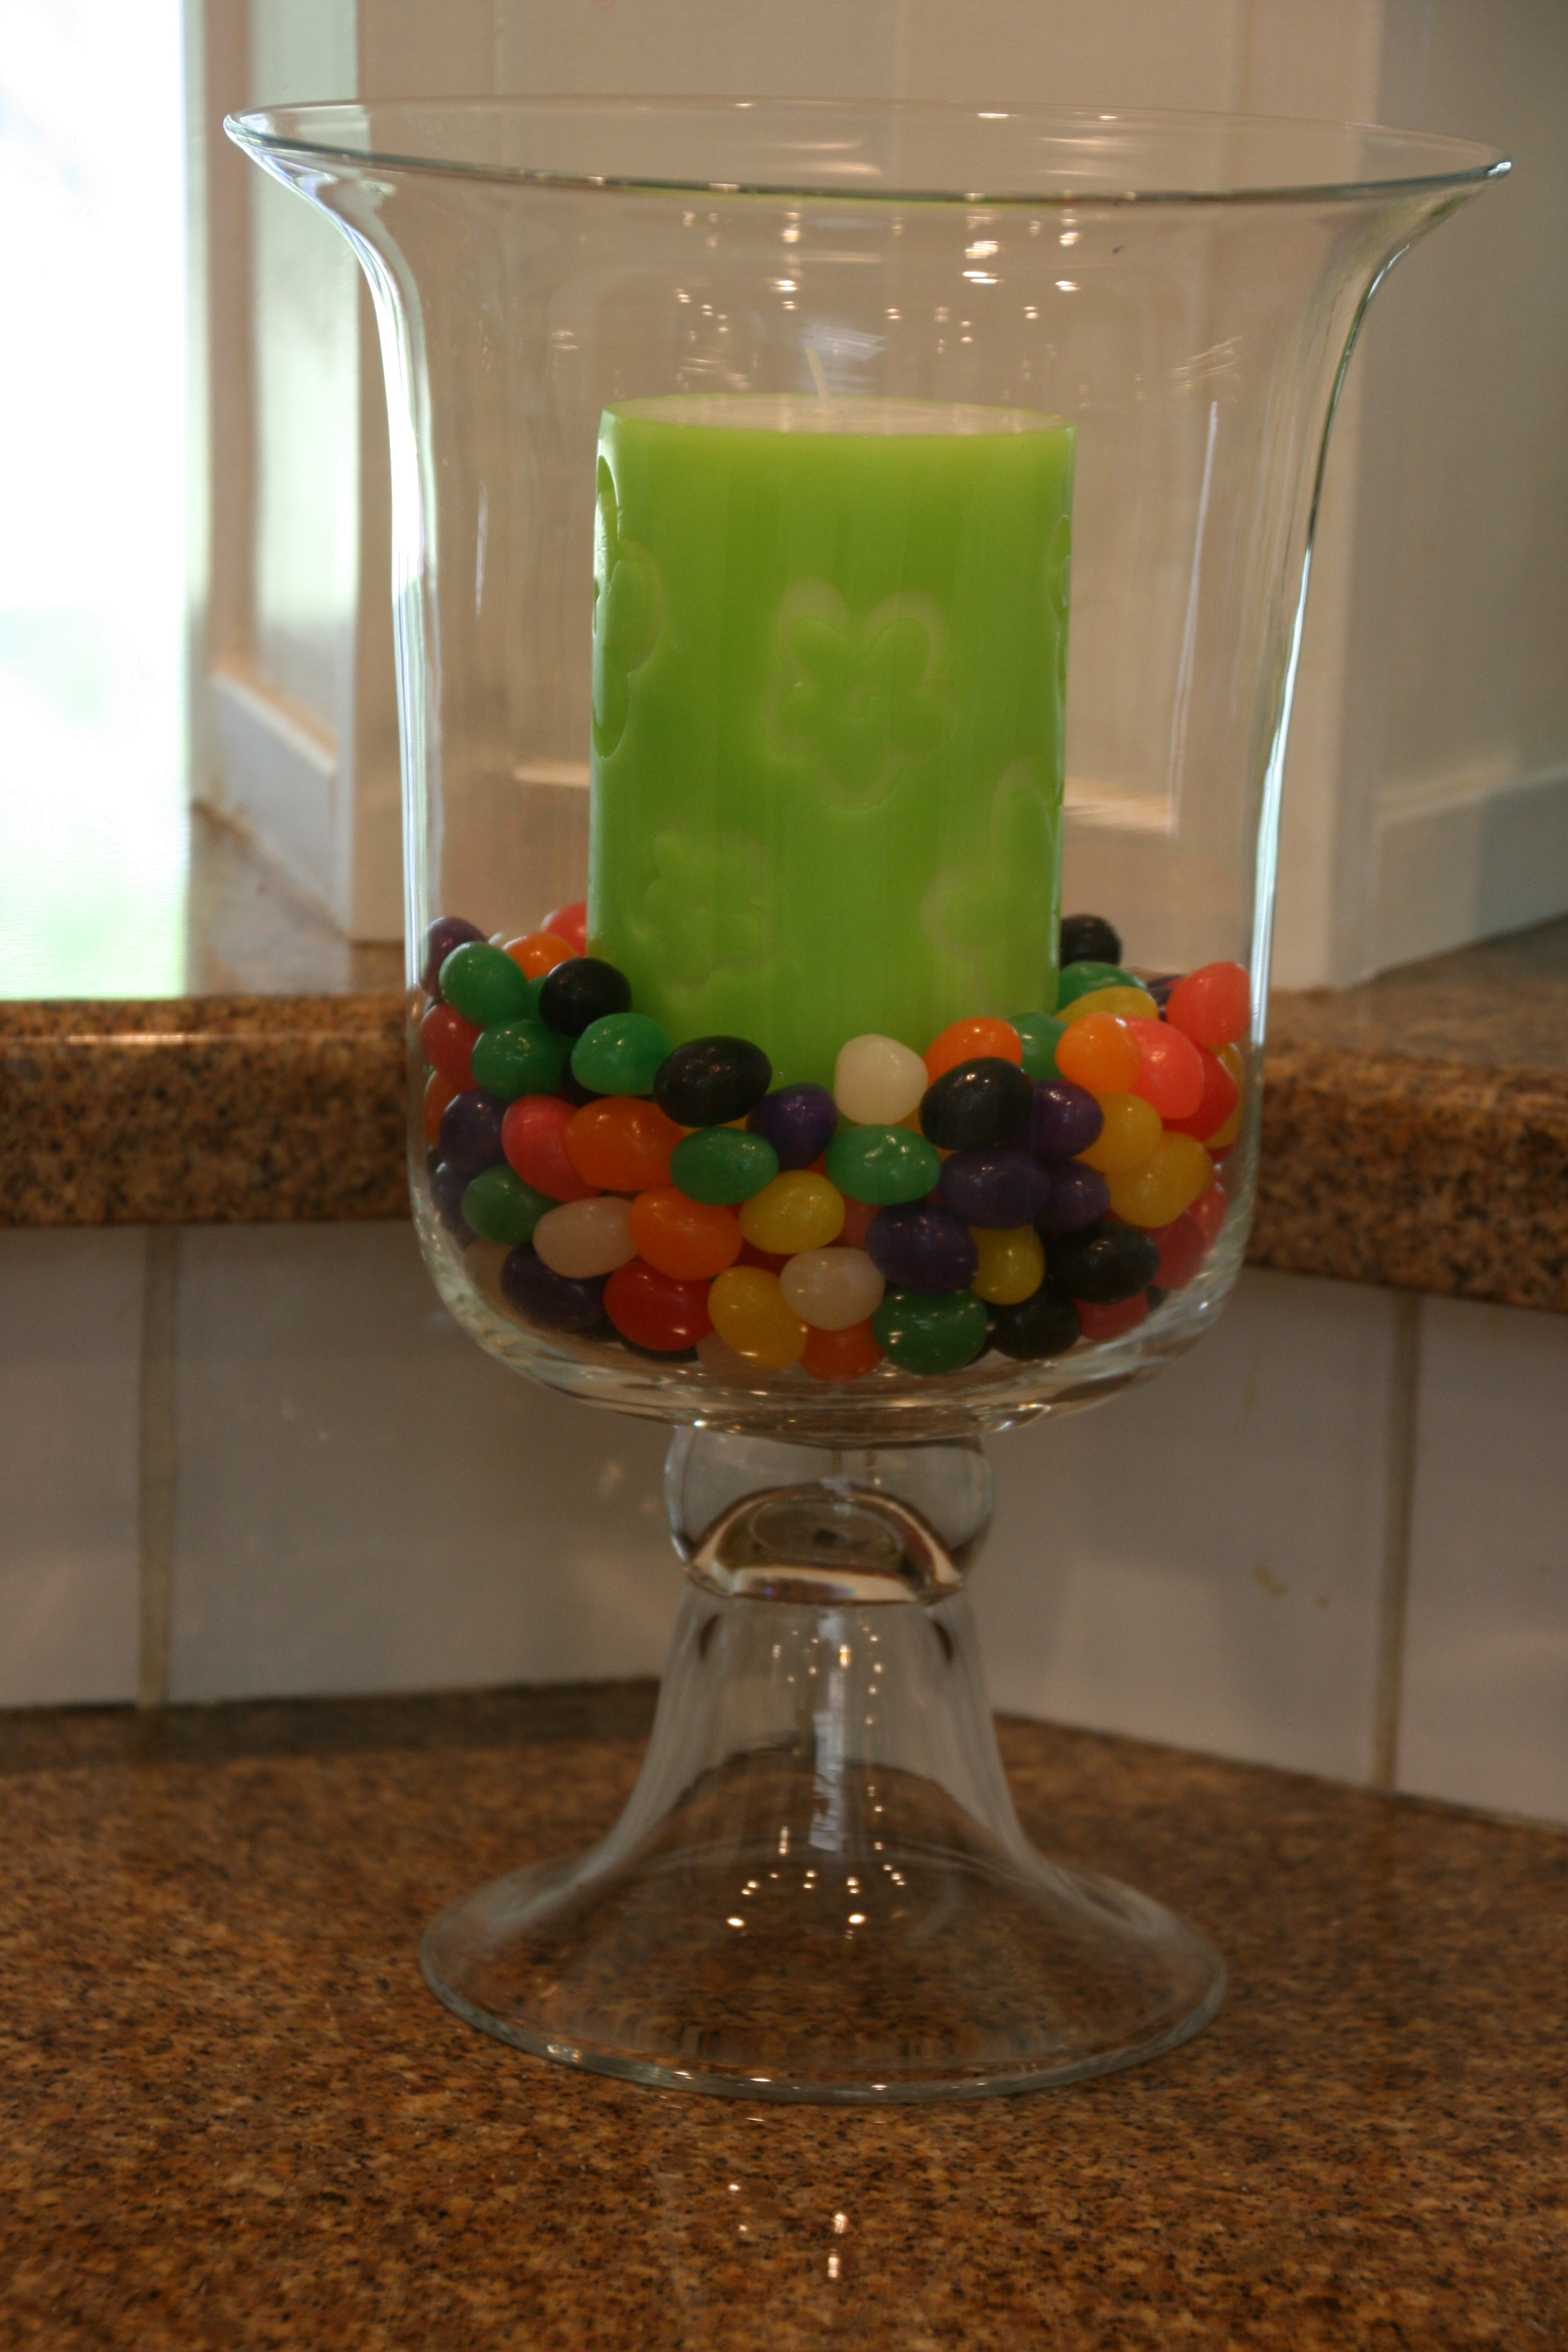
Happy Easter…
“Wonder what I will come up with next”…
