quilted fabric ball ornaments

041

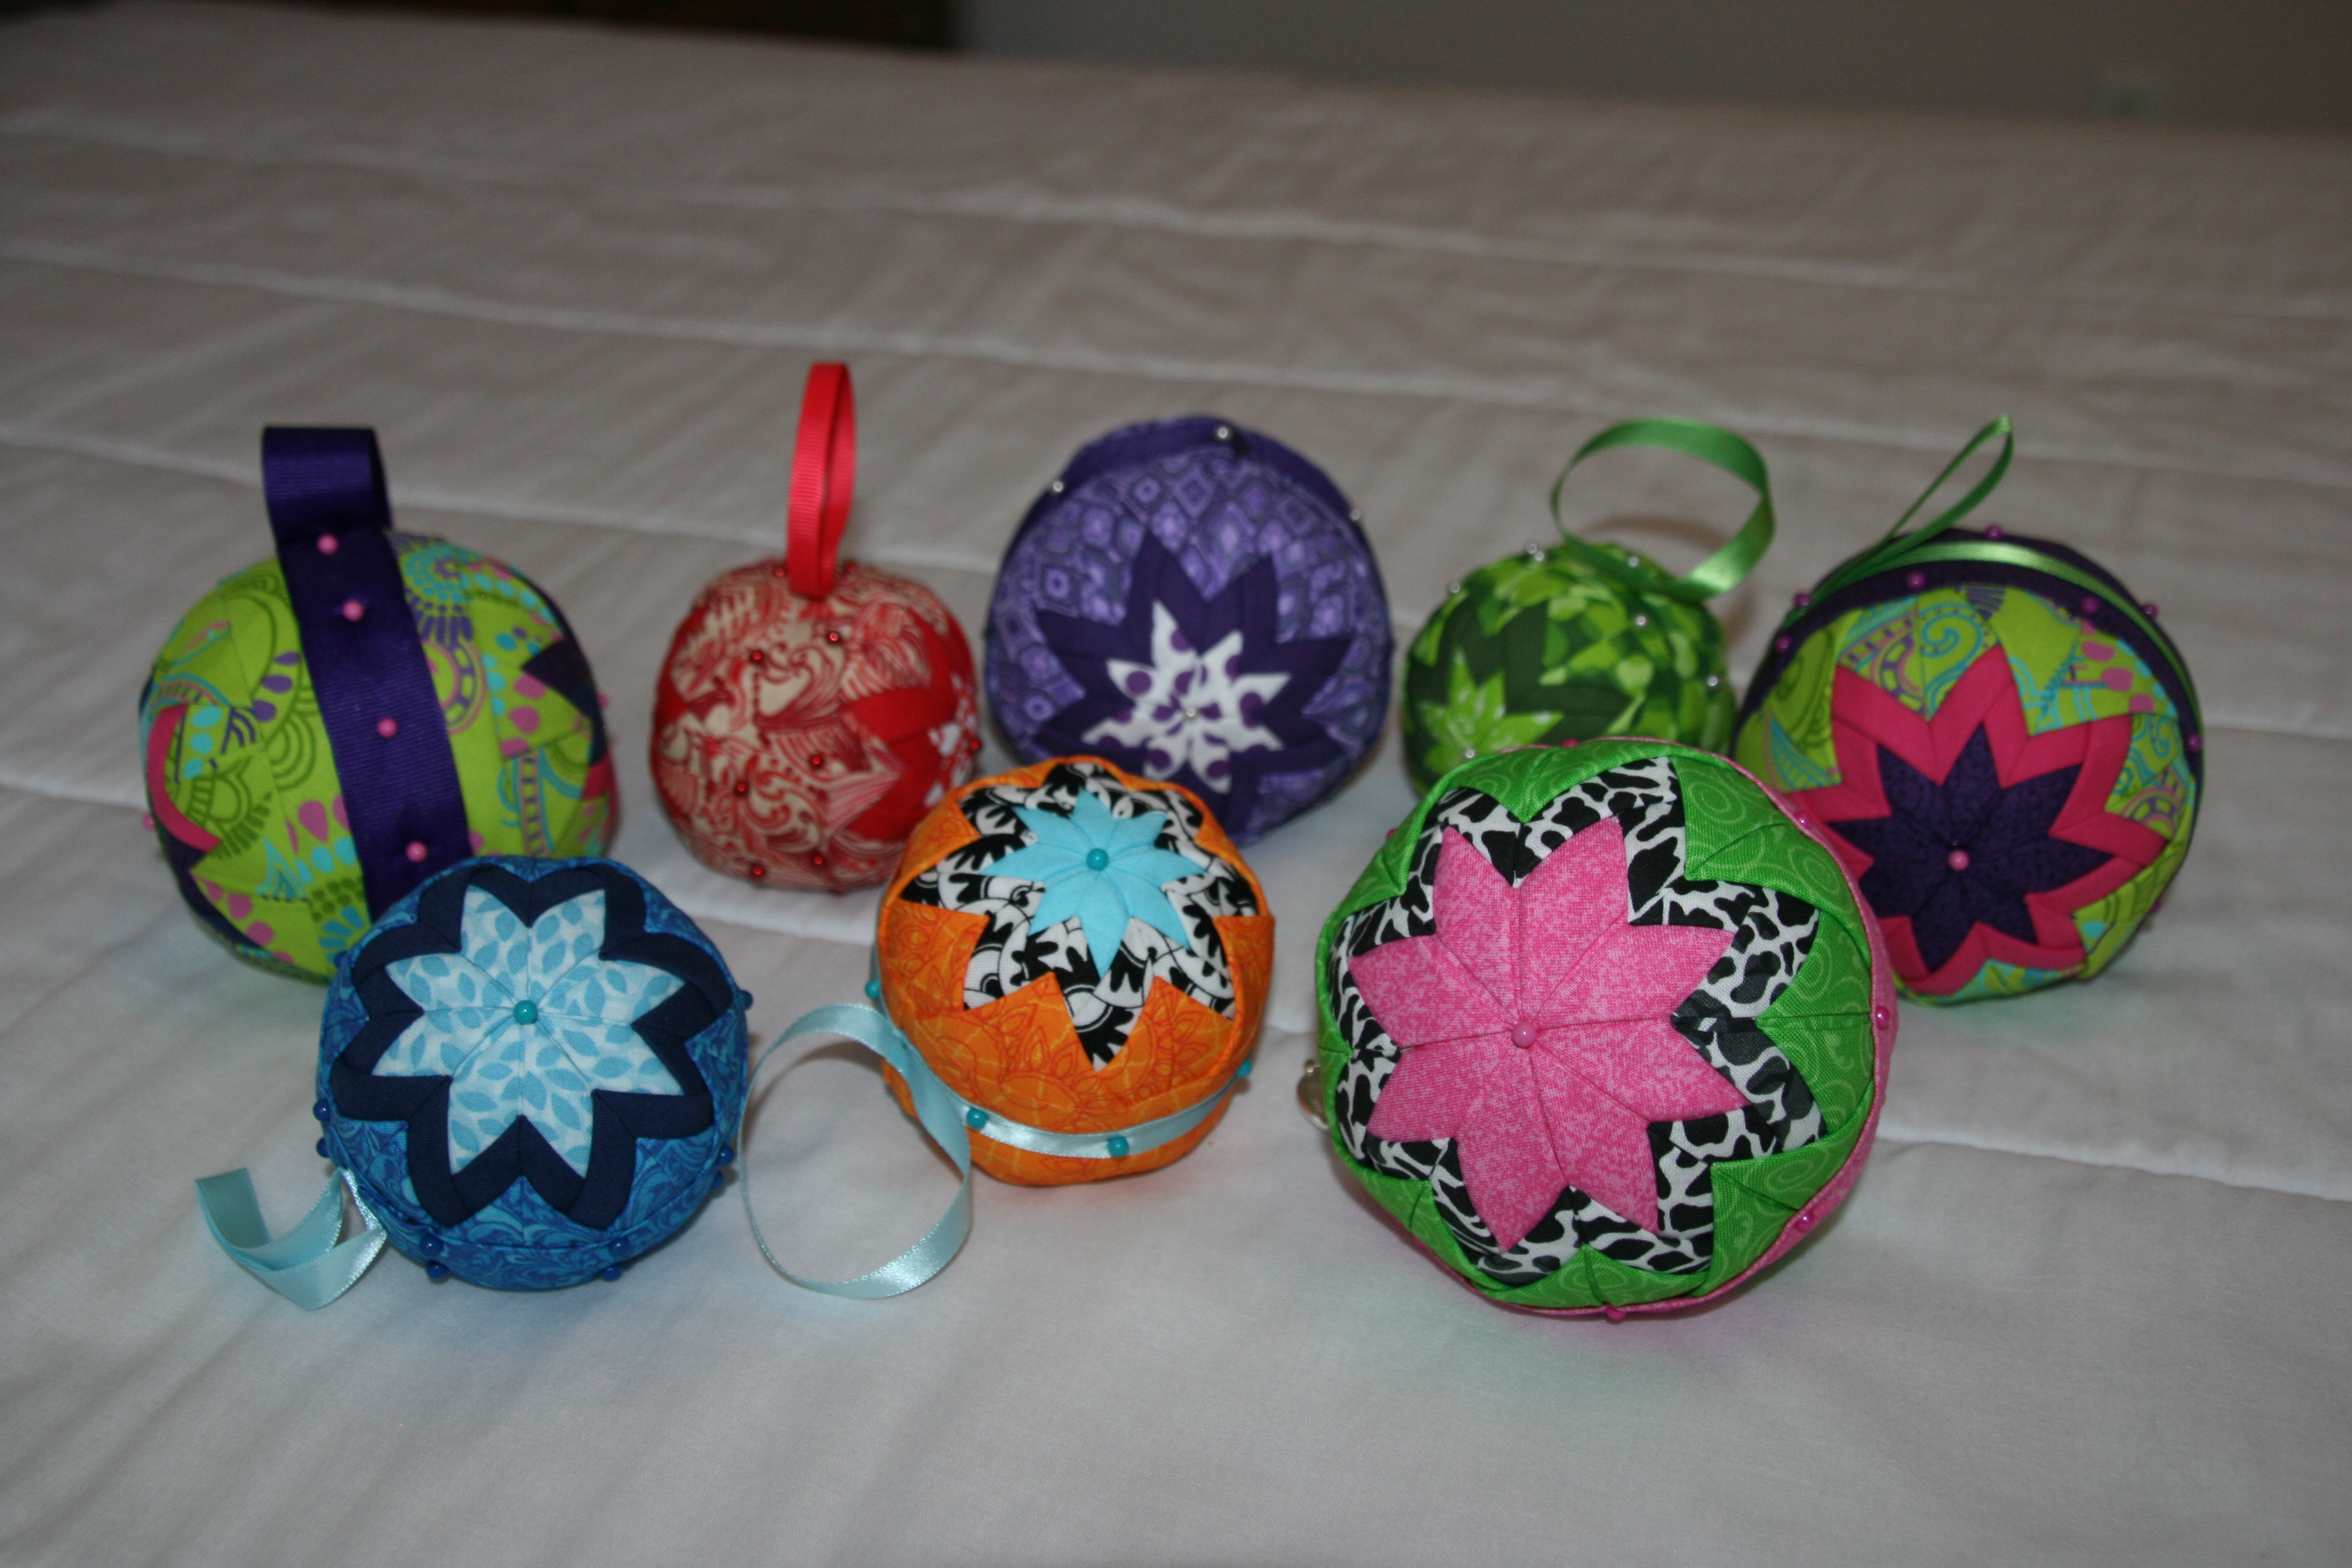
My sister taught me how to make these AMAZING quilted fabric ball ornaments.  They are absolutely beautiful!!!  I can’t wait to show you how to make your own!  You can fill a Christmas tree with several, place them in a bowl on a table for a colorful centerpiece, or make them as gifts.

To start, you will need styrofoam balls (I am using 3″ balls in this example), straight pins (I recommend buying them in bulk because each ball takes 208 pins), fabric (3 different coordinating patterns, cut into 2.5″ x 2.5″ squares), crafting glue, colorful ball top straight pins, & ribbon.

153

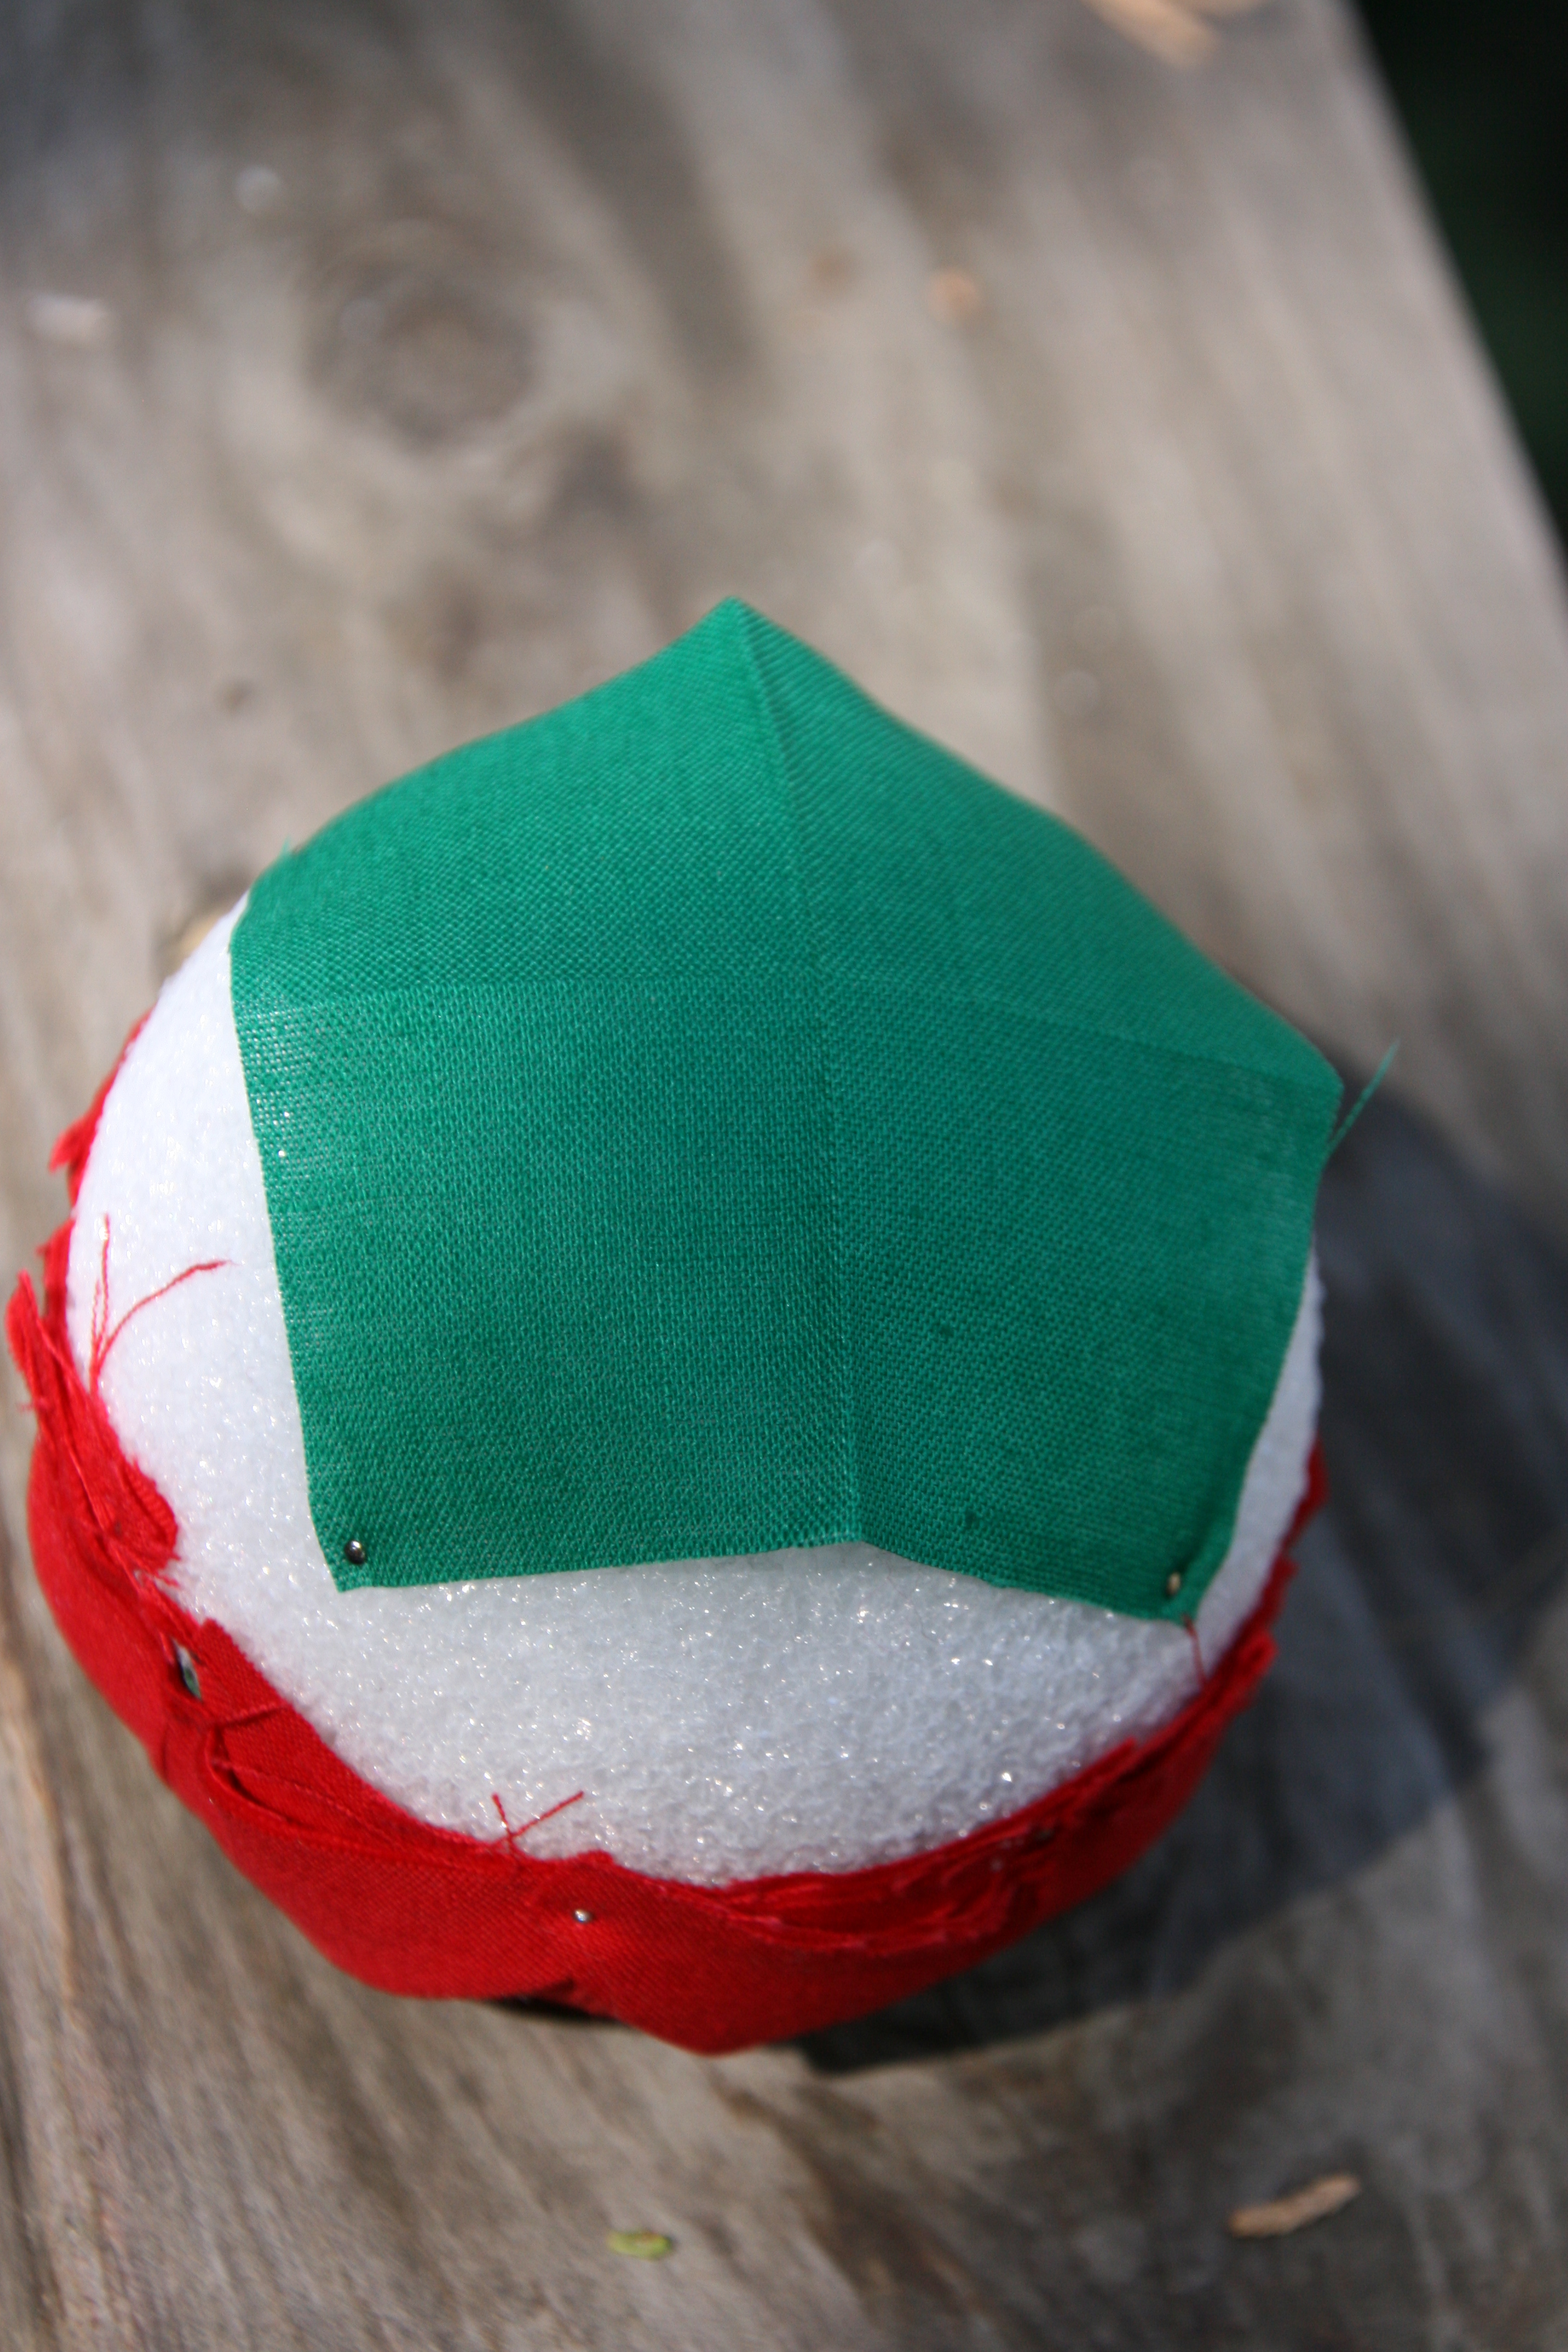
Start by folding your first piece of fabric in half, then again in half the other way to create a cross in the center.  Place the piece of fabric on the ball and pin all 4 corners.

154155

Place a pin in the center of your next piece of fabric and pin it on a line @ the center of the cross on the already placed fabric.

156157

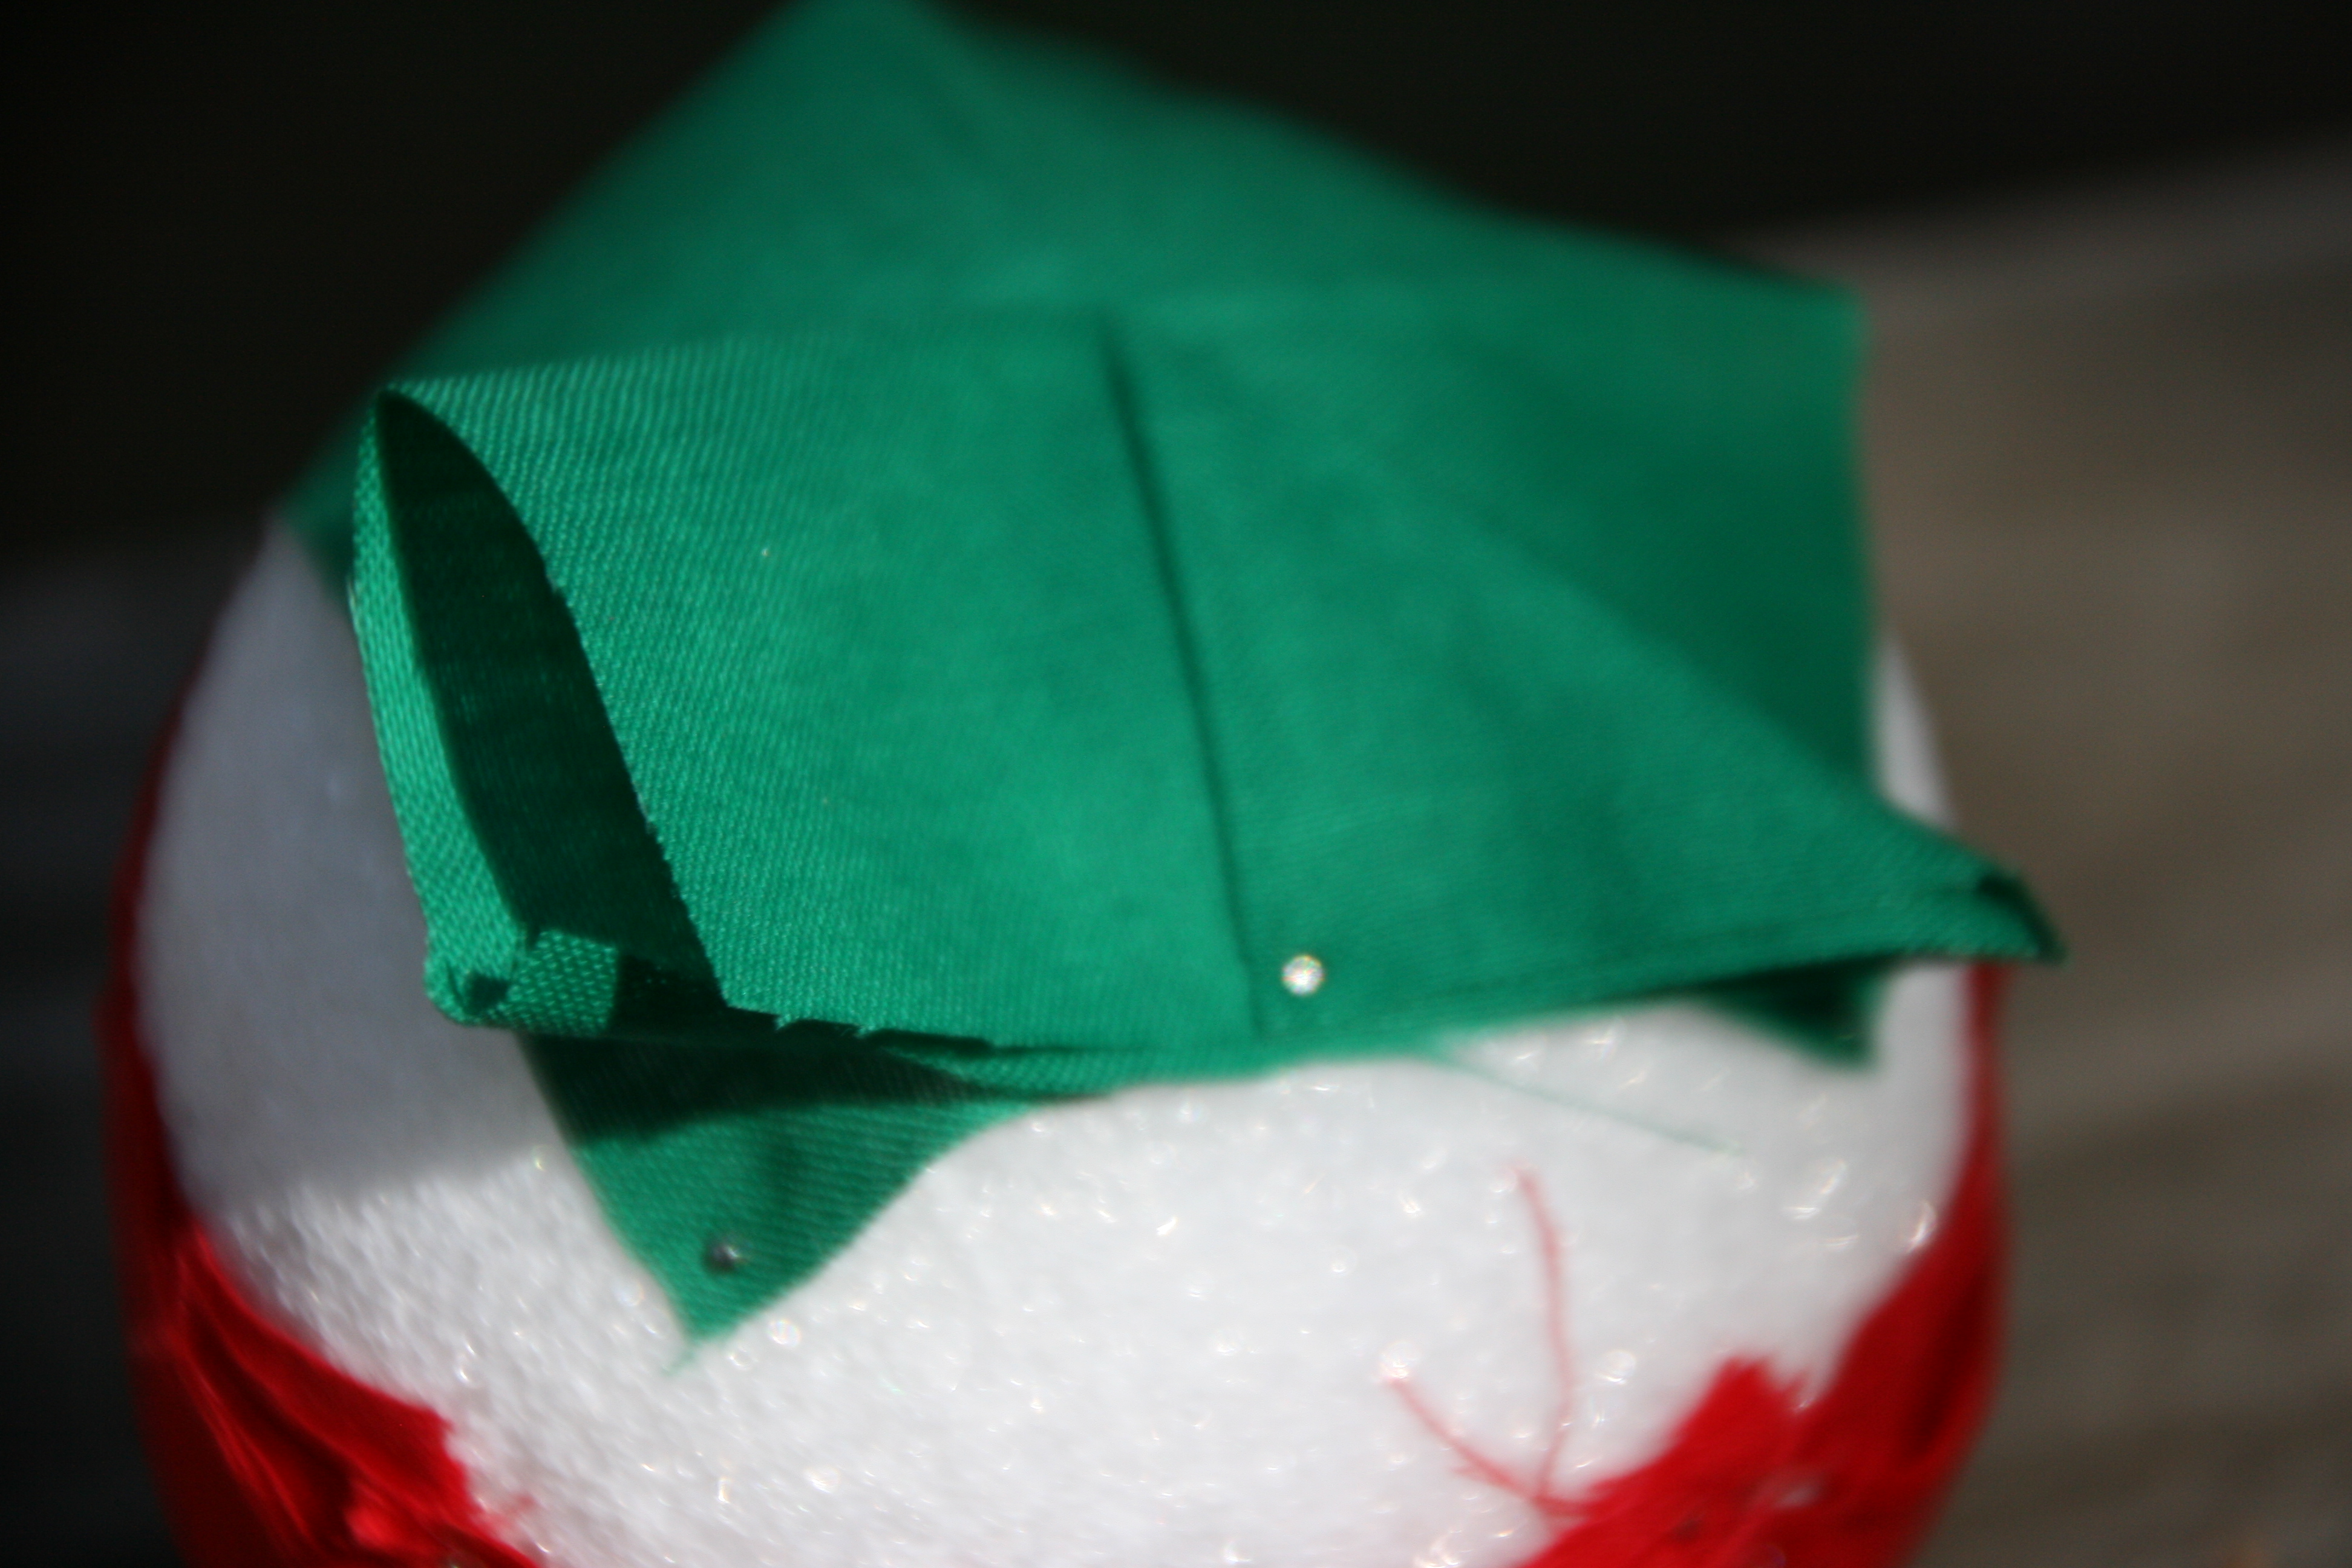
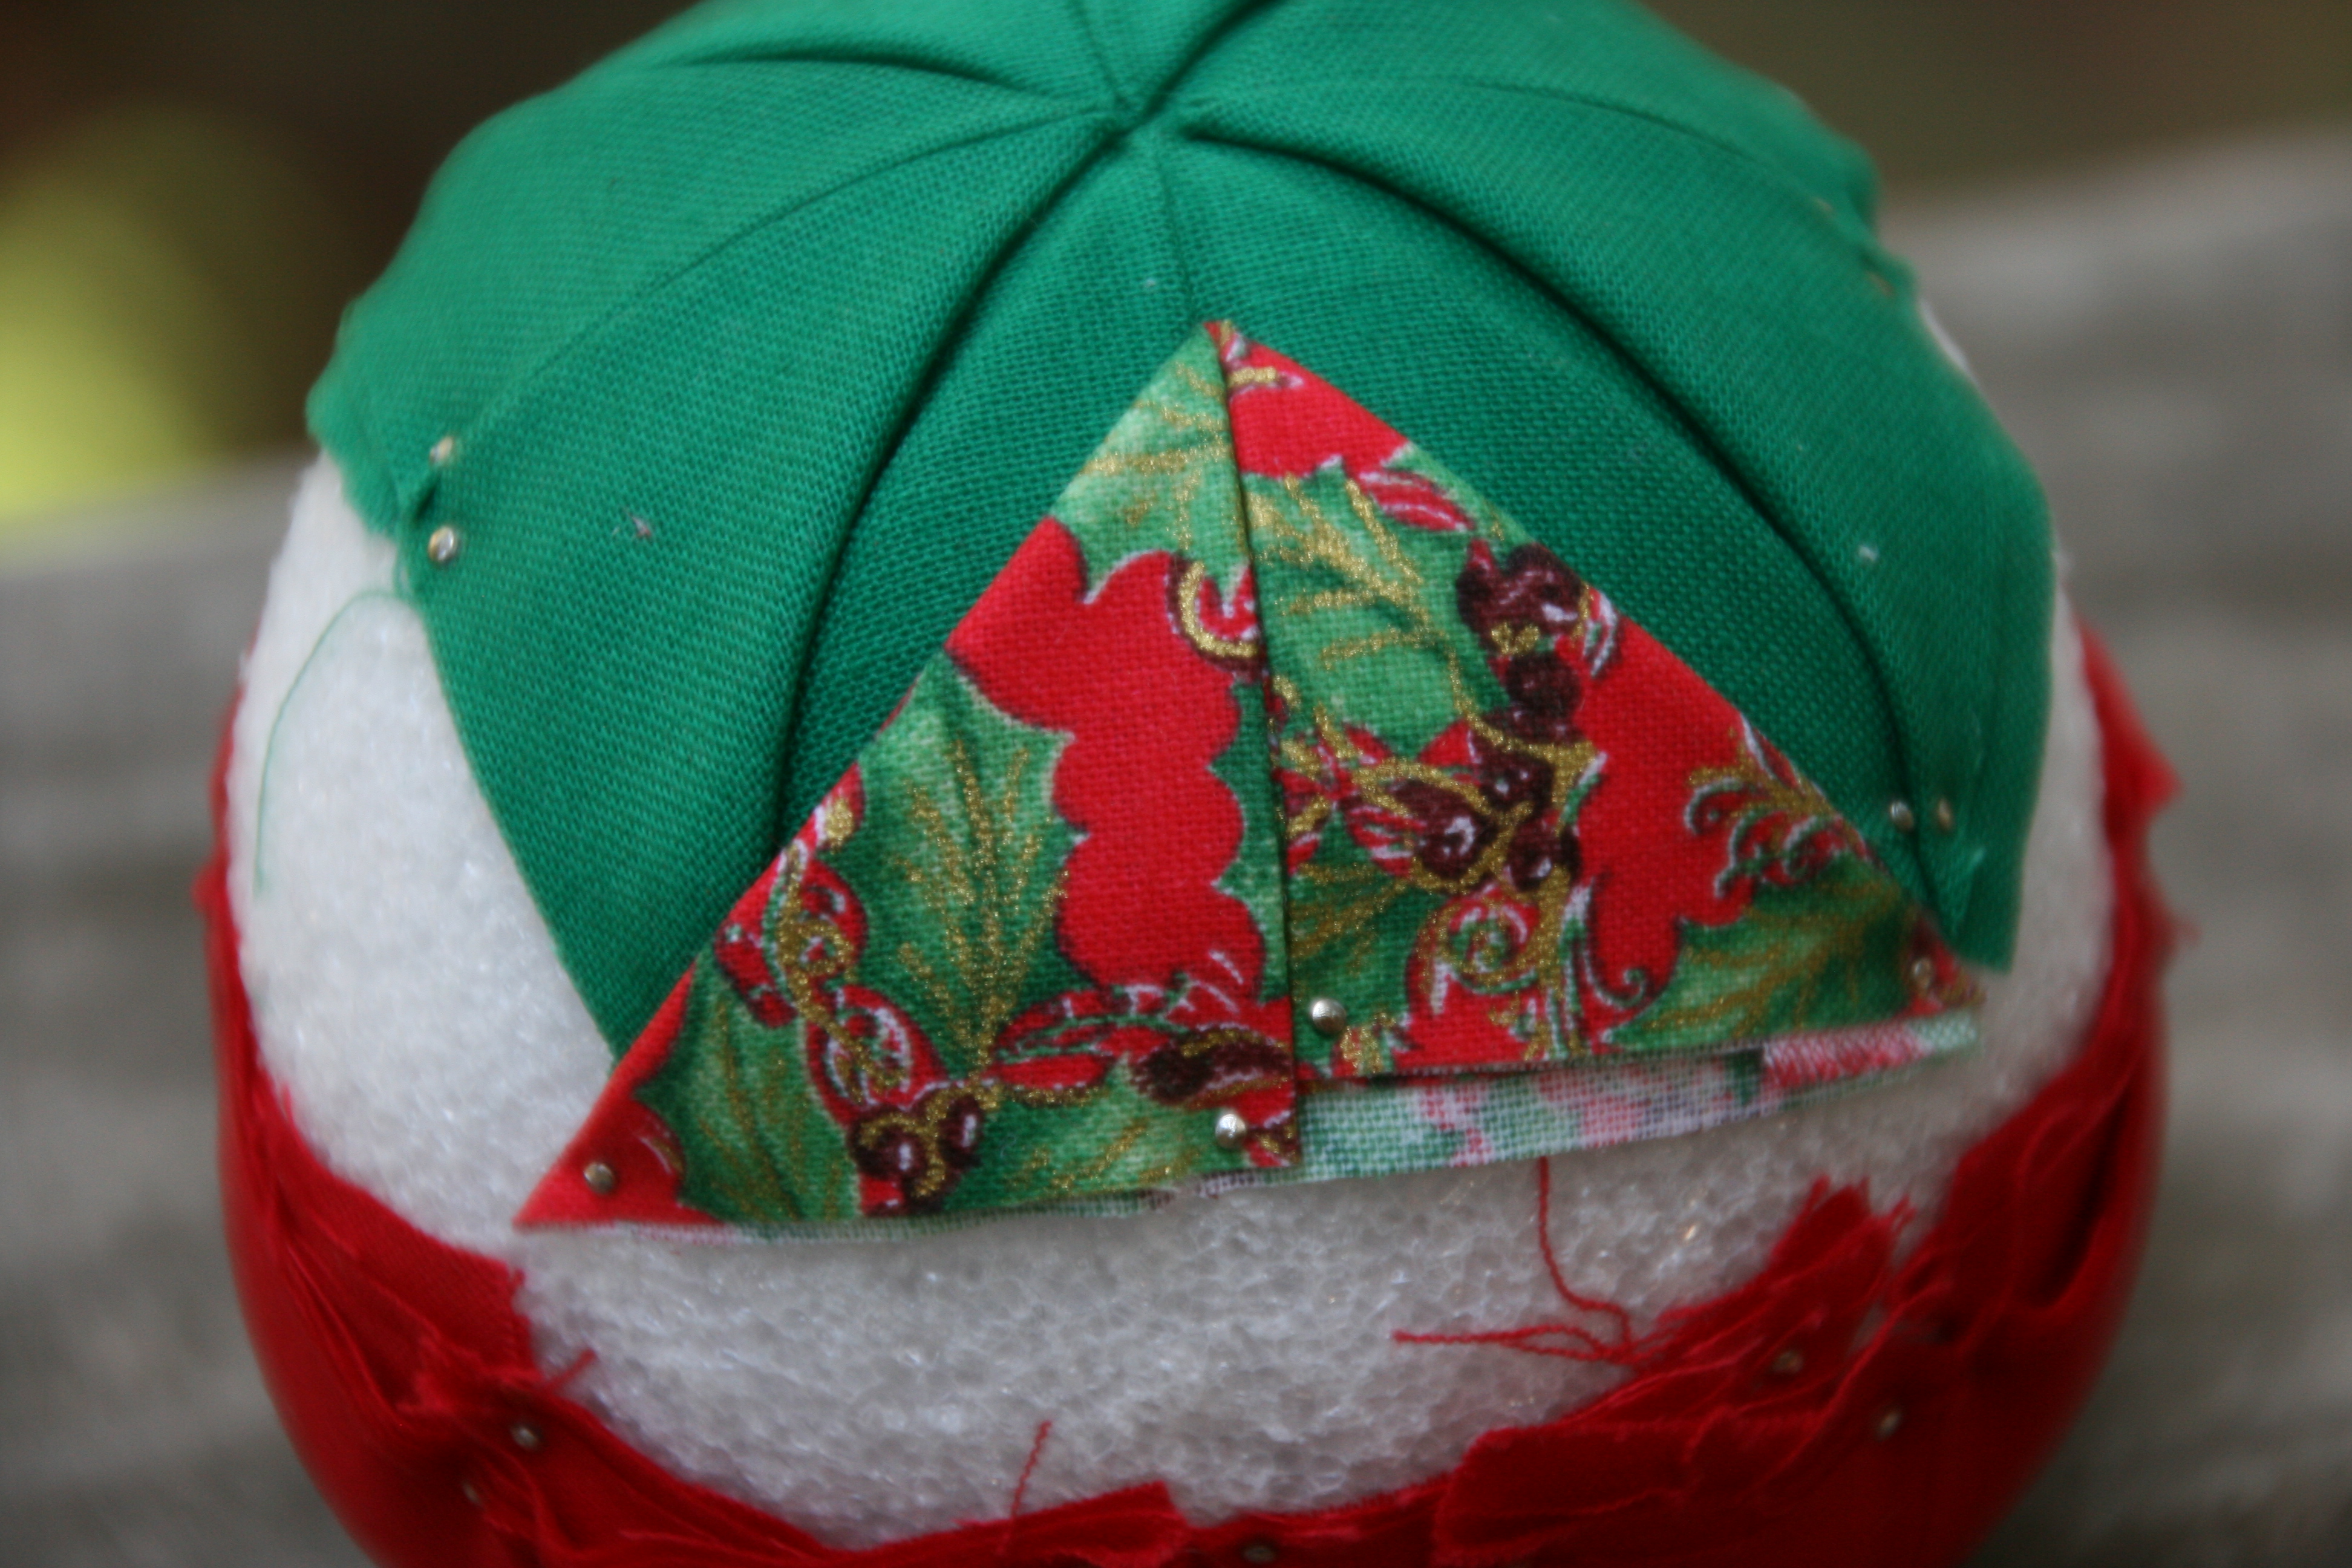
Fold the fabric in half, grab the right top corner and fold it down to the center.  Place a pin in the center to hold.  Then pin the outer corner of the fabric on the right.  Repeat the process for the left side of the fabric.  Repeat this process for 4 pieces of fabric, working your way around the initial piece.

158

Take the 1st piece of your 2nd fabric and place a pin through the center, with the head on the inside of the pattern.

159

Measure 1/2″ from the top center point of your first fabric, and place this pin there.

160161

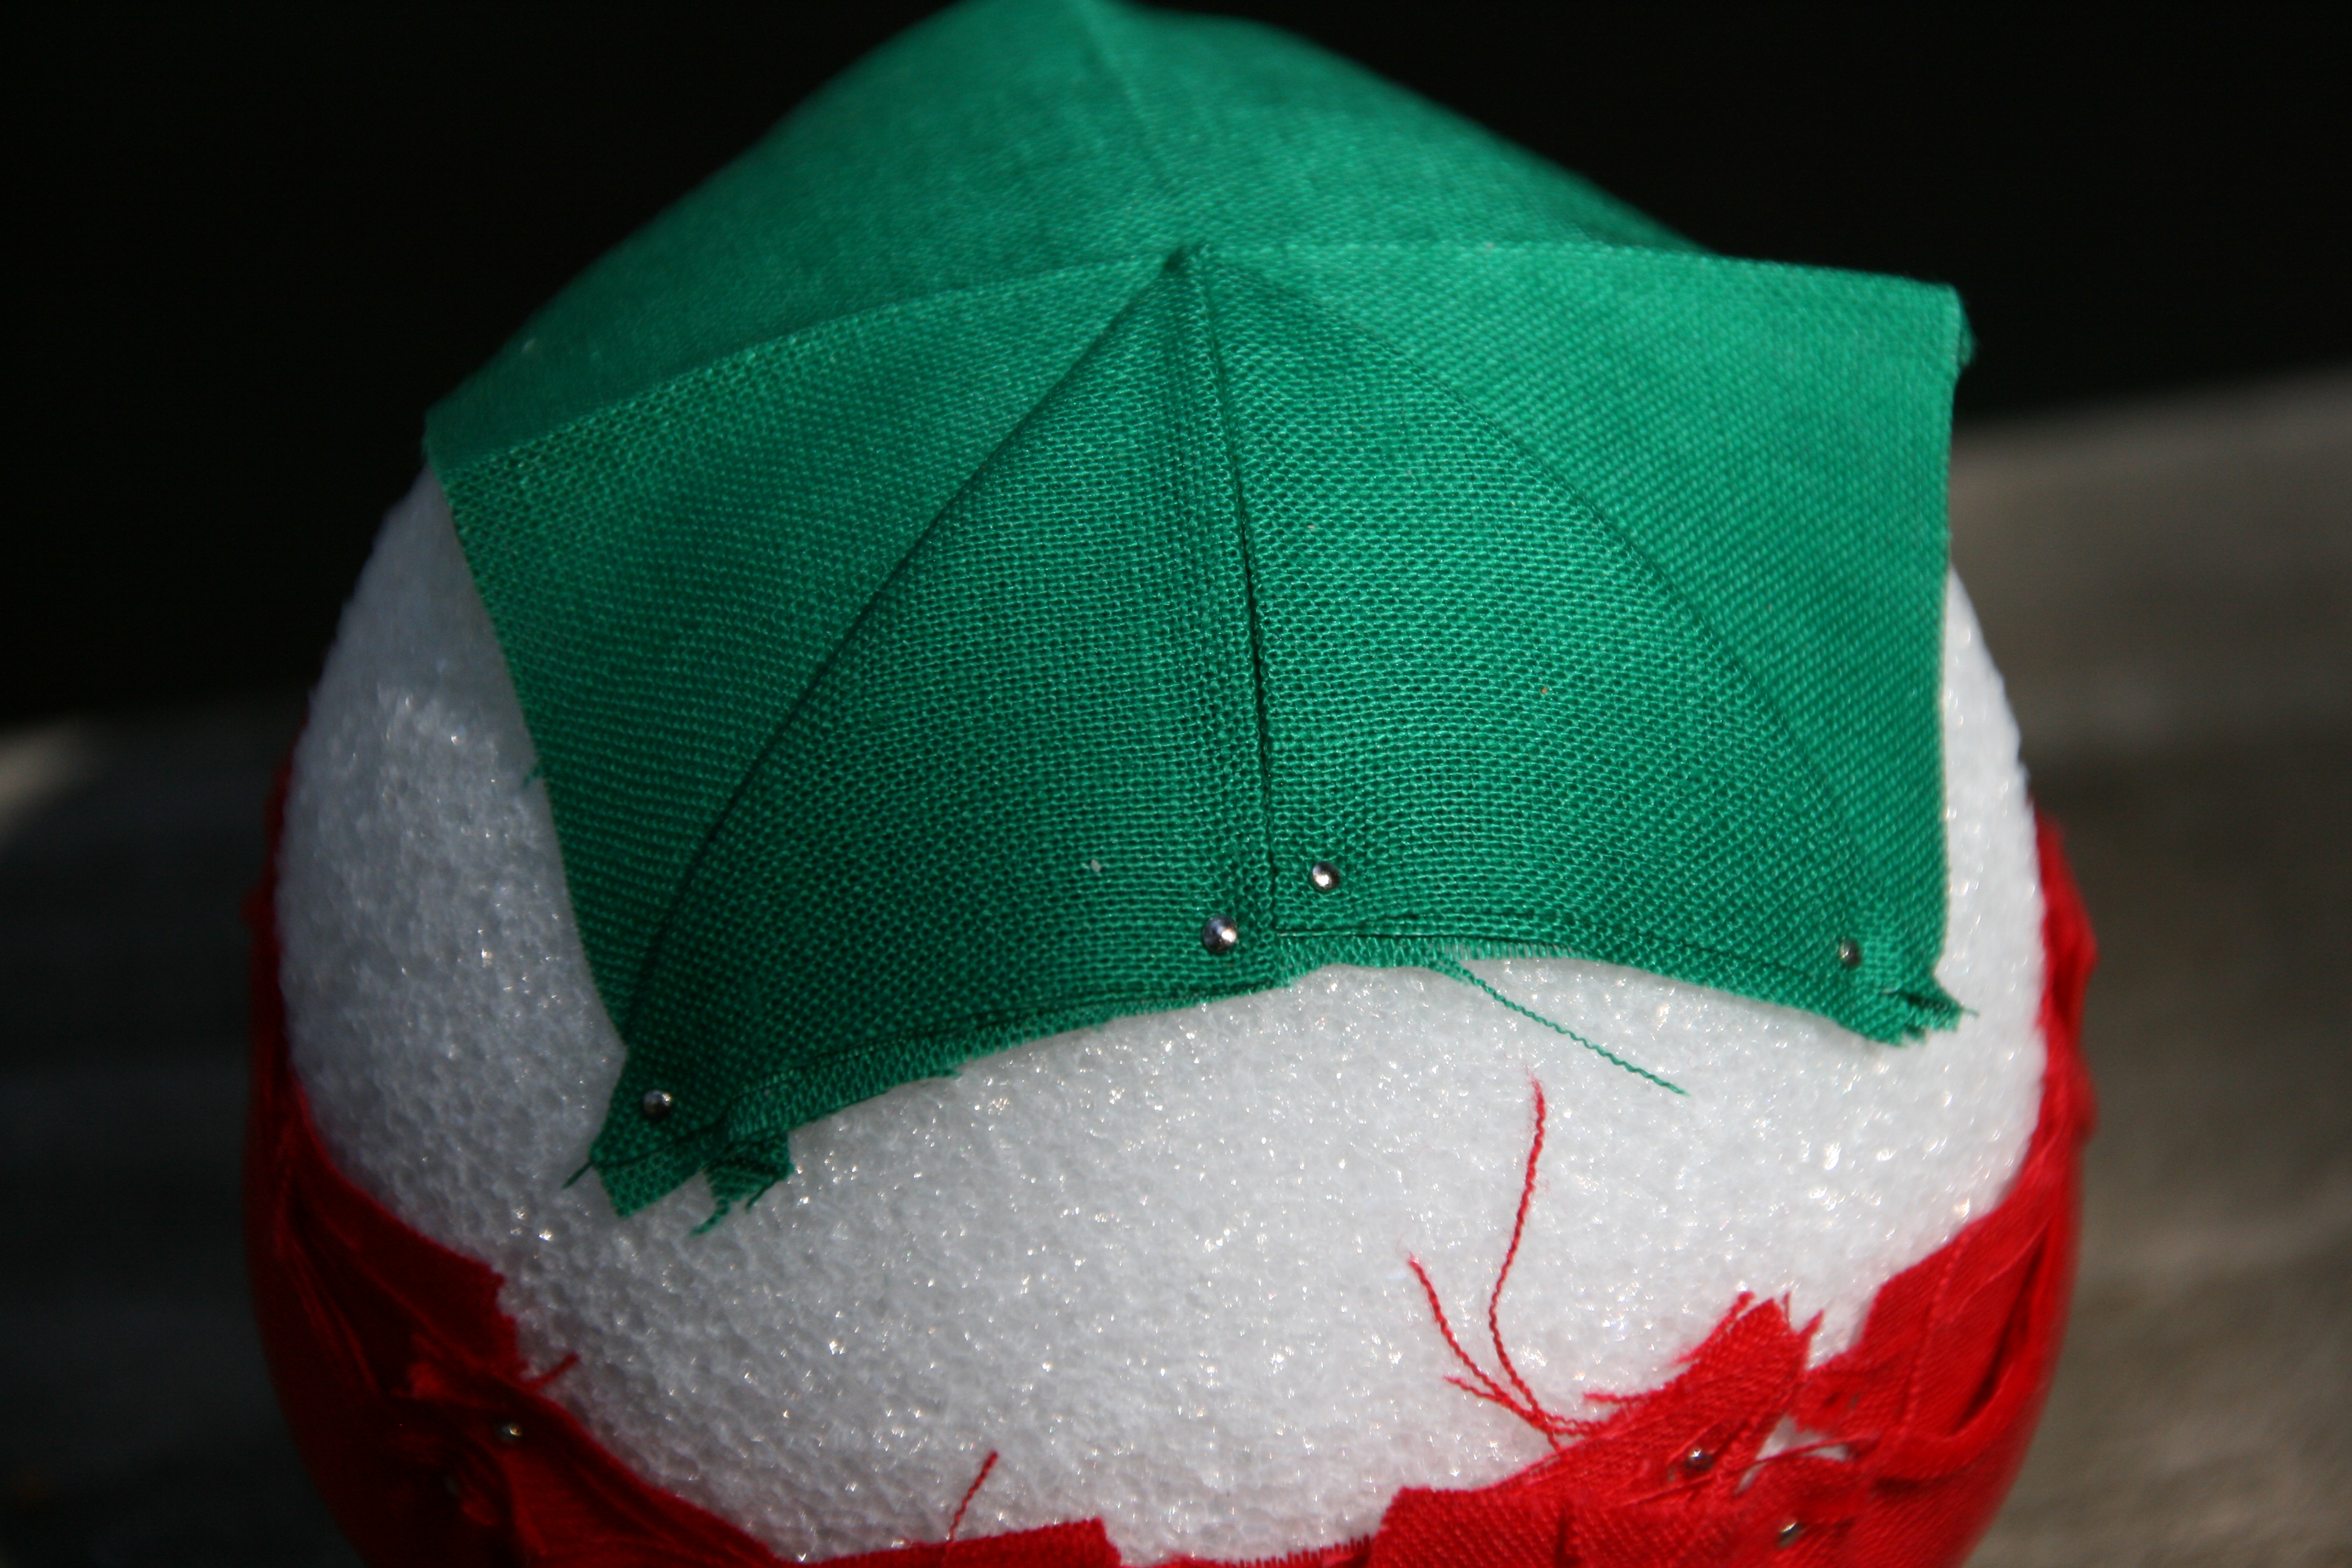
Repeat the fold and pin process as described with the 1st fabric.  Place pieces across from one another. You will use 8 pieces to complete this step.

162163

165

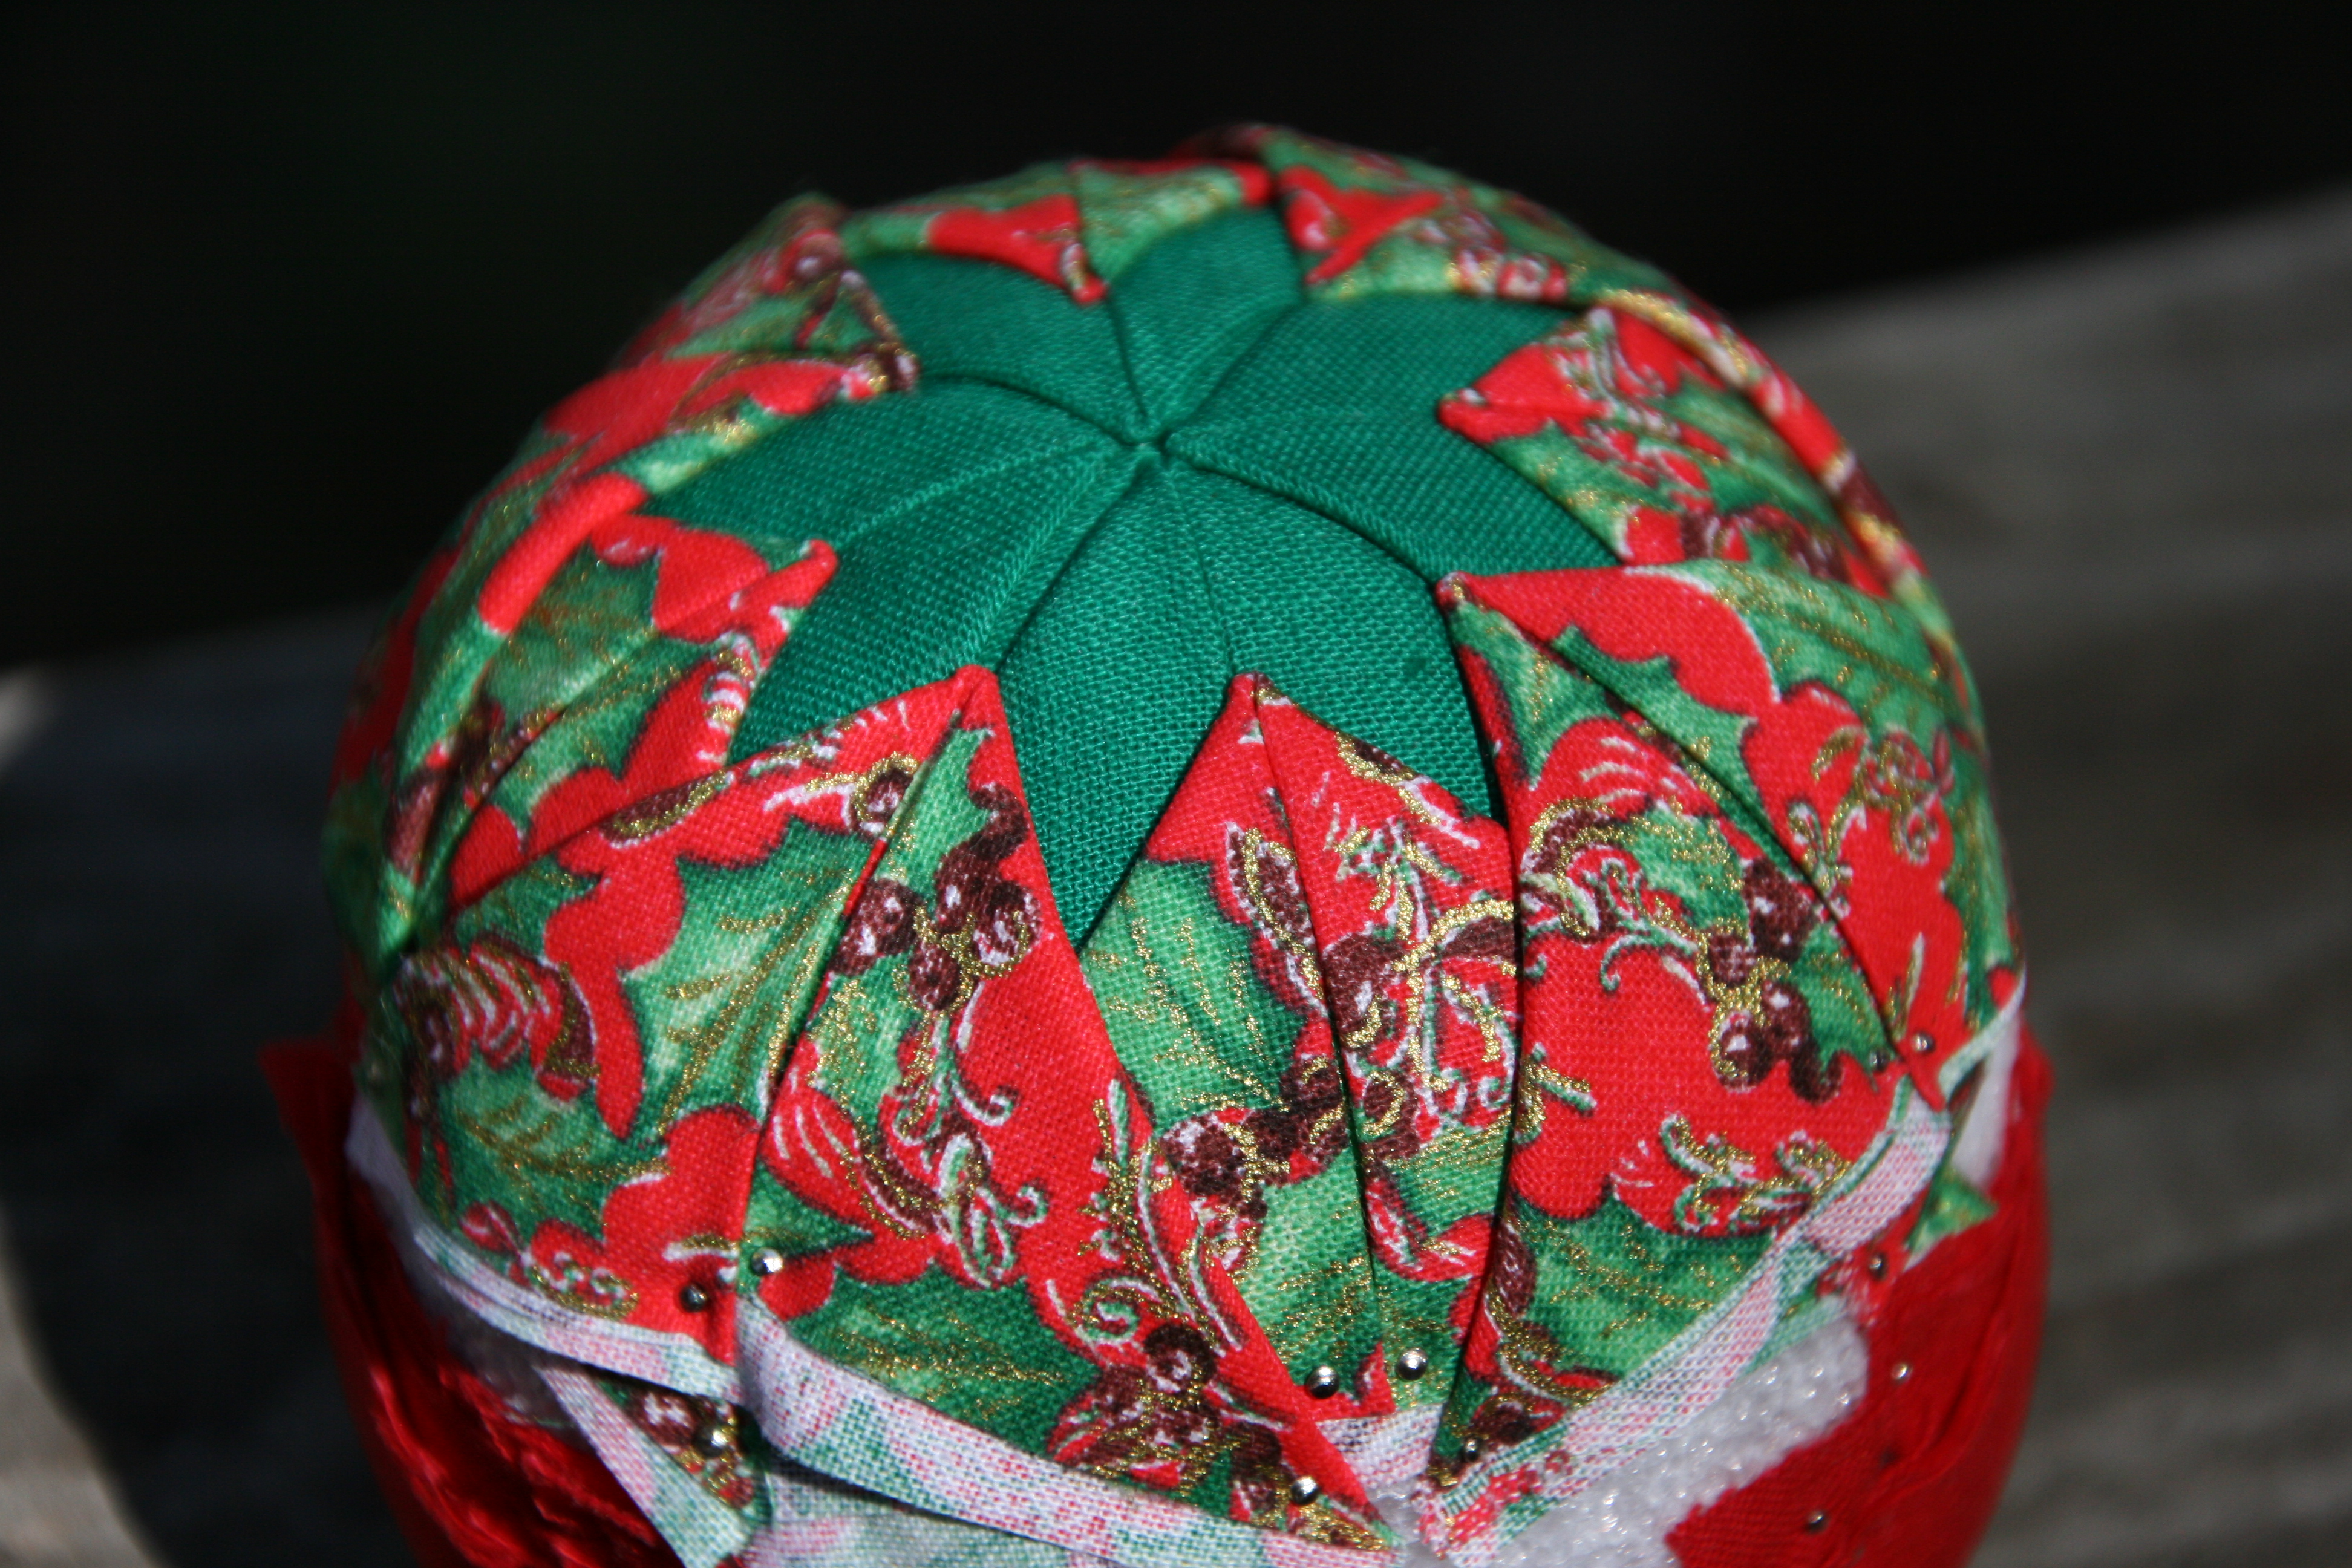
Once you have placed all 8 pieces of fabric, move on to your 3rd fabric.  Measure another 1/2″ from the center points of the 2nd fabric and repeat the fold and pin process for 8 pieces of fabric.

166167

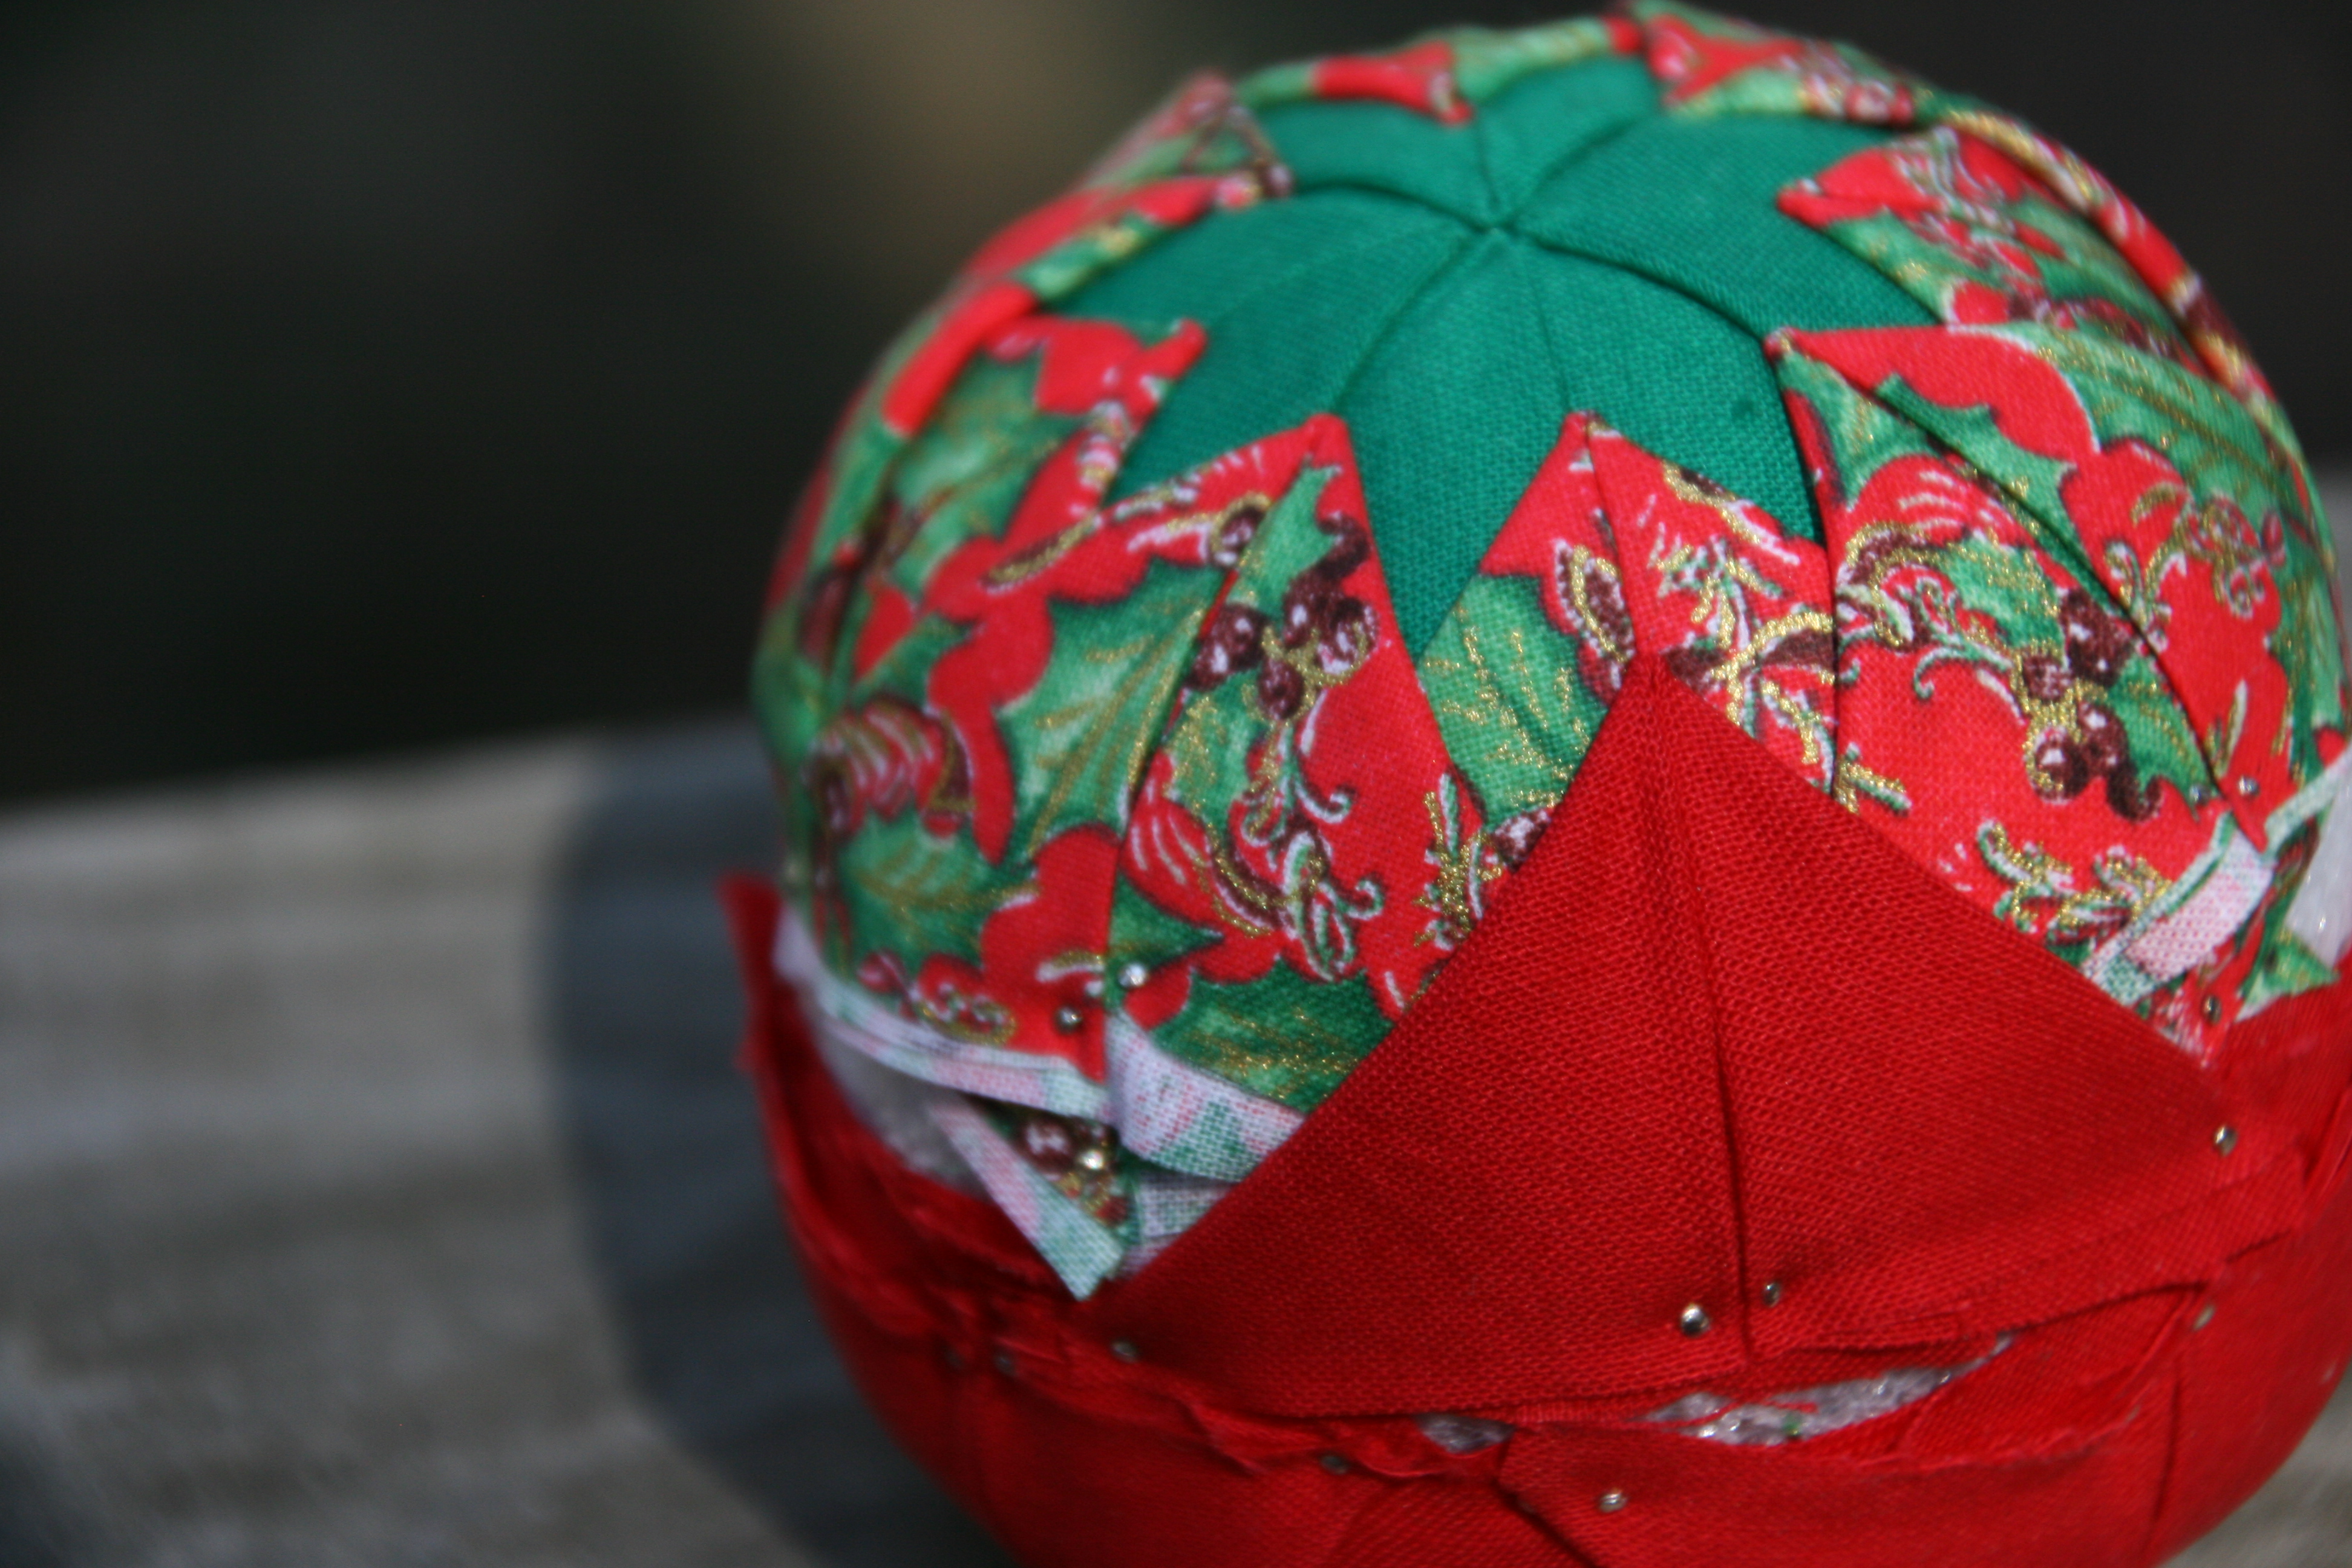
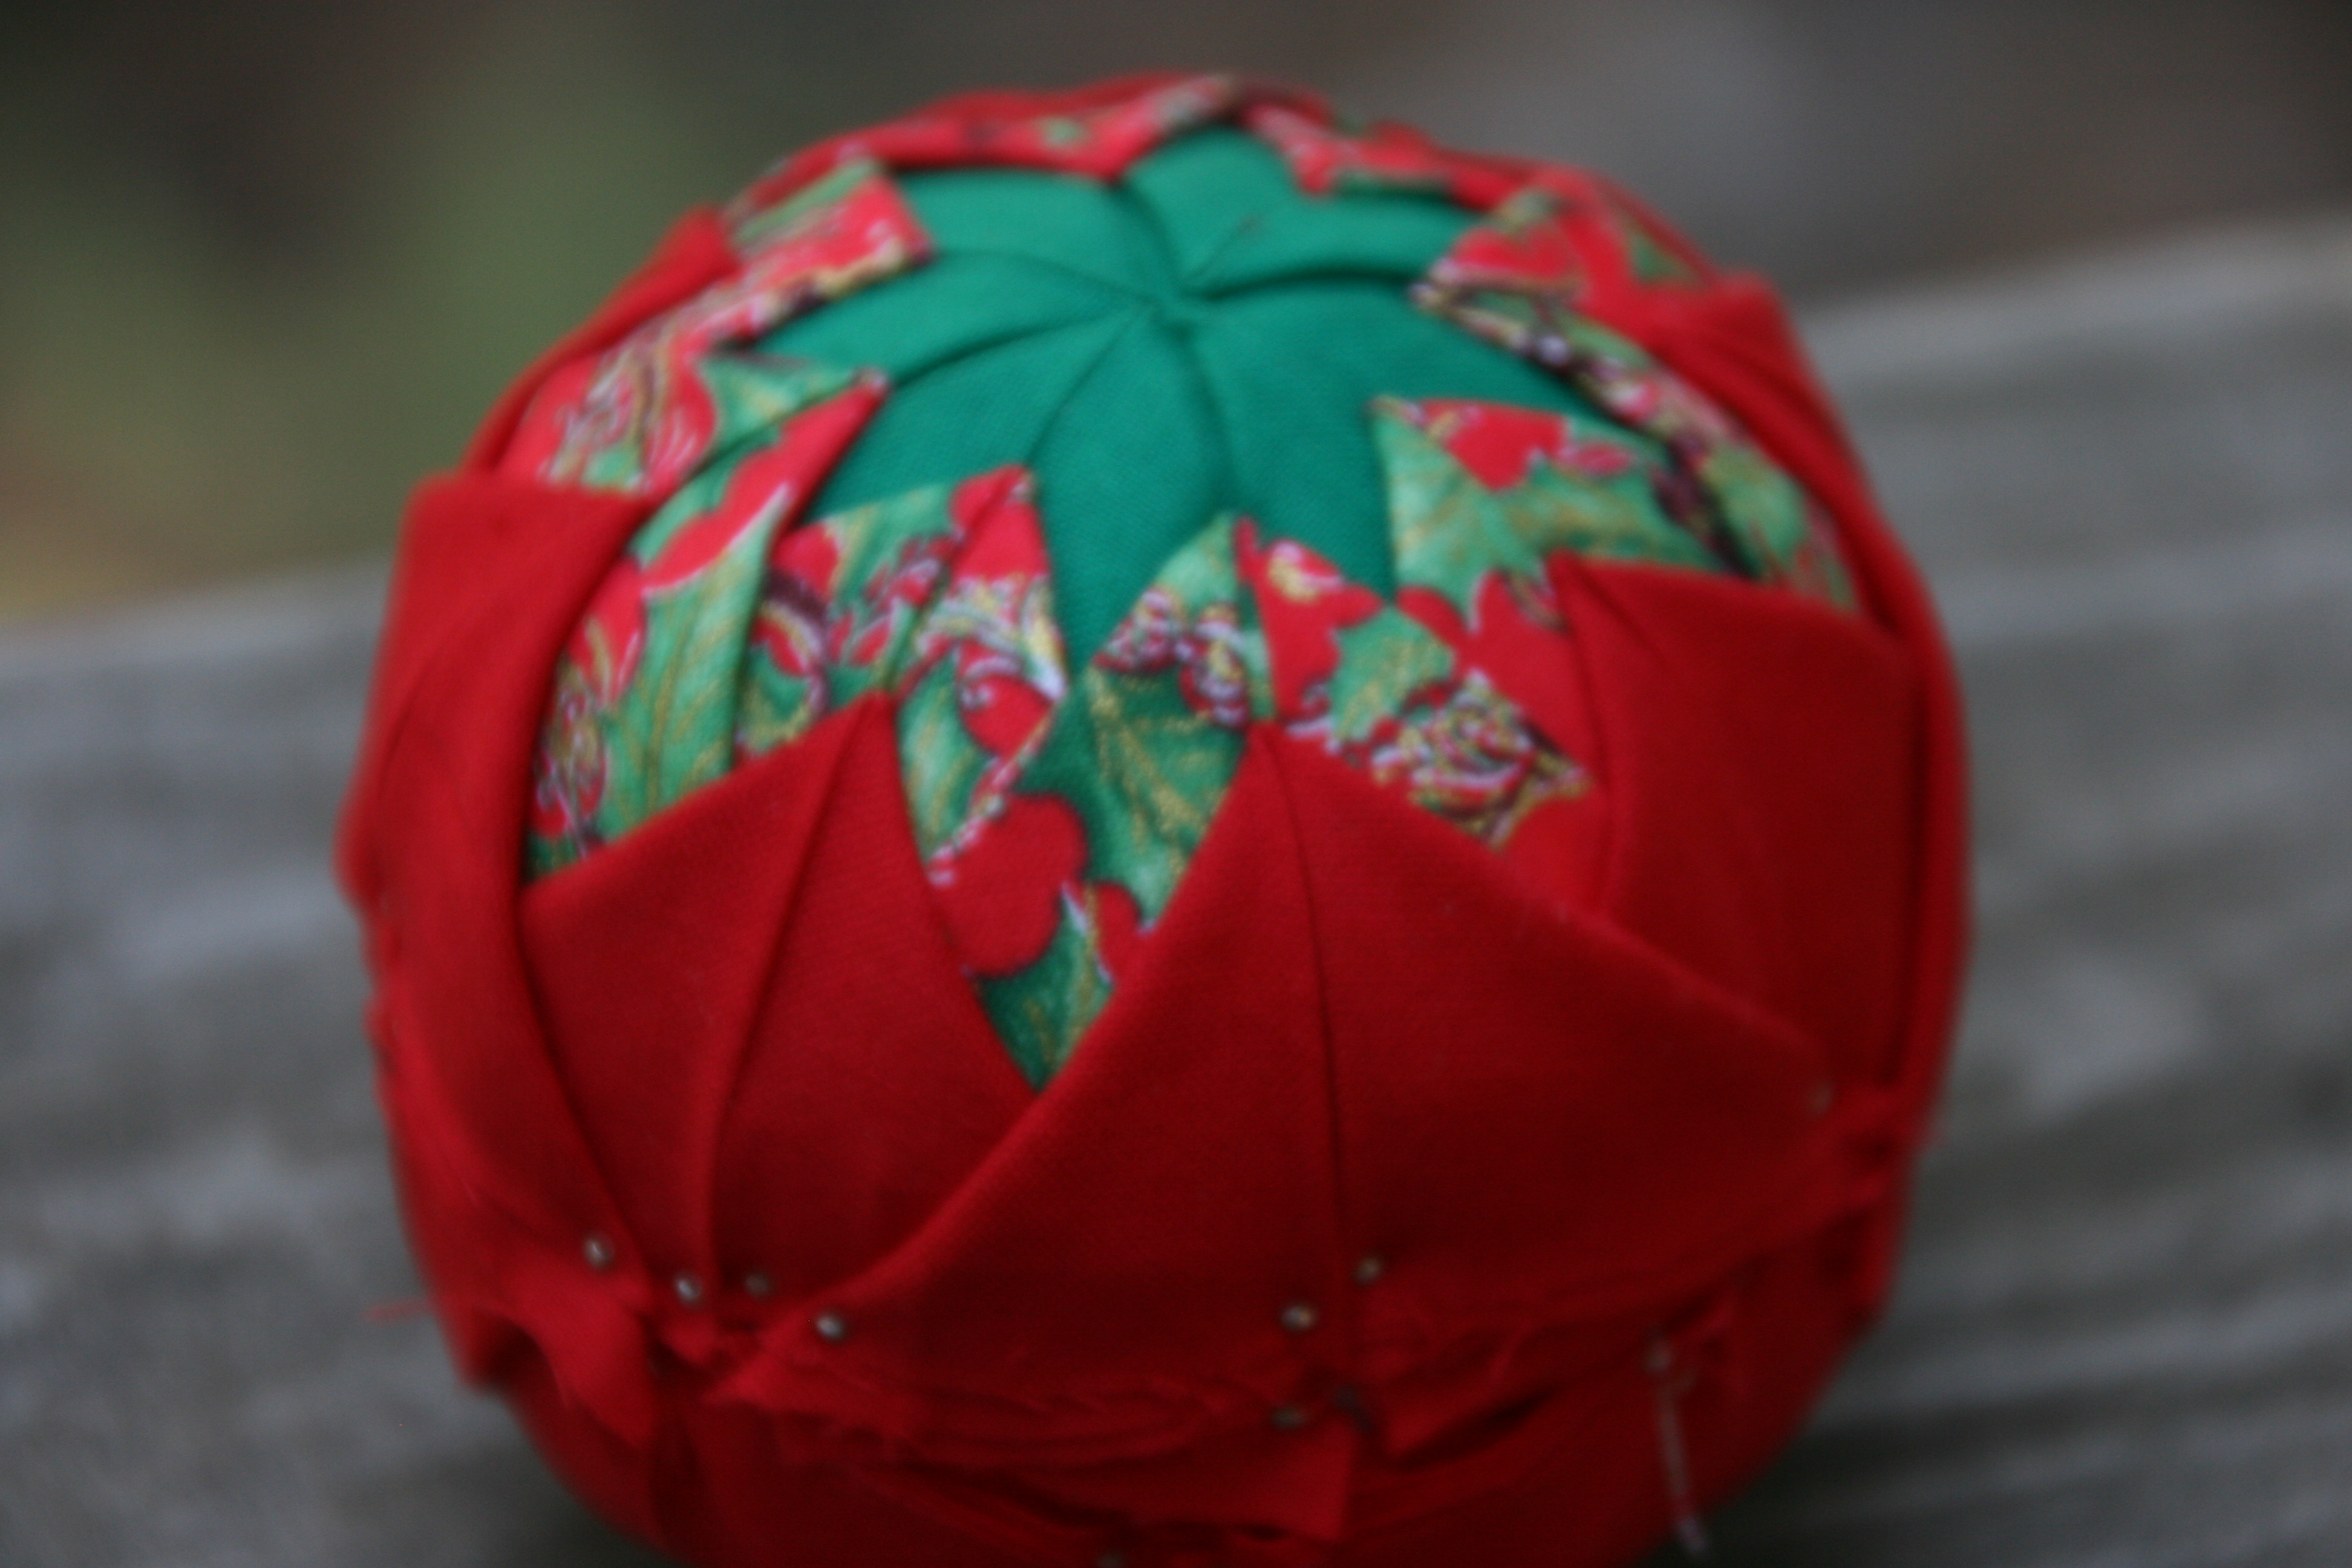
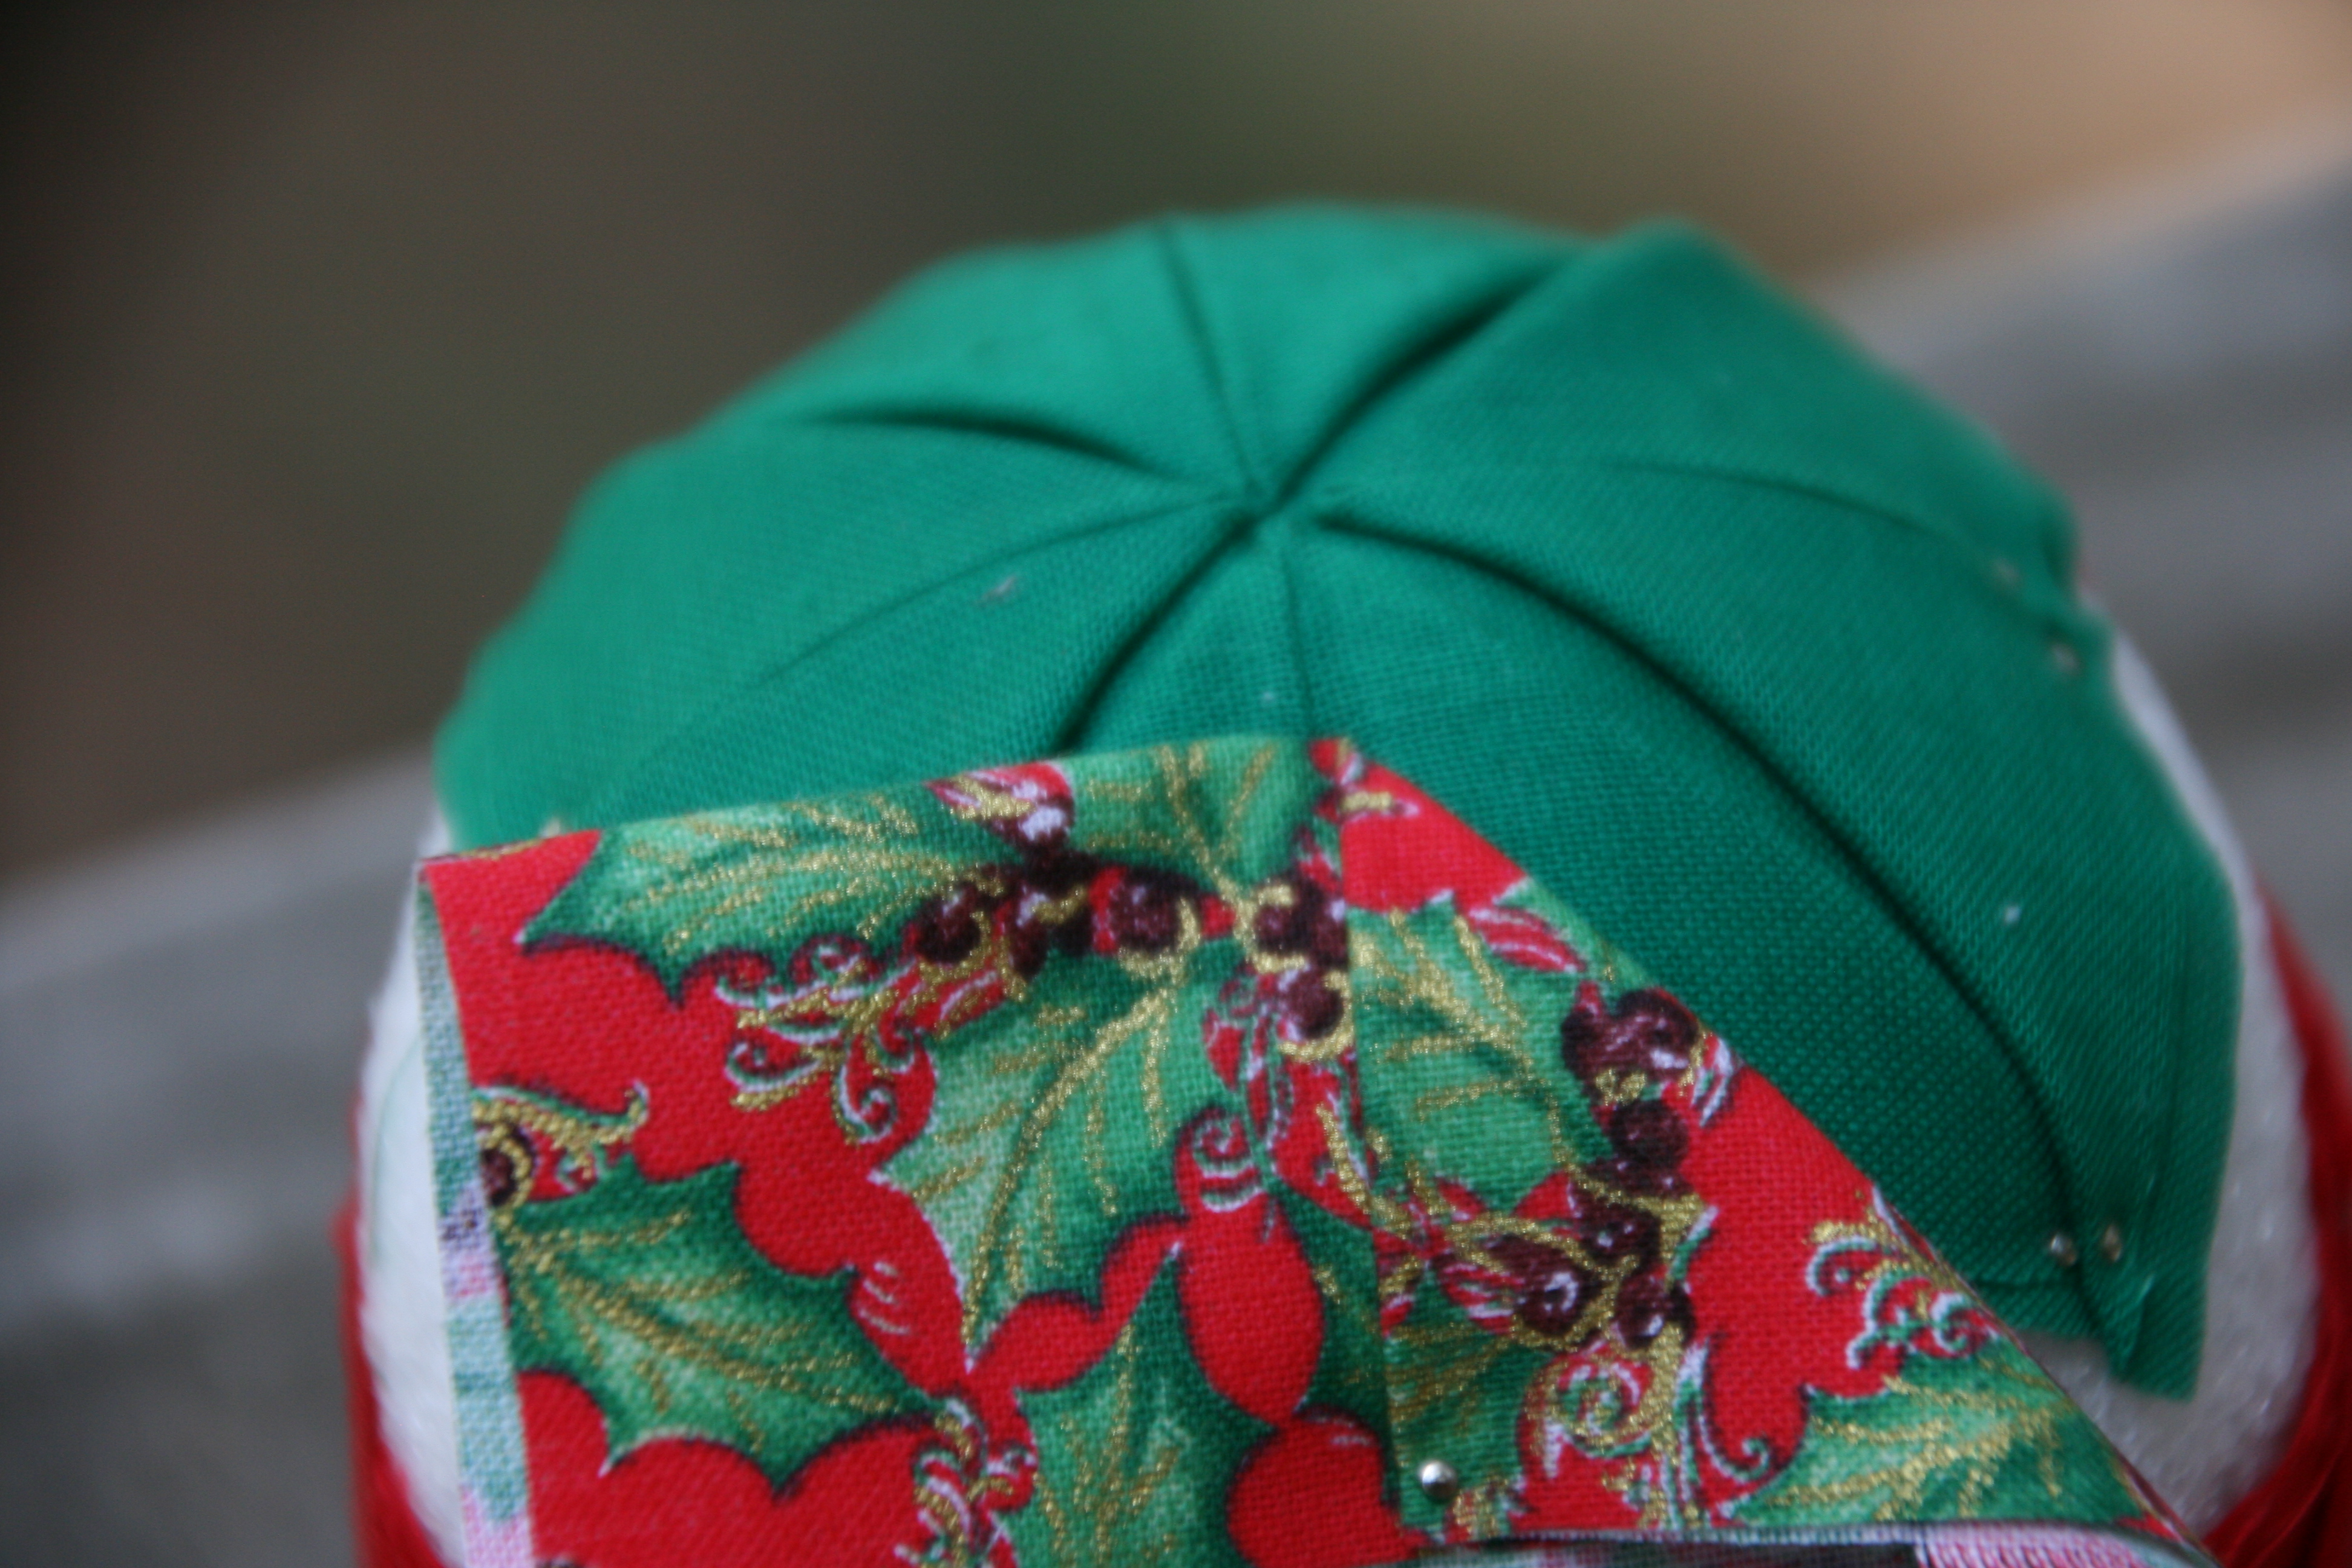
Your ball will look like this on the completed side.  Repeat the entire process on the opposite side of the ball.

168

To finish the edge, you can either use a strip of fabric, or ribbon.  Here I will use a strip of the 3rd fabric.

035037

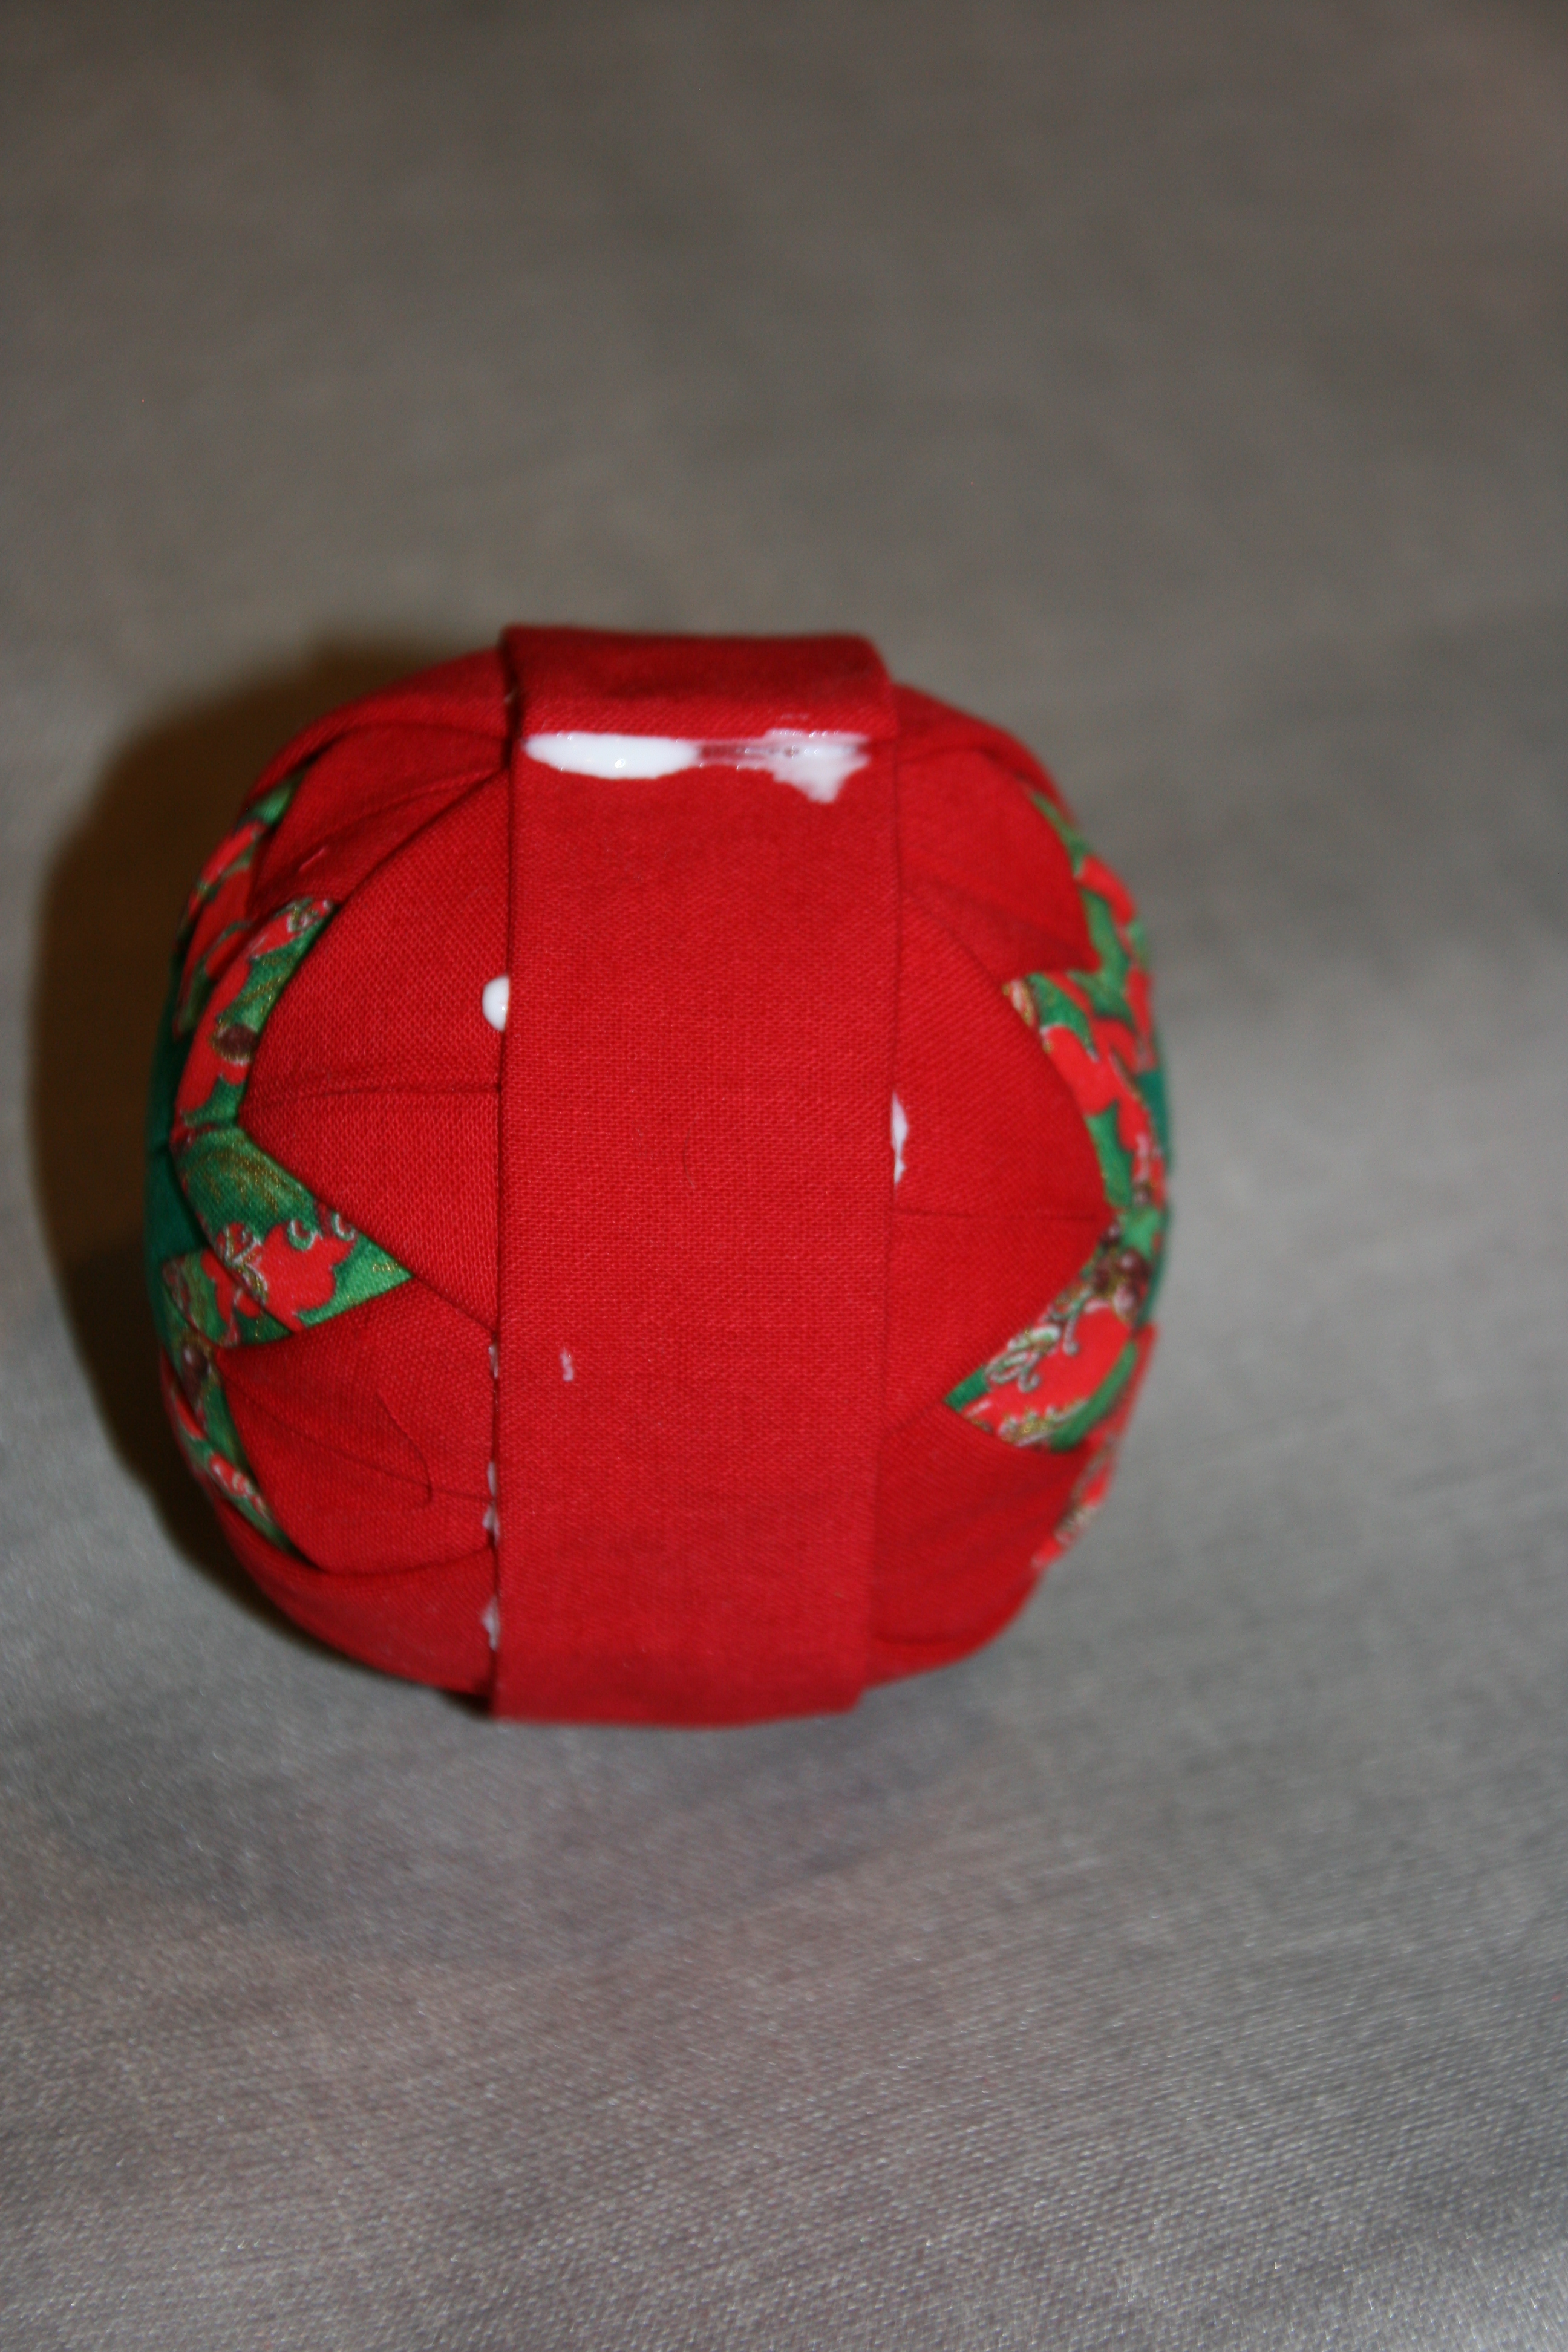
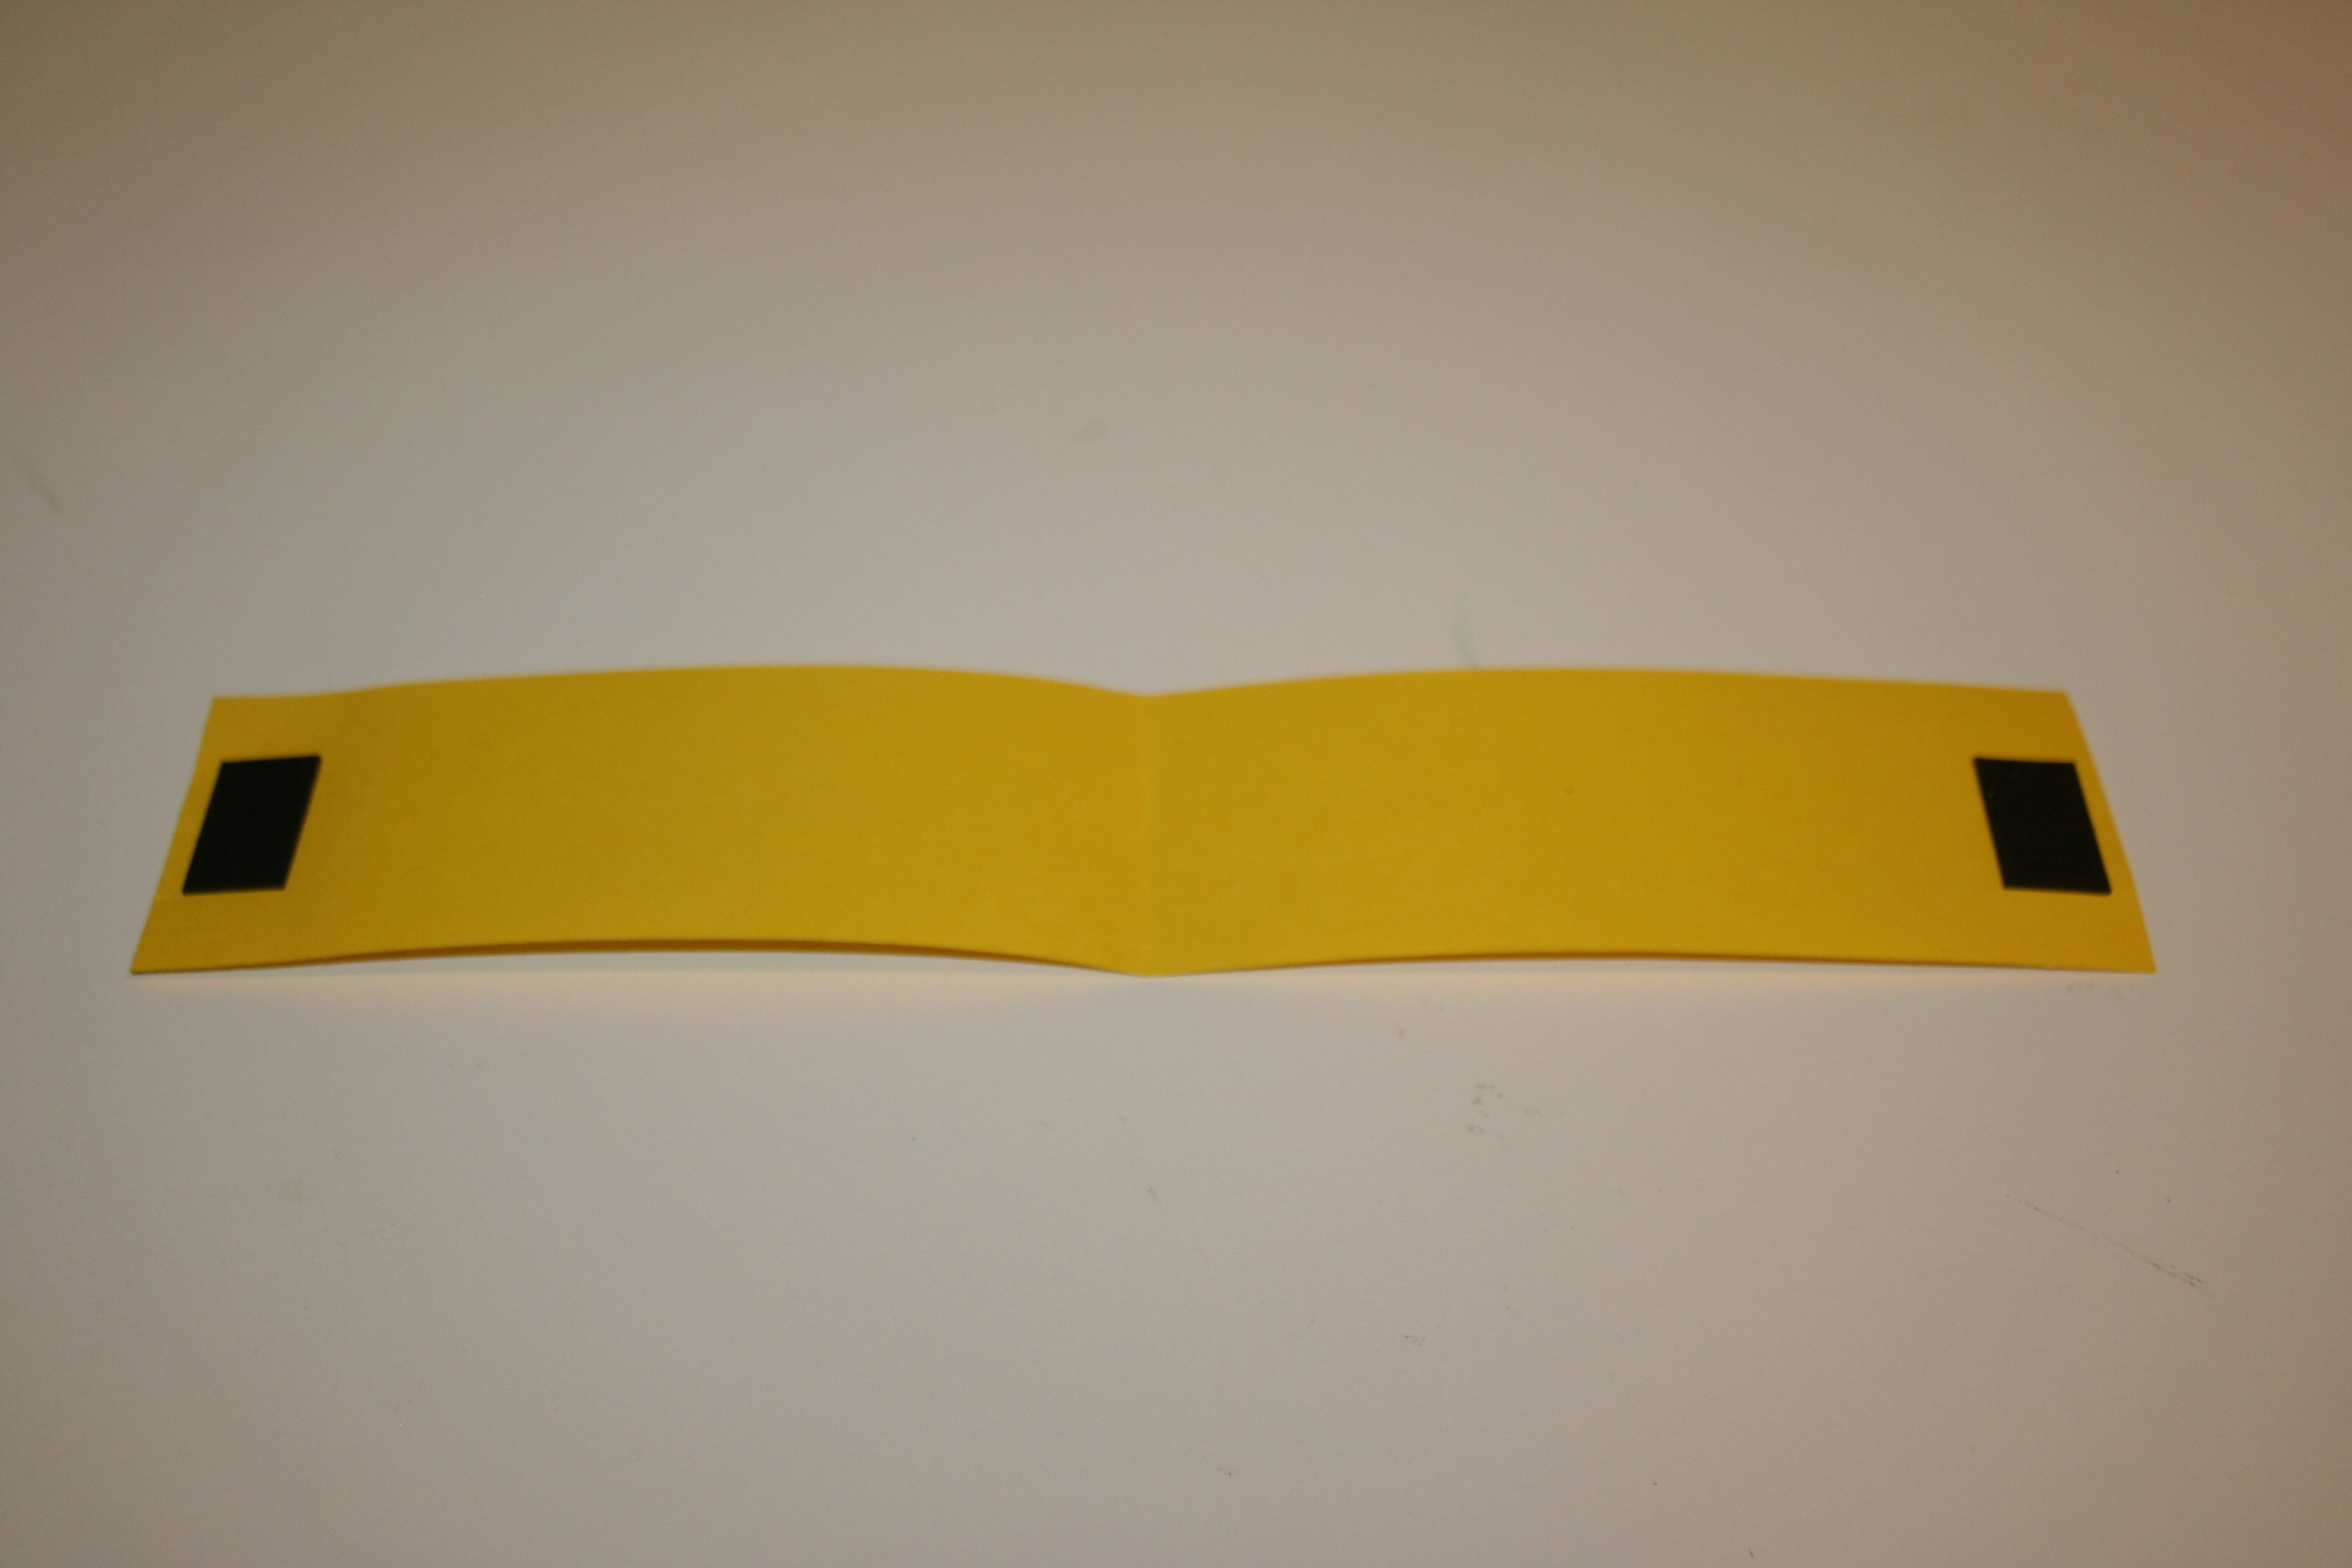
Cut the width a little bit larger than you will need to cover all of the pins.  Measure the circumference of the ball and cut.  Iron down each side to make a straight edge.  Wrap the straight piece around the ball, gluing it along the way.  Fold the very end of the fabric and glue it down.

038039

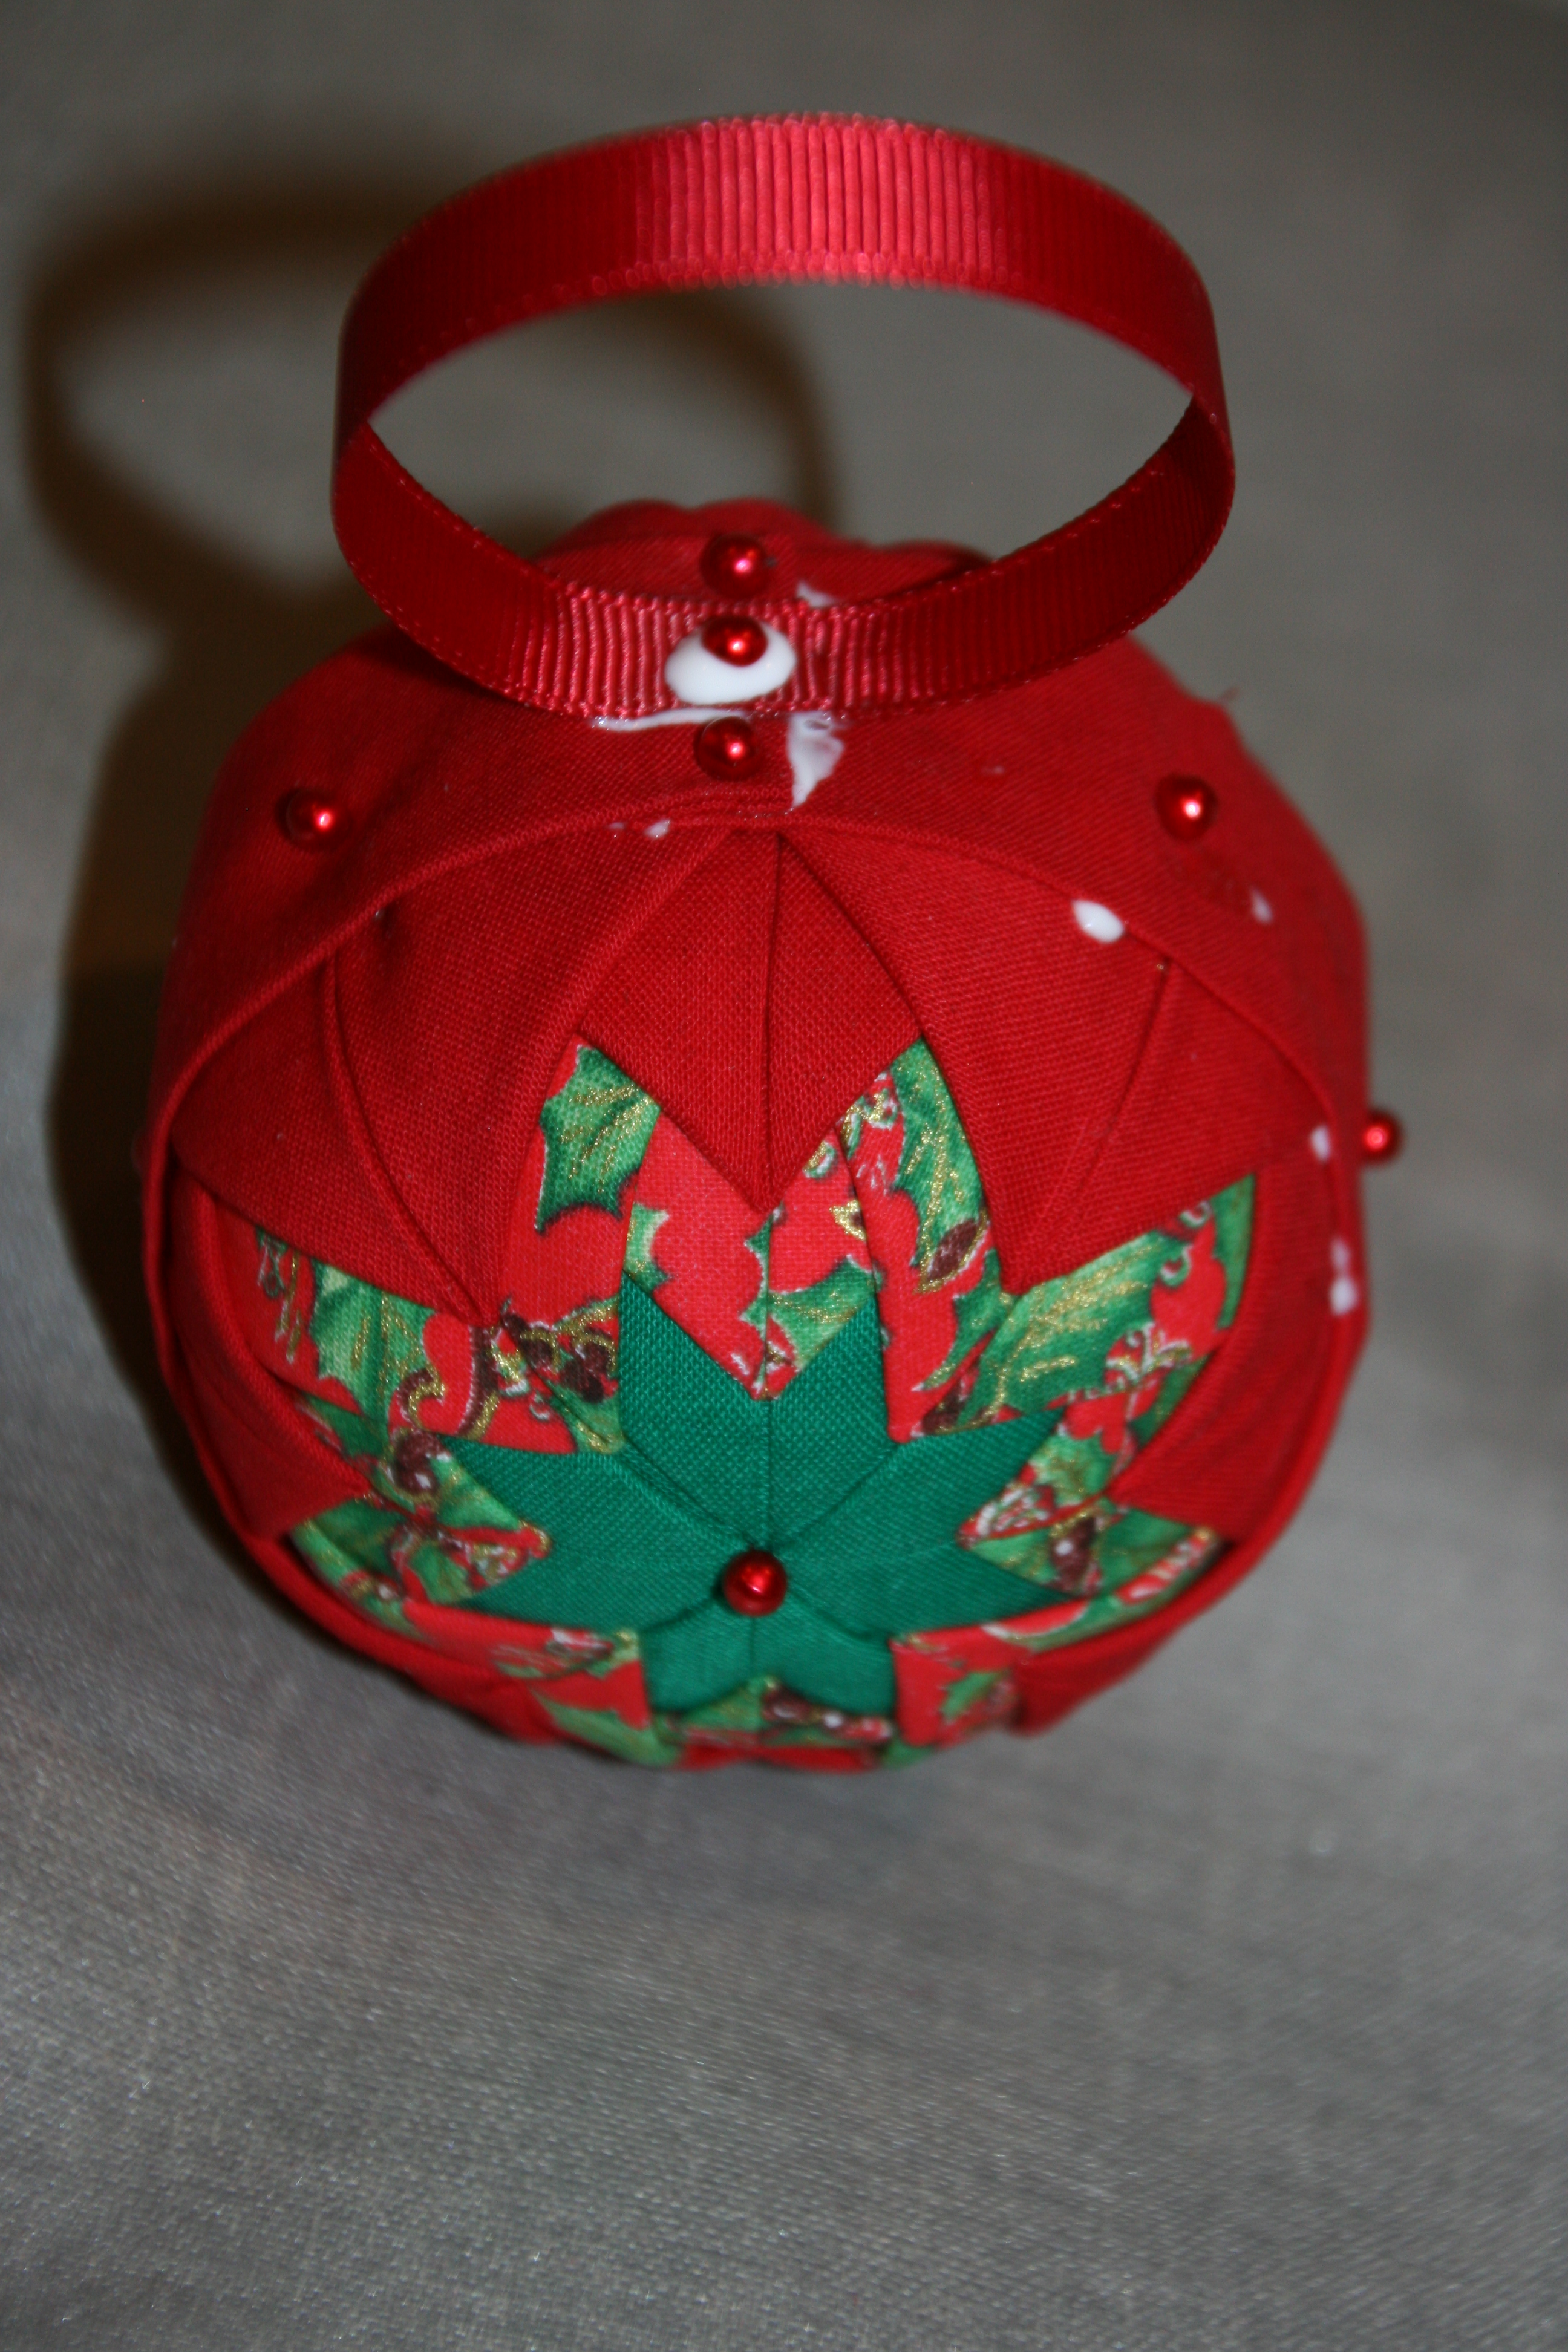
Cut a piece of ribbon as your hanger and pin it to the spot where the fabric strip ended, using the colored ball top straight pins.  Add colored ball pins as embellishments around the entire strip and the center of the “star”.  Let the glue dry and you are ready to hang them, or gift them.

I hope you have as much fun making these as I have!  My finger does get a bit sore, so I use a thimble, on occasion, but I don’t stop even when my finger is red and sore!

041

Happy ball making!

“Wonder what I will come up with next”…

Ribbon pony tail holders…

My daughters are quite “FANCY” girls!  They LOVE big flowers & bows in their hair.  I created these fun ribbon pony tail holders for them & their friends.

051

Start by purchasing 4-8 coordinating ribbons.  I used 8 different patterns per pony tail holder, with a total of 32 cuts of ribbon each.   You will also need rubber band pony tail holders.  I bought inexpensive ones at the Dollar Tree.

046

Cut the coordinating ribbons, each approximately 6 inches.  Be sure to cut the ends at an angle for a more finished look.

047048

Lay the ribbon out in a pattern.  Be sure to vary the colors.  Start tying each piece of ribbon onto the pony tail holder in the order you created.  Work your way around the entire rubber band.

049050

A fun & fancy hair piece for all of the “FANCY” girls in your life.

051

Happy coordinating…

“Wonder what I will come up with next”…

Sweet baby girl wrapped gifts…

As I have stated many times, my LOVE is creating pretty wrapped gifts for people.  I have such an amazing sense of accomplishment as I create pretty gifts to give.  I LOVE using tulle & stickers as embellishments.  Here I have wrapped a baby girl gift for a friend…

029

I used tulle, rick rack ribbon, pink & white wrapping paper, and hand/feet stickers.

030031

Happy wrapping…

“Wonder what I will come up with next”…

Gift wrapping strange shaped items…

Sometimes I want to wrap a gift that won’t fit into a box easily.  If the gift is long and narrow, creating a “candy” type wrapping works well.  It is incredibly easy to do!

 032

Fold the wrapping paper long wise around the gift and tape.  Leave the ends open.  Use ribbon to tie up the ends.  Start by bunching up the wrapping paper on the end.  Tie the ribbon and you are done!

033034

Quick, simple, and cute!

Happy wrapping…

“Wonder what I will come up with next”…

Letter pictures turned into names & words…

A few years ago, I started something that has been a TON of fun!  I take pictures of things that look like letters.  I then create peoples names and words, and frame them.  These make the BEST gifts!!!  I always take the pictures vertically, print them in black & white, and frame them in black frames with white mat.

Image

This one says “SMILE”.  I made it for my daughters Orthodontist!


Image

This one says “PAMPER”.  I gave it to my massage therapist.  She always tells me how much she loves pampering her customers.


Image

I made this one for my daughters assistant teacher “MICHELLE”.

Start with black frames that are in varying lengths.  I buy most of my frames at Aaron Brothers, especially when they have a buy one get one for 1 cent sale!  You will also need white mat board.  I buy 24×36 pieces at Michaels crafts.  Don’t worry about the mat board that comes with the frame because you won’t be using it.


Image

Trace the size you need the mat board to be and cut it out.  Scissors work just fine…you don’t need a special mat board cutter for this project.

Image

Next, space out the letters on the mat board and adhere them with photo safe double sided tape.  Then put the mat board in the frame and close up the back.  It is as simple as that!  Once you start looking for letters in every day life, you will be amazed how often you see them!  Always have a camera with you!  I have made many of these and people always LOVE them!  They make the BEST personalized gifts!  Great for Father’s Day or end of the year teacher gifts.


Image

My daughter’s teacher “CHERYL”

Happy letter finding…

“Wonder what I will come up with next”…

Father’s Day wrapping with newspaper…

Father’s Day is quickly approaching!  I don’t know about you, but my “Man” isn’t into fluffy & cute, so I came up with a cleaver wrapping idea for his gifts.  I used the classifieds from the newspaper.  I even made embellishments for them.

Image

Image Image

Image


The extra thought and effort will make him feel extra special this Father’s Day!

Happy wrapping…

“Wonder what I will come up with next”…

Using paper circles to create initials…

077

If you are looking for a very simple gift for a teacher or friend, I’ve got the perfect idea for you!!!  Creating initials using paper circles!!

062063

You will need 2 sizes of paper punches, scrapbook paper in coordinating colors, glue stick, white cardstock, and frames.  Start by punching both sizes of holes in the scrapbook paper.

068067

Glue the circles on the cardstock in the shape of the initial.  I started with the large circles, then overlapped with the smaller ones.

066

Frame the pictures.  I bought “Certificate” frames at the Dollar Tree.  They were the perfect size for the cardstock.

078077

and, of course…add ribbon for the final touch.

Happy creating…

“Wonder what I will come up with next”…

How to make simple magnetic book marks…

048

This has to be one of the easiest gift ideas EVER!!!  All you need is card stock, adhesive magnets, and stickers (or whatever embellishments you want).

Start by cutting a strip of card stock.  Be sure it is long enough, because you will be folding it to create the book mark.

049

Fold the piece of card stock.  Stick a strip of magnet on either end.  Be sure the magnets match up and connect.

050 051

Close the book mark and add embellishments.  This is a very simple one that I made for a young boy.  I only added stickers that spell out his name.  You can decorate these as much as you like!  Add this to a book, and you have a great gift for someone!

Happy reading…

“Wonder what I will come up with next”…