Red Carpet Birthday Party…

What little girl doesn’t like to pretend she is a movie star on the “Red Carpet”?  I would imagine all little girls dream of this at some point in their lives.  When my daughter turned 11, I created a faux experience for her and her friends.

134

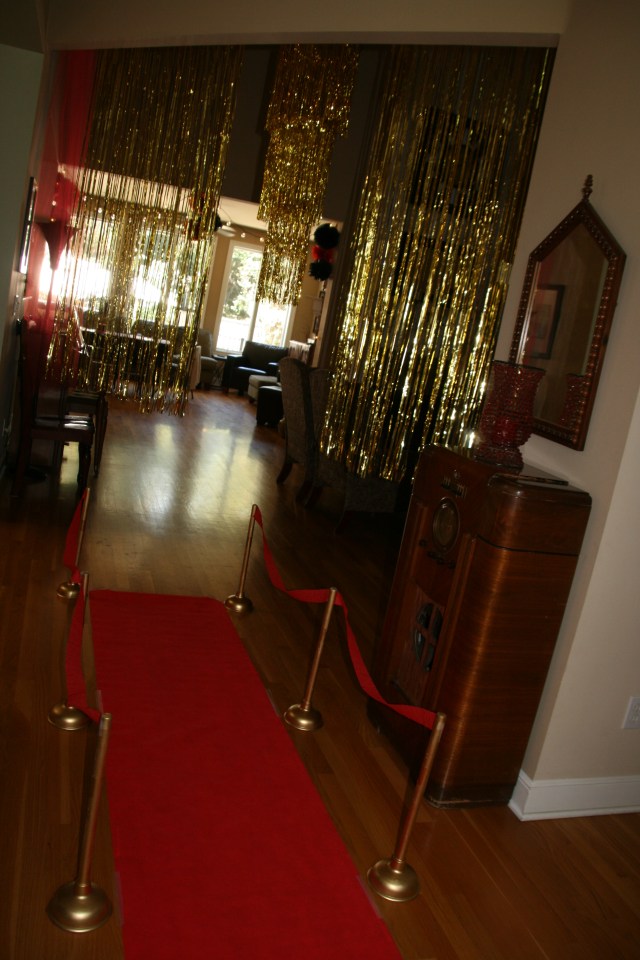
The girls entered the house on the “Red Carpet”, complete with stanchions that I made from sprayed painted gold toilet plungers purchased at The Dollar Tree!  I used gold foil door covers and a gold foil chandelier and hung them from upstairs to create a “Grand” entrance.

There were even “paparazzi” at the entrance…

138

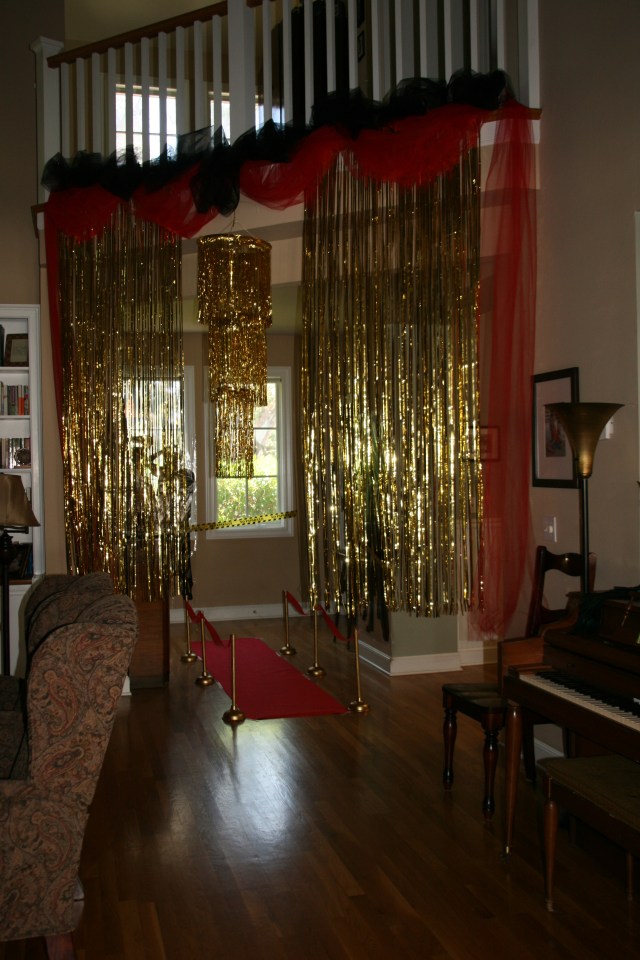
Here is a different view of the entrance.  I looped black & red tulle through the upstairs banister to hide where the gold foil door covers were attached.

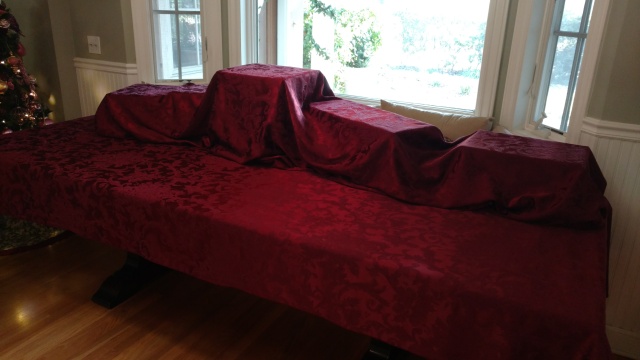
The tables were covered in black table cloths with red table cloths folded and used as runners.  I wrote each girls name on a gold star.  I created center pieces by covering styrofoam cubes with red cardstock.  I then stuck in tall picks of red, black and gold that had stars on them.  I added gold curly picks for effect.  Around the base, I taped some “celebrity zone” ribbon that i found.

146

What fun is a “Red Carpet” party without a photo booth?  I had fun props for the girls to use, including directors “take” boards.  I borrowed a friends bridesmaids dresses so the girls could dress up in fancy attire if they wanted to for their photos.  During the photos, I moved the stanchions from the entrance for the full “Red Carpet” effect.

148

Every girl won an “Oscar” at this party!

139

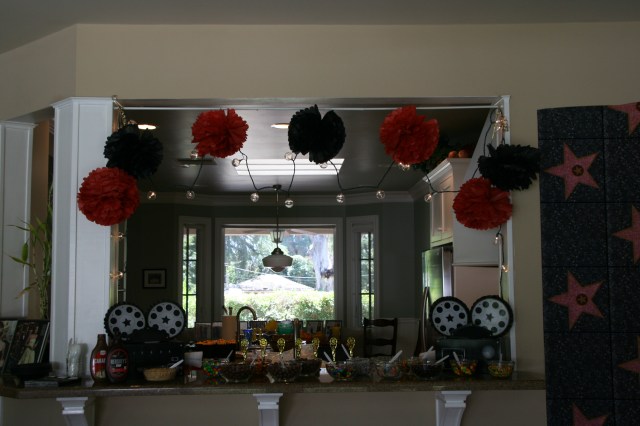
…and they got to create their own ice cream sundae, with numerous candy toppings to choose from.

Happy Birthday my sweet daughter!

“Wonder what I will come up with next”…

Tick Tock, It’s a Clock Retirement Party…

We had a retirement party for my father-in-law last year and I kept struggling with what theme to use for the party.  I didn’t want the typical “retirement” type party.  I felt he deserved something more personal than that and I wanted the party to have a more masculine feel.  He had spent 50 years in the classroom as a teacher, both at the high school and university levels, and deserved to be celebrated in an extra special way.

Why a clock themed retirement party you may ask?  Think about it…when you are retired, time is irrelevant.  You no longer need to wake at a certain time, or be at work at a certain time.  You can spend your days at leisure and it doesn’t matter what time it is!  I had a blast planning this party!  The only problem is that now I can’t wait to retire!

031

I created simple centerpieces with clocks that I printed from the internet.  I glued them back to back with a bamboo skewer in the middle and placed them in some simple low vases with green styrofoam and green basket filler on top.  It was festive, but had a masculine flare.

030

I decorated cupcakes to look like simple clocks…

I printed signs that read “Time is Irrelevant”, “Time does not matter”, and “Time is on Lew’s side” and placed them in Dollar Tree picture frames.  I had them scattered throughout the party.  My mother-in-law had a collection of antique clocks that I borrowed for the party and strategically placed them as decorations.

034

I also asked my father-in-law to bring anything of significance from his teaching career, and I put them on display.

022

In my opinion, the most amazing attraction at the party was a timeline that my father-in-law created of his 50 years of teaching.  It was unbelievable to read about his entire career!  I hung it on the wall for all of the guests to view.

035

The party was a success!  My father-in-law is enjoying his retirement and truly doesn’t care what time it is!

Happy Retirement Lew!

“Wonder what I will come up with next”…

“Flaking” Your Friends & Neighbors…

If you saw my last blog post, you read that my entire family made snowflakes on Christmas Eve this year.  Grandparents, Aunts, Uncles, Cousins, adults and kids included!  We were having so much fun sitting around the table cutting out our amazing creations.  There was even some friendly competition involved, and a little teasing for the “not so creative” snowflakes.  As I was enjoying the moment, I paused to really take it all in!  I mean, SERIOUSLY!  How many families sit around the dining table cutting out snowflakes and laughing on Christmas Eve?!?!  It was an ALL FUN AND NO STRESS, good time at my house!  I looked at the mound of paper snowflakes that was accumulating on the table and thought, “What in the world am I going to do with ALL THESE SNOWFLAKES???”  I don’t want to toss them in the garbage…no way!  They are to cool for that!  Then it hit me:

We can go “FLAKE” my neighbors!!!!

img_8830

…and that’s exactly what we did!  We bundled up in our warm coats and tried to be as stealth as we could, putting snowflakes in 3 of my neighbors yards.  We hung them in the trees, on their cars, and even dropped them on the lawn and walk ways.  We left a note on the front porch that said:

“You’ve been FLAKED”

It was a Christmas Eve to remember!  My neighbors woke up to a Christmas morning surprise from my family!  Snowflakes in their yard…in California!

“Wonder what I will come up with next”…

Simple 6 Point Snowflakes…

Making snowflakes is a fun craft for the entire family!  This year on Christmas Eve, my entire family got involved in the fun.

All you need is square paper and scissors, and you can create the most magnificent snowflakes.  I will show you how to make snowflakes with 6 points.

Start with a square piece of paper.  Here I used 12×12 scrapbook paper.  Fold the paper in half, corner to corner, as shown in the middle picture above, creating a triangle.  Then fold the triangle in half.

Hold your triangle with the main fold on the left, main point facing down and the top of the triangle the straight edge.  Fold from the bottom point, one third of the triangle towards the center (see picture #1 above).  You will have two thirds of the triangle folded over itself at this point.  Next, fold the remaining third, coming from the right side, over the fold you just made (see picture in the center above).  Flip the paper over and notice the area on top where there is a straight edge of paper with points sticking out from it.  It has the appearance of “fries” sticking out of a triangle shaped fry box. (See the last picture above)

img_8875

Cut the paper across the straight edge of the paper so you cut off the “fries”.

img_8876

Now comes the fun part!!  In order to have dimension in your snowflake, you want the main folded area to remain longer and cut a shorter side where the open folds are.  See picture above.  This will become the main shape of your snowflake.

img_8877

Now you will cut areas out to create the “holes” in the snowflake.  Be sure not to cut the entire folded area on either side.  If you do, your snowflake will fall apart.  See the picture above.  See the picture below to view the above cut opened up.

img_8878

This is what the final snowflake looks like.

Here are the pictures shown again, but side by side, so you can compare the cut paper before and after.

Above is a 2nd snowflake with more narrow points.

This gives you an idea of what two different snowflakes will look like.

Have fun cutting!  See my next blog post for some fun and creative ideas on what to do with all of your snowflakes!

“Wonder what I will come up with next”…

How to create different heights on your table display…

051-5

Whenever we have a large party, it is always a challenge to fit all of the food on the table.  I usually create different levels using boxes, which allows me to optimize the table space.

img_20161203_125756328_hdr

I first cover the table with a table cloth.  Then, I set up boxes to create the heights that I want.  Make sure to use sturdy boxes so they don’t cave in when you place platters full of food on them.

img_20161203_130356894

Cover the boxes with another table cloth that is the same as the flat table cloth.  Tuck under the edges and smooth it out onto the tops of the boxes.

Your table is ready for food!

051-5

Happy Celebrating!

“Wonder what I will come up with next”…

Gymnastics Birthday Party

053

Birthday parties are one of my favorite things to plan!!!  I think that I get more excited about them than my daughters.  This party was a gymnastics themed party held at a facility where the girls could take a gymnastics class.  I created a backdrop using a plastic table cloth taped to the wall.  Streamers & balloons with drop stars gave it the perfect touch.  I created the pennant banners with triangle shaped cardstock, ribbon and large letter stickers

Party favors included medals and water bottles.  I purchased both at The Dollar Tree.  The medals had red, white, & blue ribbons, which I switched out for the theme colors.  I used triangle shaped paper and glued on a printed gymnastics pose, stars and ribbon for the water bottle tags.

039

On the tables, I created these simple centerpieces.  I folded a 12×12 piece of scrapbook paper to create a 5 sided box and covered a styrofoam cube.  I downloaded from the internet pictures of gymnastics poses and attached them to cardstock and skewers.  A few scattered stars and medal candy for the finishing touches.

Cupcakes adorned with trophies I purchased at The Dollar Tree turned out so cute!  I topped the trophies with large marshmellows, gel & sixlets.  They were almost too cute to eat!

053

The decorations were simple but very festive.  The girls had a great time.  I can’t wait for the next birthday party to plan!

Happy birthday!

“Wonder what I will come up with next”…

Bling Candle Holders

I love burning candles at home!  I even love having candles as decoration!  I made these bling candle holders as gifts, but I may need to make one for myself.  They were so unbelievably simple and inexpensive to make!!

119

I purchased both the glasses and rhinestone stickers from The Dollar Tree.

117

Each row of stickers are connected, so I tore off the rhinestones in strips and stuck them to the glass.  At the end of the strip, I started a new strip until I made it all the way around the glass.  I did this 3 times to create the look shown here.

118

So very easy, but pretty darn cool!

Happy sticking!

“Wonder what I will come up with next”…

Oh So Adorable Clipboards

I am always trying to come up with fun gifts for teachers.  I made several decorated clipboards for teacher appreciation day this year.

086

I started with these clipboards I purchased at Office Depot.

087

I used Tacky Glue to adhere scrapbook paper on the front & back.  After the glue dried, I brushed on Mod Podge with a foam brush to both sides.

088

I then added a band of ribbon, glued on with Tacky Glue and added rhinestones.

I then tied on strips of coordinating ribbons for the final touch.  I tied the ribbon on the front circle and to the rod in the center of the clamp.

I had so much fun choosing the paper and creating these adorable gifts!

On the more masculine ones, I skipped the ribbon and added other accessories.

Some even got additional embellishments, like charms, beads and initial stickers.

I hope you enjoy making these as much as I did!

Happy creating!

“Wonder what I will come up with next”…

Simple Necklace Storage

If you are like me, you have more necklaces than days in the month!  I love jewelry, yet I have struggled over the years to remember what pieces of jewelry I own.  I found these “Command” hangers and fell in love!!!

089

I hung several hangers behind my bedroom door.  I can now easily see all of my necklaces and I can hide them when the door is open.

Happy shopping for more necklaces!

“Wonder what I will come up with next”…

“Candyland” Party Decorations

Oh my!  This event gave me the best “Candyland Dreams”!!!  I created decorations for my daughters carnival and had the time of my life!!

Let’s start with the “GRAND” entrance…

005x

007x

There is so much going on here that it will take me a few minutes to describe all I did.  The arch was created from pool noodles and pvc pipe.  I then used duct tape to attach the “Candyland” letters that I cut out of hot pink poster board and striped with masking tape.

I created “Lollipops” with paper plates, bamboo skewers, ribbon and gallon size twist top plastic bags.  I stuck the skewers into the pool noodle arch to make it look like lollipops standing on the arch.

I cut pool noddles into thirds and covered them with celophane and tied the ends with ribbon to create “Candies”.  Then I wedged the paper plate lollipops behind the tube candies.

I made large “Lollipops” with pool noodles that I rolled up and covered with celophane gift bags.  I then used a wrapping paper roll as the “stick”.

009x

I draped “Candy Streamers” made from paper plates, plastic table cloths cut into strips, and celophane, along the front walls.

010

We spray painted the grass with squares to look like the Candyland game board.  The paths led to different activities such as cake walk, silent auction, and inflatables.

020x

These ice cream cones were made from brown paper and pillow stuffing.  I rolled up the paper to form a cone shape and placed a large wad of stuffing on top.  Just to make it extra fun, I wadded up red paper to create a cherry, and glued sticks from my yard as the cherry stem.  Then I wrapped a box with pink wrapping paper, cut out wheels from black paper, and glued on a smaller ice cream cone to create an ice cream cart.

025x

With the help of other parents, we turned the covered table area into a “Gingerbread House”.

We taped on brown scalloped paper and added giant candy canes made from pool noodles striped with masking tape.  We taped on tissue paper covered toilet paper rolls that looked like candies, and paper plates covered in celophane that looked like peppermint candies.

028

We added more giant lollipops and candy canes under the roof.

032

We draped more of the paper plate streamers on the inside of the roof.

029

We wrapped the poles with streamers and taped on paper plate lollipops.  This created the cutest darn gingerbread house ever!

There was fun had by all and the decorations were talked about for weeks.  It made my heart so happy that everyone enjoyed the festive decorations and all the hard work.

Happy candy making!

“Wonder what I will come up with next”…